
Table of contents of this articleBrowse by text
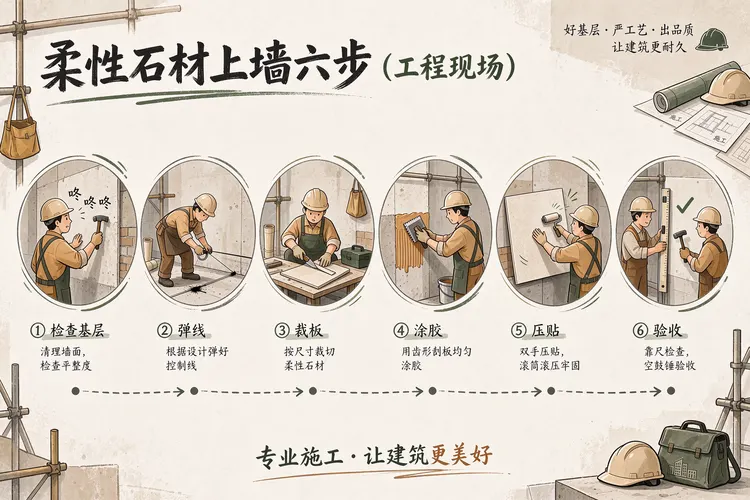
The wall installation process of IGOODS Flexible Stone can be summarized in six steps: substrate inspection, line setting and layout, cutting, adhesive application, pasting and rolling, and finishing and cleaning. Compared with wet-laying tiles, it omits three processes—leveling, joint leaving and joint filling—and involves no wet work, so the construction period is noticeably shorter; however, it has higher requirements for the substrate—if the substrate is uneven or hollow, all subsequent problems will only be exposed at acceptance in the form of bulging and edge lifting. So what really determines success is not "how fast it is applied" but "whether the substrate is judged accurately."
1. First, judge whether the substrate can be directly applied
Before starting work, carry out three checks; if any one fails, treat the substrate first and do not rush the schedule:
- flatness: Check with a 2m straightedge, and keep gaps ≤3mm. Above this value, the adhesive layer thickness will be uneven, and places that cannot be compacted will become future hollow points.
- Hollowing and delamination: Tap point by point with a hollow-sounding tap hammer and circle hollow areas with chalk. Old tile surfaces and old stone surfaces especially need checking; delaminated finishes must be removed first.
- base surface condition: Moisture content must meet the standard, with no sanding, no oil stains, and no floating dust. Oil-stained substrates require interface treatment, otherwise the adhesive will not bond.
The judgment for old wall renovation is more specific: if the existing tile surface is firmly bonded, with no hollowing and no large-area lifting, it can be directly adhered to the tile surface, saving demolition and debris removal. For the method, see Can flexible stone be directly applied to old tile walls?.
II. Six process steps, and the fault tolerance point of each
Step one: Substrate inspection and treatment. In addition to the three items above, also confirm whether internal and external corners are square and whether door and window frame positions have been determined. Flexible stone is a thin-sheet material; any unevenness in the substrate will be "copied" onto the surface layer.
Step two: chalk-line layout. First determine the starting point and joint alignment direction, and arrange non-full-panel positions at inconspicuous internal corners or secondary elevations. The advantage of 1200×2400 full panels only shows when used correctly at the layout stage. During layout, simultaneously mark the positions of access control, switches and inspection openings; holes should fall within panels as much as possible and avoid panel joints.
Step three: Cutting. Cut with a utility knife and a straightedge; keep the blade vertical and cut through in one pass—back-and-forth sawing will cause burrs. For curved areas, cut according to arc length first and leave allowance for trial bending; see the specific method in Cutting to developed length, test-bending and hole drilling.
Step four: apply adhesive. Apply full or strip troweling with a notched trowel; the adhesive layer should be uniform in thickness with no voids. Control open time according to the adhesive instructions; it shortens noticeably at high temperatures. Divide the adhesive application area into sections that can be completed within the open time; do not apply adhesive to the entire wall at once.
Step five: pasting and rolling. Use a roller tool to expel air from the center toward the surroundings, with extra pressure at edges and corners. For large-area installation, two people are recommended to work together: one person positions and aligns the seams, and the other rolls. When the panel surface rebounds, do not press hard; simply roll it again.
Step six: closing and cleaning. Internal and external corners, door and window frames, skirting and access openings are the positions most easily penalized in acceptance; use matching closure pieces and do not force-fit on site. Clean with a soft cloth before the adhesive is fully cured to avoid scratching the surface.
3. How to match auxiliary materials
Auxiliary materials are not optional; they determine whether this system can hold together:
- Adhesives are divided into indoor and outdoor weather-resistant versions. Indoor models meet the requirements for bonding on conventional indoor walls; outdoor models need to be waterproof, frost-resistant, and resistant to ultraviolet rays. When indoor models are used for outdoor projects, they usually start to buckle at the edges after two or three winter-summer cycles.
- The notched trowel determines the adhesive layer thickness: Different tooth depths result in different adhesive usage per unit area, directly affecting cost and compaction effect. Do not mix scrapers with different tooth depths within the same project.
- Finishing pieces must be matched from the same factory: The cross-sections of internal and external corners, door and window casings, and skirting lines must match the panel thickness; mixing trim pieces from different systems will result in steps and color differences.
- Rolling tools cannot be omitted: Using a scraper instead of rolling will result in incomplete air removal, and the hollowing rate will increase noticeably.
IV. How to handle curved surfaces and irregular shapes
Curved surfaces are the core advantage area of flexible stone compared with ceramic tiles and stone panels, but the method is different from flat surfaces:
- Cylindrical column cladding: First measure the perimeter and height, and cut according to perimeter plus overlap allowance; after cleaning the substrate, start bonding section by section from one side, pressing along the curved surface with a soft roller tool.
- Curved wall: Cut according to arc length, test-bend first to confirm springback, then apply adhesive. The smaller the radius, the more obvious the material's springback, requiring more thorough rolling and temporary fixing.
- Cutouts and corners: Locate before cutting holes; make the hole diameter slightly larger than the actual pipe diameter; use matching trim pieces at corners where possible—do not rely on folding the material itself.
The complete process for curved walls can be found in How to construct flexible stone on curved walls with How to construct flexible stone curved walls.
V. Joints and temperature
Flexible stone is not "done once it's stuck on": joint treatment determines long-term performance:
- Indoor tight-joint: The visual effect is the most complete, but it places the highest demands on substrate flatness and cutting precision.
- Leave a joint: In dry regions, regions with large temperature differences, and large continuous wall surfaces, joints are usually required and must be sealed; joint width is determined by the layout and the material's thermal expansion characteristics. For practices during the heating season in the north, see How to leave joints for flexible stone in dry regions.
- Construction temperature: Control according to the adhesive instructions; below the lower limit or above the upper limit will affect curing. In winter construction, avoid condensation on the substrate; in summer, avoid applying adhesive immediately after the material has been exposed to direct sunlight.
VI. How to treat each of the five common substrates
Different substrates require different preparatory processes. If this step is judged incorrectly, all subsequent work is wasted:
- Masonry and concrete: The most common and also the easiest to handle. Sweep off floating dust, repair holes, apply a primer if necessary, and control flatness to ≤3mm gap under a 2m straightedge before applying adhesive.
- Gypsum board partition wall: Commonly used for lightweight partitions. Confirm that the panel joints have been filled, that the self-tapping screws do not protrude from the panel surface, and that the screw holes are leveled; the panel joint positions should preferably avoid the material seams to prevent double-layer seams.
- Old tile surface: The prerequisite is that the tiles are firmly bonded, with no hollow spots and no large-area lifting. Glossy ceramic tiles must be roughened or treated with a bonding agent, otherwise the adhesive only "sticks to the glaze surface" and pull-off strength is insufficient.
- Old stone and old wood finish: For stone surfaces, check whether a protective agent has been applied (some protective agents affect adhesion); for wood veneer, check for moisture deformation. For damp substrates, address the moisture content first; do not seal it inside directly.
- Metal panel and aluminum panel substrate: The surface is smooth and non-absorbent; a bonding system suitable for metal substrates must be used, and adhesion tests must be carried out according to the supplier's specifications.
There is only one principle for judging whether the substrate can be used:Anything that can be picked off by hand or rubbed into powder cannot be applied directly.
7. How to make a mock-up section
Before formal full-scale installation, make a sample section first; this step can save a lot of later rework:
- Choose a representative wall section; the area does not need to be large, but it must include an internal or external corner or a finishing node;
- Carry out the complete formal process once, including adhesive application, rolling and edge finishing;
- Check for hollow sounds 24 hours later, observe the straightness of the joints and color differences;
- Estimate the schedule using the actual efficiency of the sample section, and estimate auxiliary material budgets using the actual adhesive consumption.
After the mockup section is confirmed, carry out bulk construction; the owner, designer and construction party can all use it as the acceptance benchmark.
VIII. The five most common construction errors
- Applying adhesive without inspecting the substrate: On substrates with hollowing or dusting, adhesive does not bond firmly, and the entire area will sound hollow during acceptance inspection.
- Apply adhesive to the entire wall in one go: Installing after the open time has passed causes a significant drop in bond strength.
- Use a scraper instead of roller pressing: Air is not fully expelled, leaving bubbles under the board.
- Finishing pieces hard-assembled on site: Steps and color differences appear at internal and external corners, and acceptance will inevitably require rework.
- Installing different batches on the same facade: Different batches of the same color code may have slight color differences; the same wall must use the same batch.
IX. How to schedule the construction period
Taking a common commercial space wall as an example, the daily progress of a crew depends on the substrate conditions and the complexity of the layout. Walls with good substrate conditions, mainly full panels and few openings progress fastest; curved surfaces, column wrapping and areas with many openings are noticeably slower. A reasonable arrangement is: first make a sample section to confirm the effect and workmanship, then proceed in the order of "flat surface → curved surface → closing", and finally carry out cleaning and self-inspection uniformly.
For projects requiring on-site technical briefing, this can be requested when placing an order; IGOODS provides engineering support and installation specification explanations.
X. How to Connect with Acceptance
Construction self-inspection checks four items: hollow rate, flatness, joint straightness, and color difference. Check hollows by tapping each point with a hollow hammer, check flatness with a 2m straightedge, check joints for straightness and width consistency, and check color difference visually from 1 meter away under natural light. See the complete checklist in How to inspect and accept flexible stone walls, for internal and external corner details, see How to close internal and external corners.
Outdoor projects also require two additional checks: whether edge sealing and waterproofing and drip-edge details are completed according to drawings, and whether adhesive joints are continuous without breaks.
XI. Common Questions
Q1: Can one directly stick to the putty layer?Putty layers have low strength and soften easily when exposed to water, so they are not recommended as the final substrate. The adhesion strength of the putty layer should first be confirmed, and if necessary it should be removed down to a solid base before interface treatment.
Q2: How many square meters can be pasted in a day? There is no unified answer; it depends on the substrate, layout, and amount of openings. Flat facades with good substrate conditions progress fastest, while curved surfaces and column wrapping are much slower. It is recommended to first make a mock-up section and use its actual efficiency to estimate the construction period.
Q3: How long after installation can you touch water?Follow the curing time specified in the adhesive instructions. Avoid water exposure and strong direct wind before curing; for outdoor projects, pay special attention to short-term rainfall after construction.
Q4: Can construction be carried out in winter?Yes, but the substrate temperature and construction ambient temperature must be controlled to avoid condensation and incomplete curing at low temperatures. For projects in northern China, it is recommended to complete before the heating season or to follow a winter construction plan.
Q5: Do you have to use special adhesive for the curved surface?Curved areas have higher requirements for the initial adhesion and flexibility of adhesive. It is recommended to use a matching flexible adhesive and not replace it with ordinary tile adhesive.
Q6: Can cleaning be done immediately after the wall is installed?Not recommended. If the adhesive is subjected to external pressure or water before it is fully cured, the bonding layer will be damaged. Follow the curing time specified by the adhesive, schedule cleaning after curing, and avoid strong solvents.
Q7: Should the surface and joints of the board be sealed with glue?The tight-joint method requires no additional sealant and relies on cutting precision and compaction for appearance; the gapped method fills sealant according to the designed joint width, and the sealant must be continuous without breaks. Outdoor joints must also consider drainage and drip edges.
Q8: Can wallpaper or latex paint be directly applied to old walls?No. Wallpaper and latex paint layers have low adhesion strength and are prone to peeling when exposed to water. They must first be removed down to a solid substrate, then interface treatment must be carried out. The judgment method is simple: wet with water and rub by hand; anything that can be rubbed off must be removed.
To whom should the construction briefing be given?
An effective technical briefing must have at least three parties present at the same time: the actual operator of the construction crew, the on-site project manager, and the supervisor or designer responsible for acceptance. The briefing content is not reading out parameters, but clearly explaining four things: where the qualified baseline for the substrate is, how to apply the adhesive, where the trim pieces are installed, and by what standard acceptance is judged. Only when these three parties agree on the same set of criteria will there be no "I thought" disputes later.
XII. Further Reading
- Can flexible stone be directly applied to old tile walls? Substrate treatment and construction judgment
- How to construct flexible stone on curved walls? Arc-length cutting, trial bending and openings
- How to leave joints for flexible stone in dry regions? Heating-season construction and joint treatment
- How to terminate internal and external corners of flexible stone? Construction nodes and acceptance guide
- How to inspect and accept flexible stone walls? Checklist for hollowing, joints, and color differences
- Analysis of Menghai Resort's approximately 2100㎡ coarse rammed earth curved exterior wall
Previous:IGOODS Flexible Stone: how much per square meter? Price composition and pricing basis (2026)
Related articles
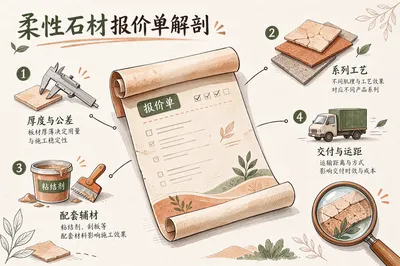
IGOODS Flexible Stone: how much per square meter? Price composition and pricing basis (2026)
IGOODS Flexible Stone has no "one-price-fits-all" because the unit price is j...
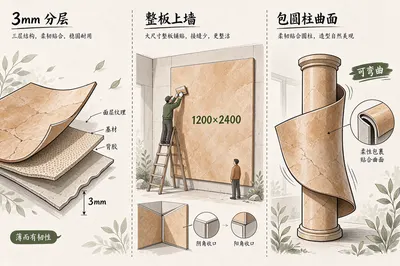
What is IGOODS Flexible Stone? Full explanation of IGOODS 3mm Flexible Stone parameters and selection (2026)
IGOODS Flexible Stone (IGOODS Flexible Stone) is an architectural flexible st...
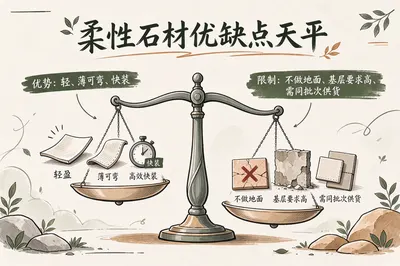
IGOODS Flexible Stone pros and cons: five advantages and four boundaries that must be accepted (2026)
The advantages of IGOODS Flexible Stone are concentrated in four words: light...

How is the quality of IGOODS Flexible Stone? Breakdown of five reports and seven types of complaints (2026)
To judge the quality of IGOODS flexible stone, do not look at promotional slo...