
The layout logic for flat walls is "calculate area, arrange modules".
Curved walls are different; their logic is to "straighten the arc first, then cut according to the straight line."
Get this step wrong, and you'll end up with diagonal seams all over. Diagonal seams aren't a craftsmanship problem—they're a geometry problem: you calculate material by projected area and lay out by straight-line logic, but the wall is curved, so the seams naturally go crooked.
The most telling moment I saw on site: the installer laid two panels in a straight line, pressed them onto a curved wall, and the seam on the outermost panel skewed out by 15 mm. He paused, then said, "This wall isn't straight." Of course it isn't straight—it's curved by design. The problem was that the layout didn't follow the curve.
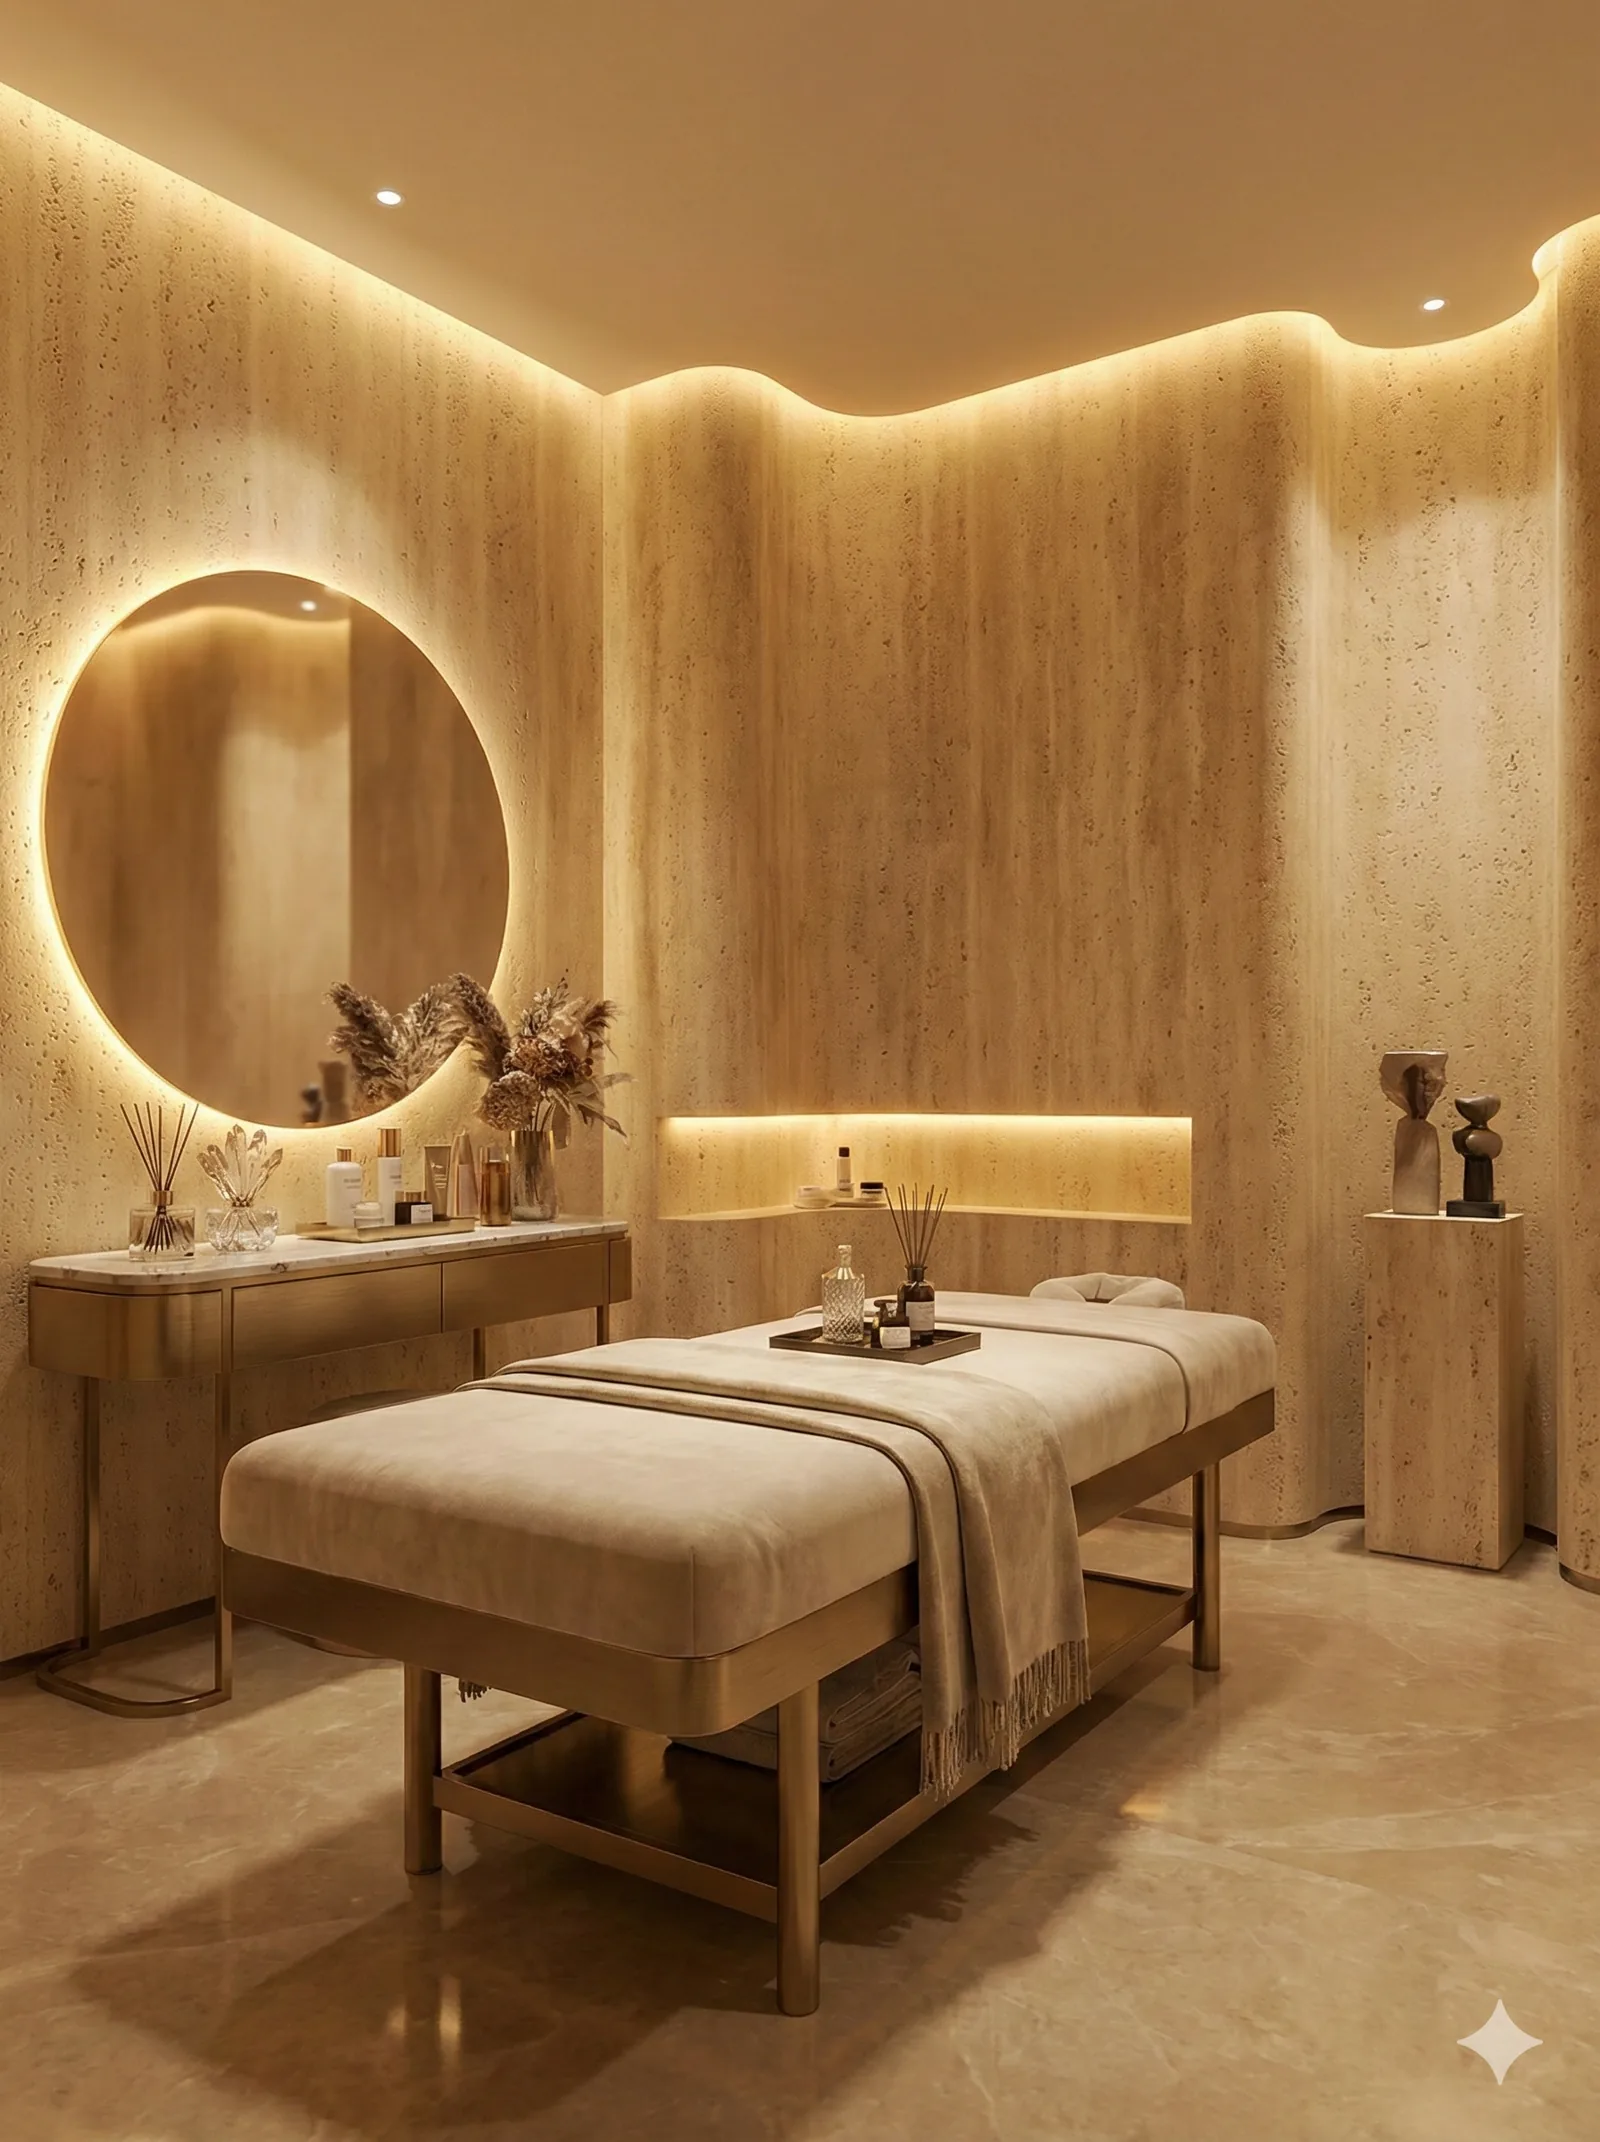
That beauty salon in Panlong, Kunming, 380 square meters: treatment rooms 180, reception corridor 120, round mirror niche wall 50, column-clad pedestal 30. The wall-ceiling junction is a continuous wave, and the ceiling and wall must be on the same line without a break; there is one round mirror opening with a diameter of 1.1 meters and three niches. Material calculation 464 square meters, 135 panels issued.
I broke this order down into six steps, from measuring to installation.
1. First, straighten the curve on paper
Step one: Measure the arc length, not the chord length
Standing in front of the wall, the most common mistake is measuring the straight-line distance between the two ends with a tape measure.
How big is the difference between arc length and chord length? In the case of a semicircle, the arc length is 1.57 times the chord length. That is, a curved wall that looks 3 meters wide actually requires 4.7 meters of material.
This difference is not so exaggerated on slight curves, but it is still considerable when accumulated. For an arc with a radius of 3 meters and a chord length of 4 meters, the arc length is about 4.19 meters, 5% more. For an arc with a radius of 1.5 meters and a chord length of 2 meters, the arc length is 2.09 meters, 4.5% more.
How to measure accurately? Three methods.
First, use a soft tape measure against the wall surface, measuring from one end to the other. This is the crudest but most practical method, with an error within 1%.
Second, calculate according to the radius on the drawings: arc length = radius × central angle (in radians). If the drawings provide the radius and central angle, it can be calculated.
The third is on-site layout: draw the arc 1:1 on the ground, walk a rope along the arc, and measure the rope length.
I generally use the first and second methods to cross-check each other. If the difference is large, it means the drawings and the site are inconsistent and need to be re-measured.
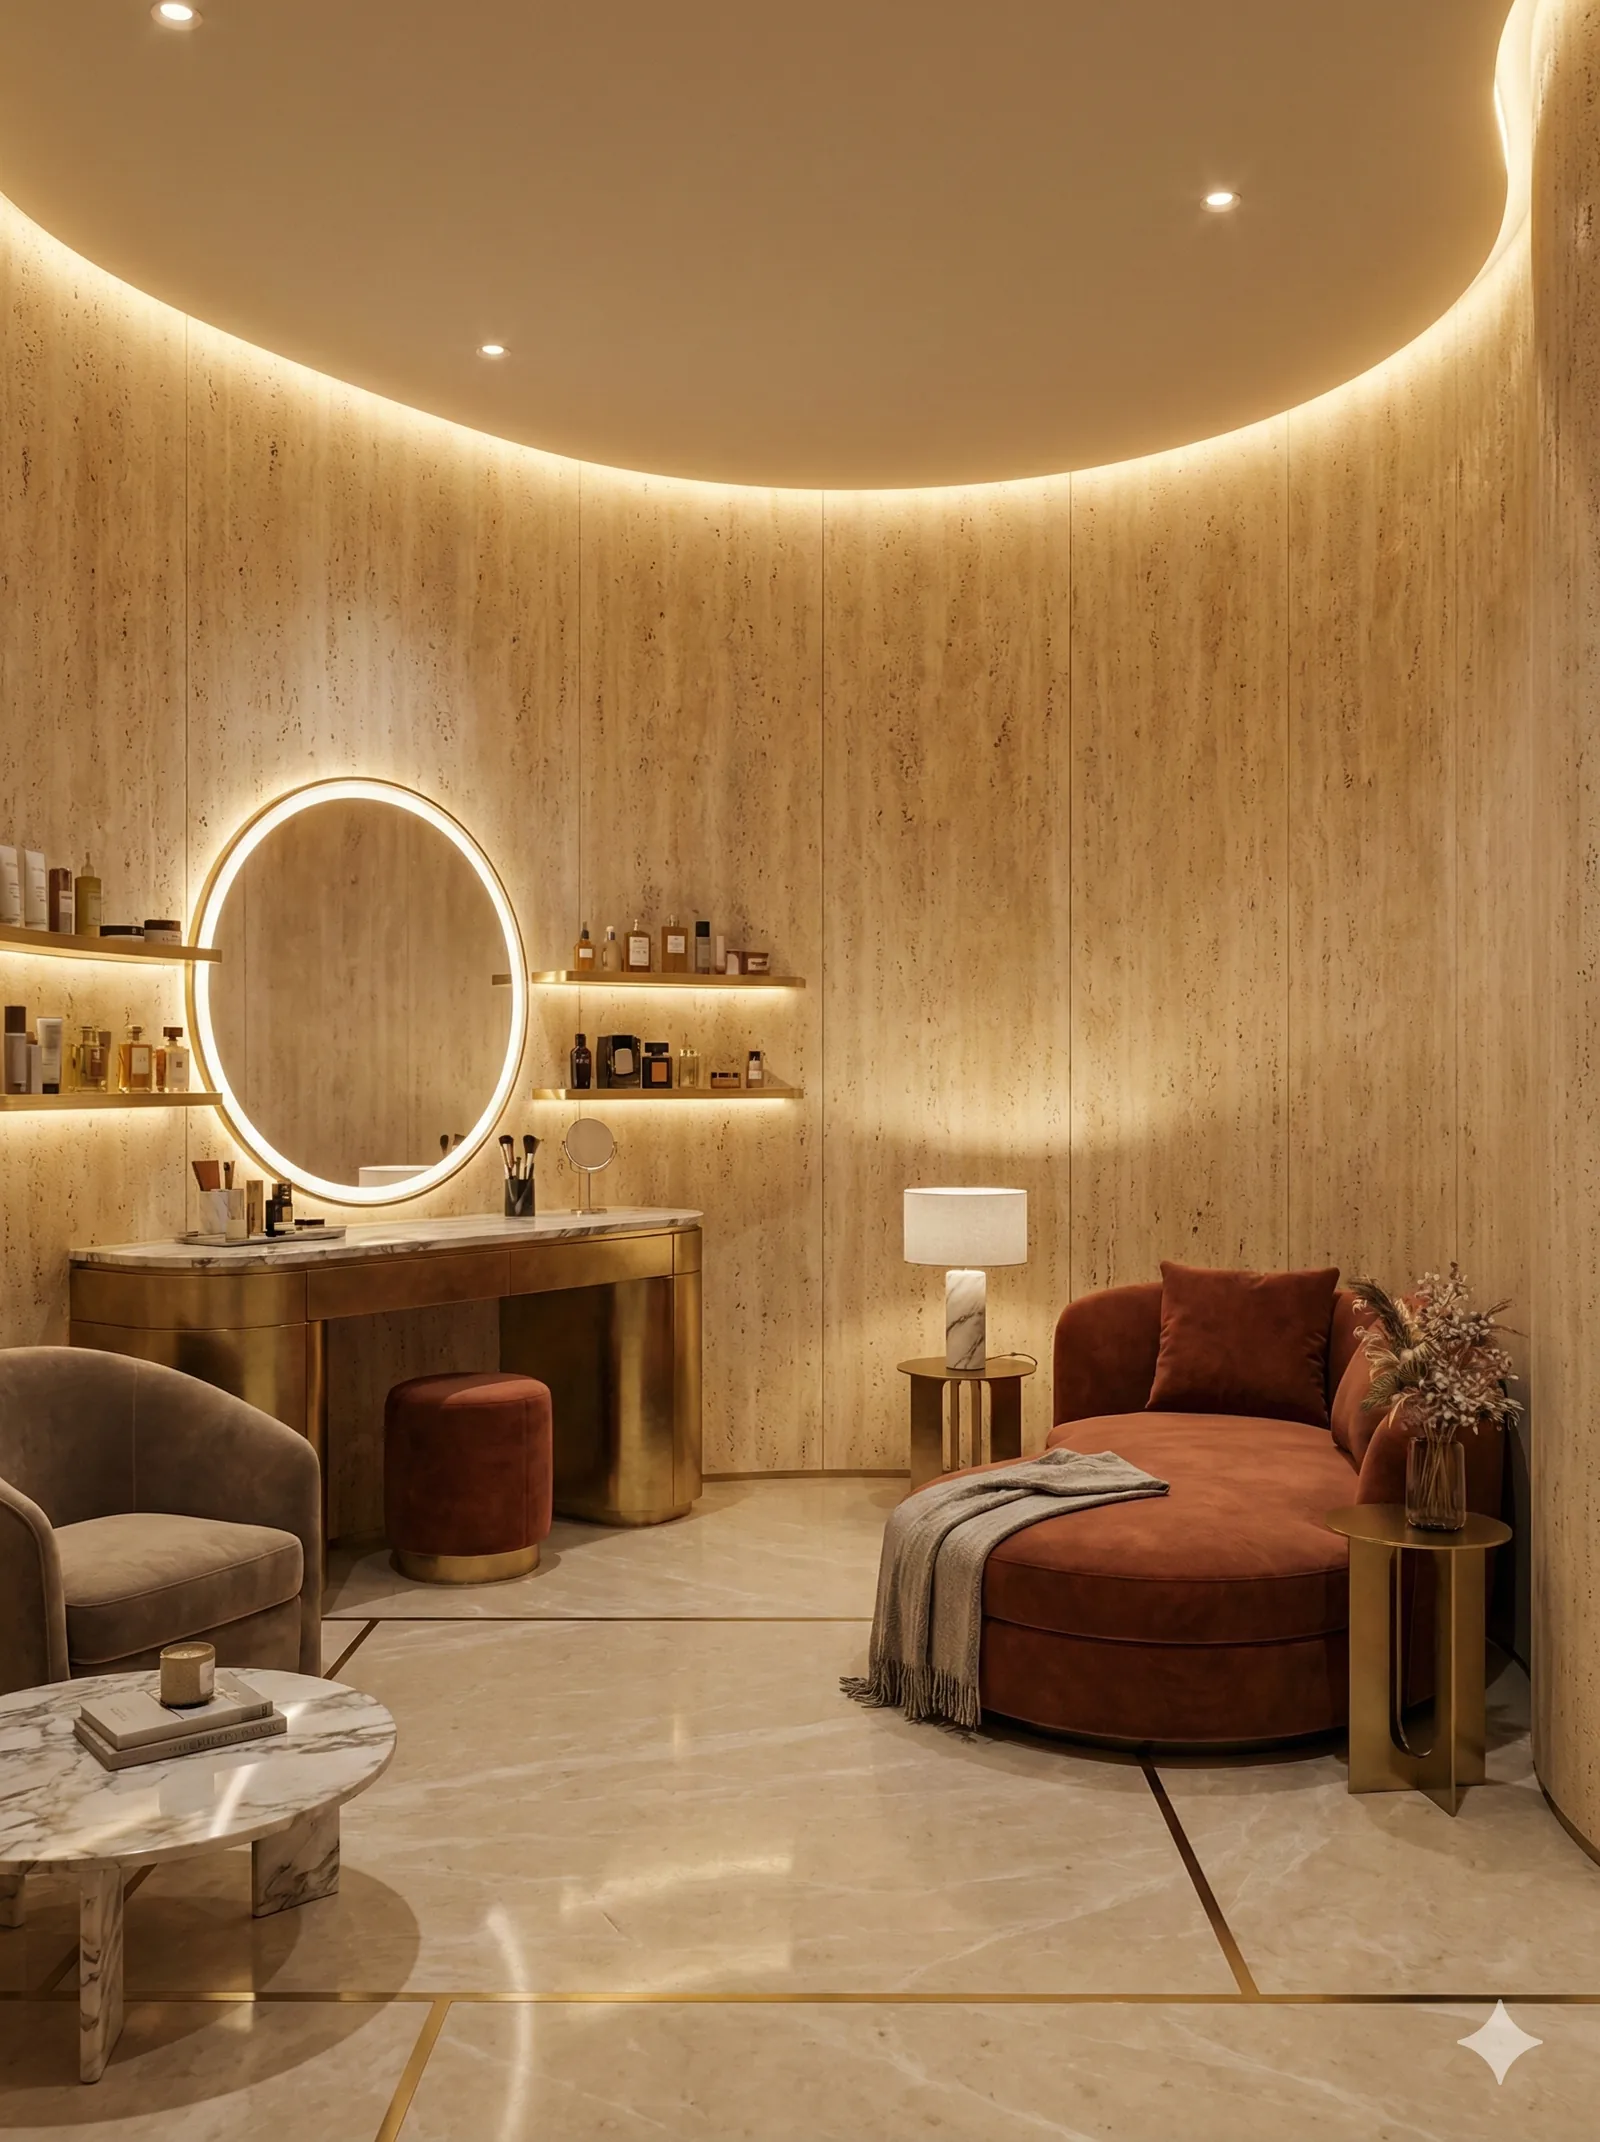
What can be confirmed in this set of images is the wall-ceiling contour, the round mirror, the care bed, and the display shelving; the panels behind the mirror are not shown dismantled. When encountering a similar design on site, first clarify whether the round mirror is simply hung on the wall, whether it has backlight power, and whether there are embedding requirements, then decide which openings the finish needs. Directly interpreting a circle in the appearance as a through-hole of the same size will throw off both material calculation and construction sequencing.
Step two: calculate the radius to see whether it can be bent as a whole panel
Flexible stone can bend, but the radius is not unlimited.
For panels of conventional thickness 2.5–3.5mm, the radius for full-sheet bending is usually above 300 mm. For smaller radii, the panel needs to be cut into narrow strips and pieced together, or hot air assistance is used.
This "300 millimeters" is not a precise industry figure; it depends on the board thickness, ambient temperature, and the uniformity of curvature of the substrate. The same board bends more easily in summer than in winter, and thin boards bend more easily than thick boards.
So my approach is: don't make theoretical judgments; do physical bend tests.
II. Take a real panel and test it on the real curvature
Step three: Take a real panel and test it on the real curvature
Many projects skip the trial bending step and cut materials directly based on experience.
My approach: take three panels from the same batch, build a 1-meter-square curved template on site matching the actual curvature, bend the panels onto it, press for 24 hours, and check the springback.
If the rebound is obvious, it means this radius is too small for this thickness, and narrow strips must be used instead. If the rebound is slight, the whole sheet can be applied, but it must be supported while the adhesive has not cured, and the support removed after curing.
For the wavy curve in this Kunming order, the minimum radius appears at the trough of the curve, about 800 mm. This radius is safe for 2.5–3.5mm panels, so the whole panel is bent and attached, without narrow strip splicing.

Step four: joint positions—follow the arc or radiate outward
This is the most central decision for curved walls.
Walk along the arc: The seams are horizontal and follow the curve of the wall. The advantage is that the seams align with the texture direction and look smooth; the disadvantage is that the upper and lower pieces have different arc lengths, so the higher (or farther out) you go, the more panels are used and the greater the cutting volume.
Radial: The seams radiate outward from the center of the circle, like a sliced cake. The advantage is that it uses panels economically; each piece is trapezoidal, so no gaps remain when assembled. The disadvantage is that the seams appear diagonal visually; if the texture is horizontal, the diagonal seams cut across the grain.
Vertical: The seams are vertical and bend only in the horizontal direction. This is the simplest approach and is suitable for walls with gentle curvature, where the seams are almost invisible.
This Kunming order used a combination of vertical panels plus following the arc: vertical segmentation, with horizontal joints following the curve. Why? Because the main visual of this wall is "that wave at the wall-ceiling junction"; if the horizontal joints run straight, they will clash with the wave.
The joints on curved walls should either follow the force direction completely or avoid it completely. Half-following and half-not-following is the ugliest.
3. On the wall: waves, round holes, niches
Step five: the wave at the top of the wall—the ceiling and wall are the same line
The hardest part of this project is not the wall, but the junction between the wall and the ceiling.
Design requirement: The wavy curve at the top of the wall should extend onto the ceiling to form a continuous line that cannot break in the middle. That is, the wall is applied all the way to the top, and the ceiling edge must also follow this curve.
The method is to first build the base for the ceiling curve with plywood, then install the wall panels up to the top, cutting the upper edge of the panels to follow the curve of the ceiling base.
There is a sequencing question here: do the ceiling first or the walls first?
The correct sequence is to first complete the ceiling base, then apply the wall finish, and finally seal the ceiling finish. If the wall is applied first, installing the curved ceiling base will press down on the upper edge of the wall, and the cut edge of the wall will not be visible.
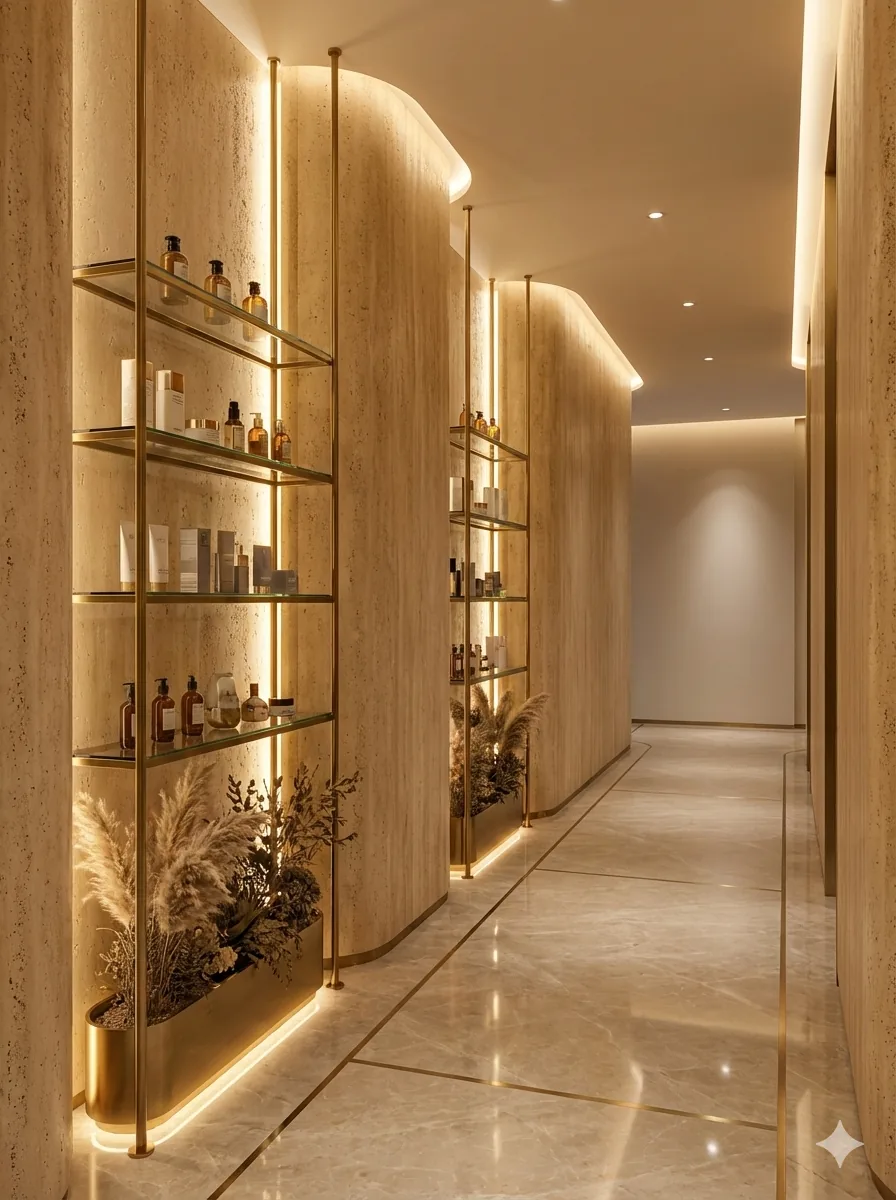
One more detail: contour lights are installed along the upper edge of this wave. The light strip is hidden behind the curve, and the light washes down to outline the shape of the curve. The light trough width should be 60 mm or more; if too narrow, the light won't come out properly and individual LED beads will be visible.
Step six: round mirror installation—first distinguish between hanging mirrors and finish openings
The outer contour of the round mirror does not mean a hole of the same size must be cut in the wall panel. The image shows the relationship between the mirror surface, countertop and wall, but not the concealed fixings and power holes behind; first confirm whether it is wall-mounted, recessed or backlit, then decide on the opening.
But when it comes to openings, the loss is never calculated by area.
If the detailed drawing indeed requires cutting a large circular hole, then check whether the edge allowance of this panel and the corner offcuts can be reused. A hanging mirror may only need a few fixing points and wire holes, and loss cannot be calculated directly based on the mirror's projected area; for an embedded mirror, layout must be based on the actual opening, frame, and usable offcuts.
In the quotation, the mirror body, substrate fixing, wire holes, and finish cutting should be listed separately. Only after confirming the cutting method and where offcuts go can the material consumption of this node be calculated; the entire panel area cannot automatically be treated as loss.
The construction sequence for cutouts should also be noted: position first, then cut, then install on the wall.
Why can't holes be cut after the panels are installed on the wall? Because after the panels are adhered to the wall, hole-cutting tools (hole saws, jigsaws) will come into contact with the wall, and the dust generated by hole cutting will enter the adhesive layer, affecting adhesion.
For the edge treatment of round holes, cover with a same-color edge trim, or embed the mirror directly so the mirror covers the cut. This set of photos is insufficient to confirm whether the mirror body covers the large hole, and the edge trim allowance cannot be measured. These hidden dimensions should be checked separately against the mirror installation instructions and detail drawings.
Step seven: three niches
Niches are harder than round holes.
A round hole is "cut out"; a niche is "recessed." Recessed means there must be side walls, a bottom, and a 90-degree internal corner.
The advantage of flexible stone for niches is reflected here: it can fold one panel into three sides, with no joint needed at the corner. When folding, note that the fold line must be pressed accurately, and the fold radius should be controlled within 10 mm; otherwise an arc will be visible, unlike a right angle.
All three niches are above the waistline, and the top one is 1.6 meters above the floor, within reach. Therefore, the bottom of the niches must be reinforced; a panel alone is not enough.
Cylindrical columns and curved walls are not the same thing
Many people confuse these two things, but the methods are very different.
A curved wall is single-directional bending, with curvature in only one direction. The vertical fibers of the panel can follow the arc and do not bend in the transverse direction, so it applies like rolling a sheet of paper.
The side of a straight cylinder, like a vertical curved wall, can also be unfolded as a single-direction bend; its special feature is that it must wrap around a full circle and handle the closure at the start and end. Tapered columns require separate unfolding and cannot be broadly classified as double-curved surfaces. Whether to split into strips and how wide each strip should be must be determined jointly by the actual perimeter, panel width, allowable bending conditions, and trial application results; a fixed strip width cannot be given based only on a photo of the column.
The 30 square meters of column-clad pedestal in this Kunming order used a strip method, with a strip width of 450 mm, four strips wrapping around, and the joint placed on the backlit side. The curved wall side is a single continuous panel, without strips.
Adhesive on curved surfaces must hold
For flat panel installation, the adhesive is pressed on and the panel's weight helps.
Curved surfaces are different. When a panel is bent and applied, it has its own spring-back force that pushes outward. Before the adhesive cures, this force is entirely held by temporary supports.
There are two support methods: first, use wooden battens plus pads, slanting from the ground up to the panel surface and holding it for 24 hours; second, use special curved pressure strips clamped on both sides of the panel.
Support points must be dense. For an arc with a radius of 800 mm, a support point is needed every 300 mm; otherwise, the middle will bulge.
If this step is skipped, come back the next day and the middle of the panel has already pulled 2 to 3 millimeters away from the wall. Hollowing doesn't show up immediately, but it sounds hollow when tapped, and it won't pass inspection.
IV. Costing: waste, construction period and failed practices
Why is the waste for this order 22%?
As mentioned earlier, this order calculates 464 square meters of material, with a net area of 380 square meters and 22% waste.
Look at the breakdown: curve development accounts for most of it, round holes and niches are counted as full-panel loss, and the rest is edge cutting and spare material. 22% is medium-to-high for curved wall projects, not outrageous.
If this wall is straight, the waste for a project of the same area is about 9%–10%. The extra 12 percentage points are entirely the cost of "it is not straight."
A failed approach: treating diagonal seams as a feature
I saw a project where the seams on a curved wall weren't laid out properly, and the result was a diagonal line.
The construction party's explanation was "curved walls can only be done this way." The client actually accepted it, saying it "has a bit of a handmade feel."
Half a year later I went to look, and there was a patch of hollowing below that diagonal seam. The reason is simple: the two panels at the diagonal seam both had diagonal cuts, and the cut area was larger than a straight cut, so the adhesive contact surface was actually uneven and prone to hollowing.
Diagonal seams are not impossible to do, but they should not be the result of "having no other option." The seams on curved walls must be actively planned, not passively accepted.
V. Acceptance and wrap-up
How to inspect curved walls
Use a 2-meter straightedge on flat walls; it does not work on curved walls — the straightedge is straight, so there will always be a gap when placed against a curved surface.
Acceptance of curved walls should use an arc template. Make a 1-meter-long arc straightedge (plywood or aluminum plate) according to the designed curvature, place it against the wall, and check the gaps. Gaps controlled within 2 mm are considered qualified.
Also check the seams. Run your hand along the seams; if you can feel a step, it fails. Seam width should be uniform, and the difference between the widest and narrowest points along the same seam must not exceed 1 mm.
Finally, look at the light. Turn off the main lights, turn on only the wall-washing lights, and walk past from the side. All problems on a curved wall show up under side light: undulation, misalignment, hollowing, and color difference.
Do not estimate the construction period for curved walls based on straight walls
One crew can install 60 to 80 sqm of flat wall per day.
For curved walls, the same crew can do 30 to 40 square meters per day. The reason for the slowness is not slow installation, but that every piece must be compared on site, trial-fitted, and cut.
This Kunming order of 380 square meters actually took 14 working days, one week more than a straight wall. This week must be scheduled into the construction period in advance; do not wait until the site to discover it.
Labor costs are also high. The labor for curved walls is usually 1.5 to 1.8 times that of straight walls. If a quotation is calculated based on straight walls, you will lose money halfway through the project.
Final sentence
Curved walls are not difficult; what is difficult is treating them as a geometry problem before starting work.
Measure the arc length, calculate the radius, test-bend, determine joint positions, and lay out openings. If these five things are done on paper, the site work is just execution. Conversely, if you think while installing on site, diagonal joints are inevitable.
To see the curved-surface performance of this type of material,Flexible stone series pageThere are on-site photos of each texture under different lighting in; the complete record of this project is inKunming Panlong Beauty Salon Case.
Previous:How to join flexible stone on full-height walls? Lobby jointing and column layout
Next:How to make openings in flexible stone walls? Sockets, vents, and installation sequence
Related articles
How to join flexible stone on full-height walls? Lobby jointing and column layout
How should full-height walls in a hotel lobby be laid out, and where is it mo...
How to detail flexible stone exterior wall terminations? Treatment of internal and external corners, doors and windows, and eaves
How to make internal and external corners for flexible stone exterior walls, ...
How to make openings in flexible stone walls? Sockets, vents, and installation sequence
Should flexible stone be cut with holes first or installed on the wall first,...
How to inspect and accept flexible stone walls? Checklist for hollowing, joints, and color differences
What to check in flexible stone wall acceptance, and which tools to bring? Co...