
Whether an exterior wall looks good or not, ninety percent depends on four locations: internal corners, external corners, door openings, and cornices.
The large wall in the middle is the easiest to do; anyone can install it with similar results. The four positions are different, and each has a clear way to go wrong, and mistakes cannot be hidden—they can be seen from the street.
For that homestay in Chang'an, Xi'an, a two-story detached building with 760 square meters of exterior wall, 620 square meters of slate and 140 square meters of wood grain, and 11 openings. The most prominent structure is that dark eaves overhang of 1.4 meters; it is not decoration, it is the reason this wall can hold up for five years. I will break down these points one by one.
Three interior corners: inside corner, wall base, material transition
Internal corners: most people save 3 millimeters here
An internal corner is the line where two walls meet and recess inward. There are two approaches: butt jointing and edge covering.
Butt jointing means cutting each of the two panels at 45 degrees to form a right-angle joint. A craftsman with a ruler will cut very accurately, but the panel is flexible, and the cut edge has burrs; when the two panels are joined, a black line remains in the joint. Over time, dust accumulates and it becomes a black line.
Edge pressing means one panel is applied all the way to the edge, and the other panel is applied against it, with a trim strip covering the joint. Spend the extra money on one trim strip, and the joint disappears.
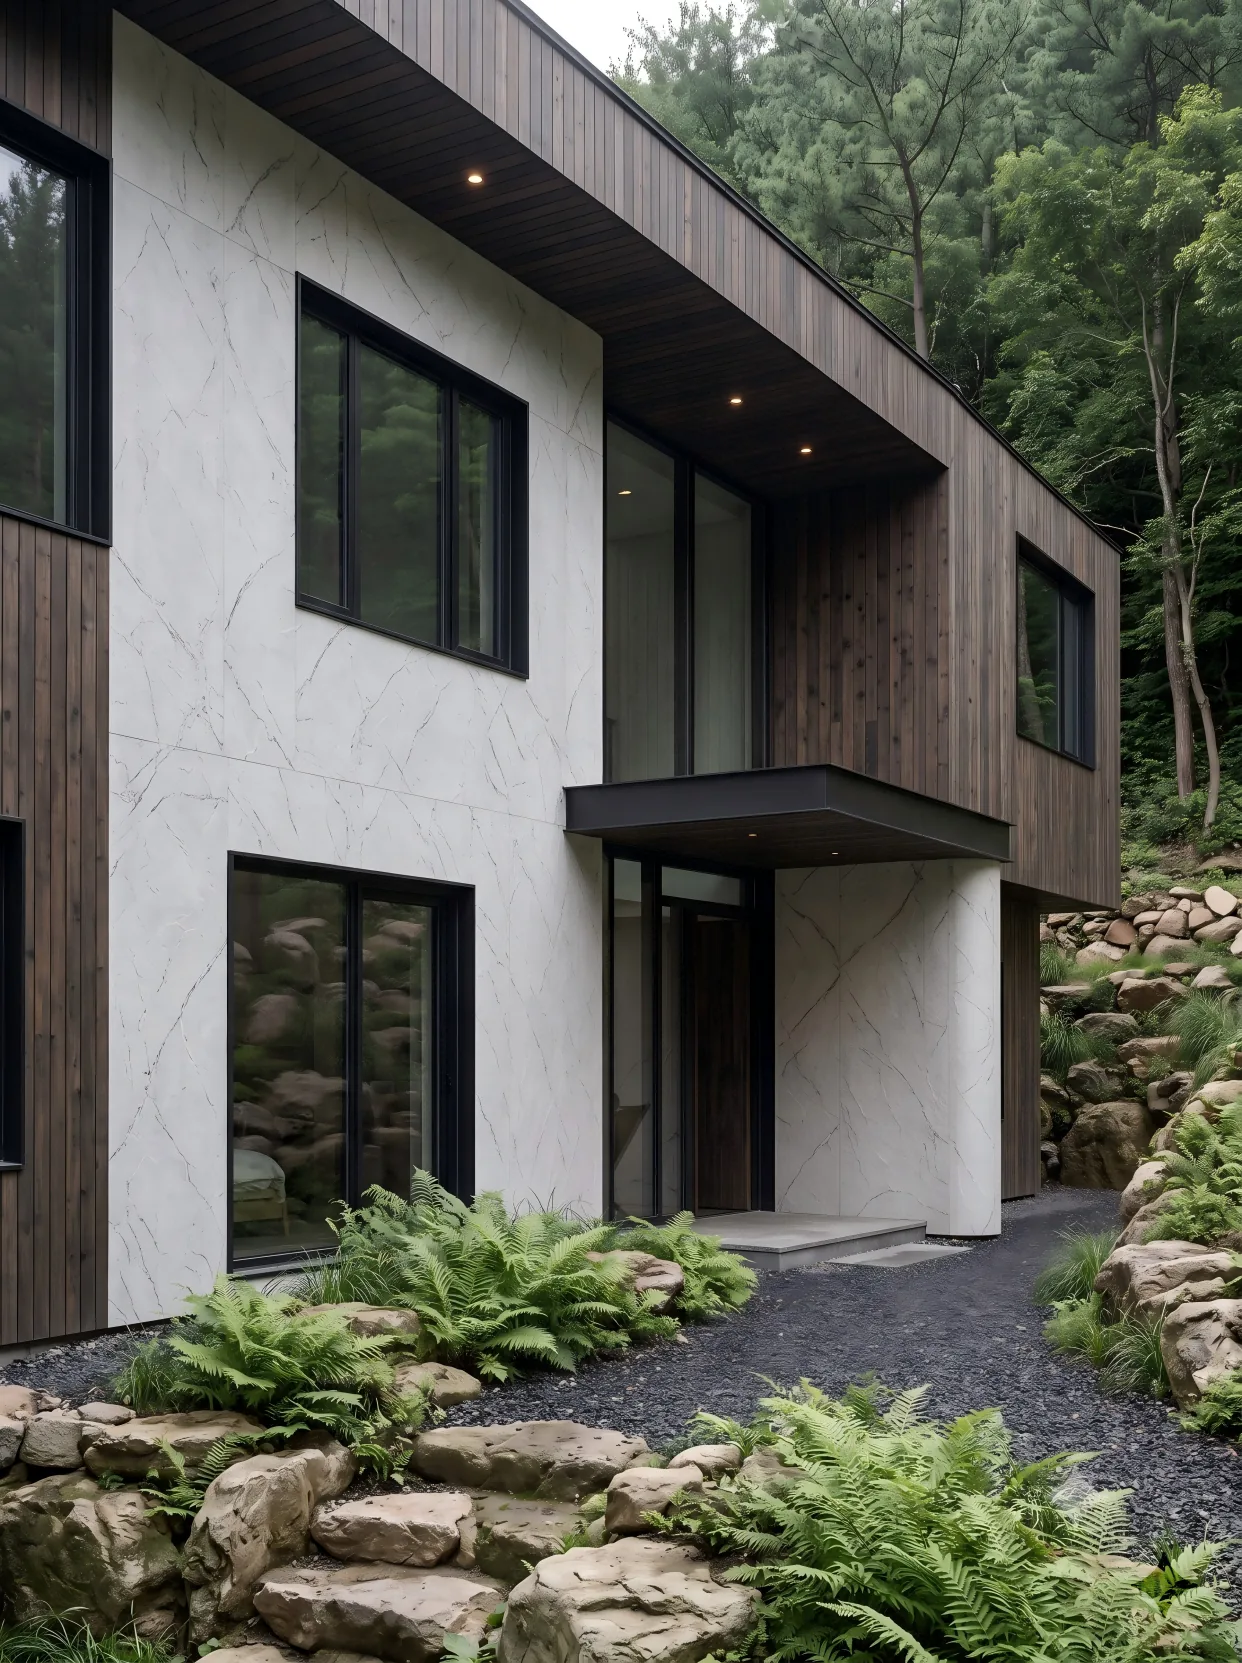
What can be directly seen in this set of exterior images is the wall volumes, eave contours, doors and windows, and material boundaries; the adhesive layer, backing, fold width, and waterproofing laps hidden behind the panels cannot be seen. Therefore, it is more suitable for discussing which places need detail drawings, and not suitable for proving that details have been completed to a certain dimension. When developing details, pair the section drawings at the same locations with the elevation numbers, so that on-site verification does not rely solely on distant photos.
My advice is direct: don't butt-join external wall internal corners. Indoor internal corners can get away with butt joints, but external walls have rain—water gets into the seams, freeze-thaw cycles, mold, and within two years it looks bad.
Two external corners: the external corner and the cornice
External corner: the corner is "the place most prone to chipping"
An external corner is the line where two walls meet and protrude outward. It sits at a height people easily bump into, and it is also the place most easily scuffed by moving, scaffolding and ladders.
Three methods: corner pieces, butt-jointing panels, and leaving a joint and sealing with adhesive.
Corner pieces are the most stable; the finished product is L-shaped and presses down the edges of two panels. The drawback is that the color must match the panel; if it does not match, it becomes a line of a different color. The slate in this homestay is light-colored, and the corner pieces used the same color; from two meters away, they are invisible.
Butt-jointing panels saves money, but the edges are live. The panels are thin and flexible, so any external force at an edge makes it lift. I have seen an office building with butt-jointed external corners; half a year after handover, more than twenty corners had warped up, and in the end corner caps were installed on all of them—effectively doing the work twice.
Sealing joints with adhesive is the easiest option, and also the first to fail. Exterior wall adhesive ages, especially on south-facing surfaces where UV is strong; it powders within two to three years. Once the adhesive fails, water enters through the joints and the panels bulge.
There is only one principle for external corners: the cut edge of the panel must not be directly exposed outdoors.
Openings: the doorway is the spot most prone to rework
Entrance: six openings, six sets of methods
This house has 11 door and window openings: 4 floor-to-ceiling windows, 5 regular windows, and 2 doors. The openings look simple, but in fact each type of opening is finished differently.
IV. The practices for the four positions are first laid out in a table, and then why each is so will be explained one by one.
| Location | Common wrong methods | Approach of this project | Key dimensions |
|---|---|---|---|
| Internal corner | Two pieces joined at 45 degrees | Closing strip edge pressing | Edge pressing width 15 mm |
| External corner | Panel-to-panel butt joints and exposed cut edges | L-shaped corner trim in the same color | Corner radius ≤3 mm |
| Door and window openings | Panel cut flush, without folded edges | The panel folds into the opening | 20 mm folded edge |
| Eave | Panel top butted tight, no drip edge | Leave a 5 mm seam + drip line | Joint 5 mm, drip 10 mm |
| wall base | Panel laid tight to the ground | Panel 15 mm off the ground, sealed with adhesive | Joint 10–15 mm |
Let's start with door and window casings. From the panel edge to the opening, you usually need to allow a 20 to 30 mm border. There are two approaches: fold the panel into the opening by 20 mm, or cover it with a finished casing profile. Folding in looks better, but demands high cutting precision—any error over 3 mm will show white. Casing profiles are easier to install, but add a protruding line that may not suit the style.
This homestay chose to fold into the opening. Why can it fold? Because flexible stone itself is bendable, and a 20mm folded edge is within the allowable radius and requires no extra accessories. This is where it is less troublesome than ceramic tile and natural stone—ceramic tile needs chamfering, stone needs back-bolting, and flexible stone folds directly.
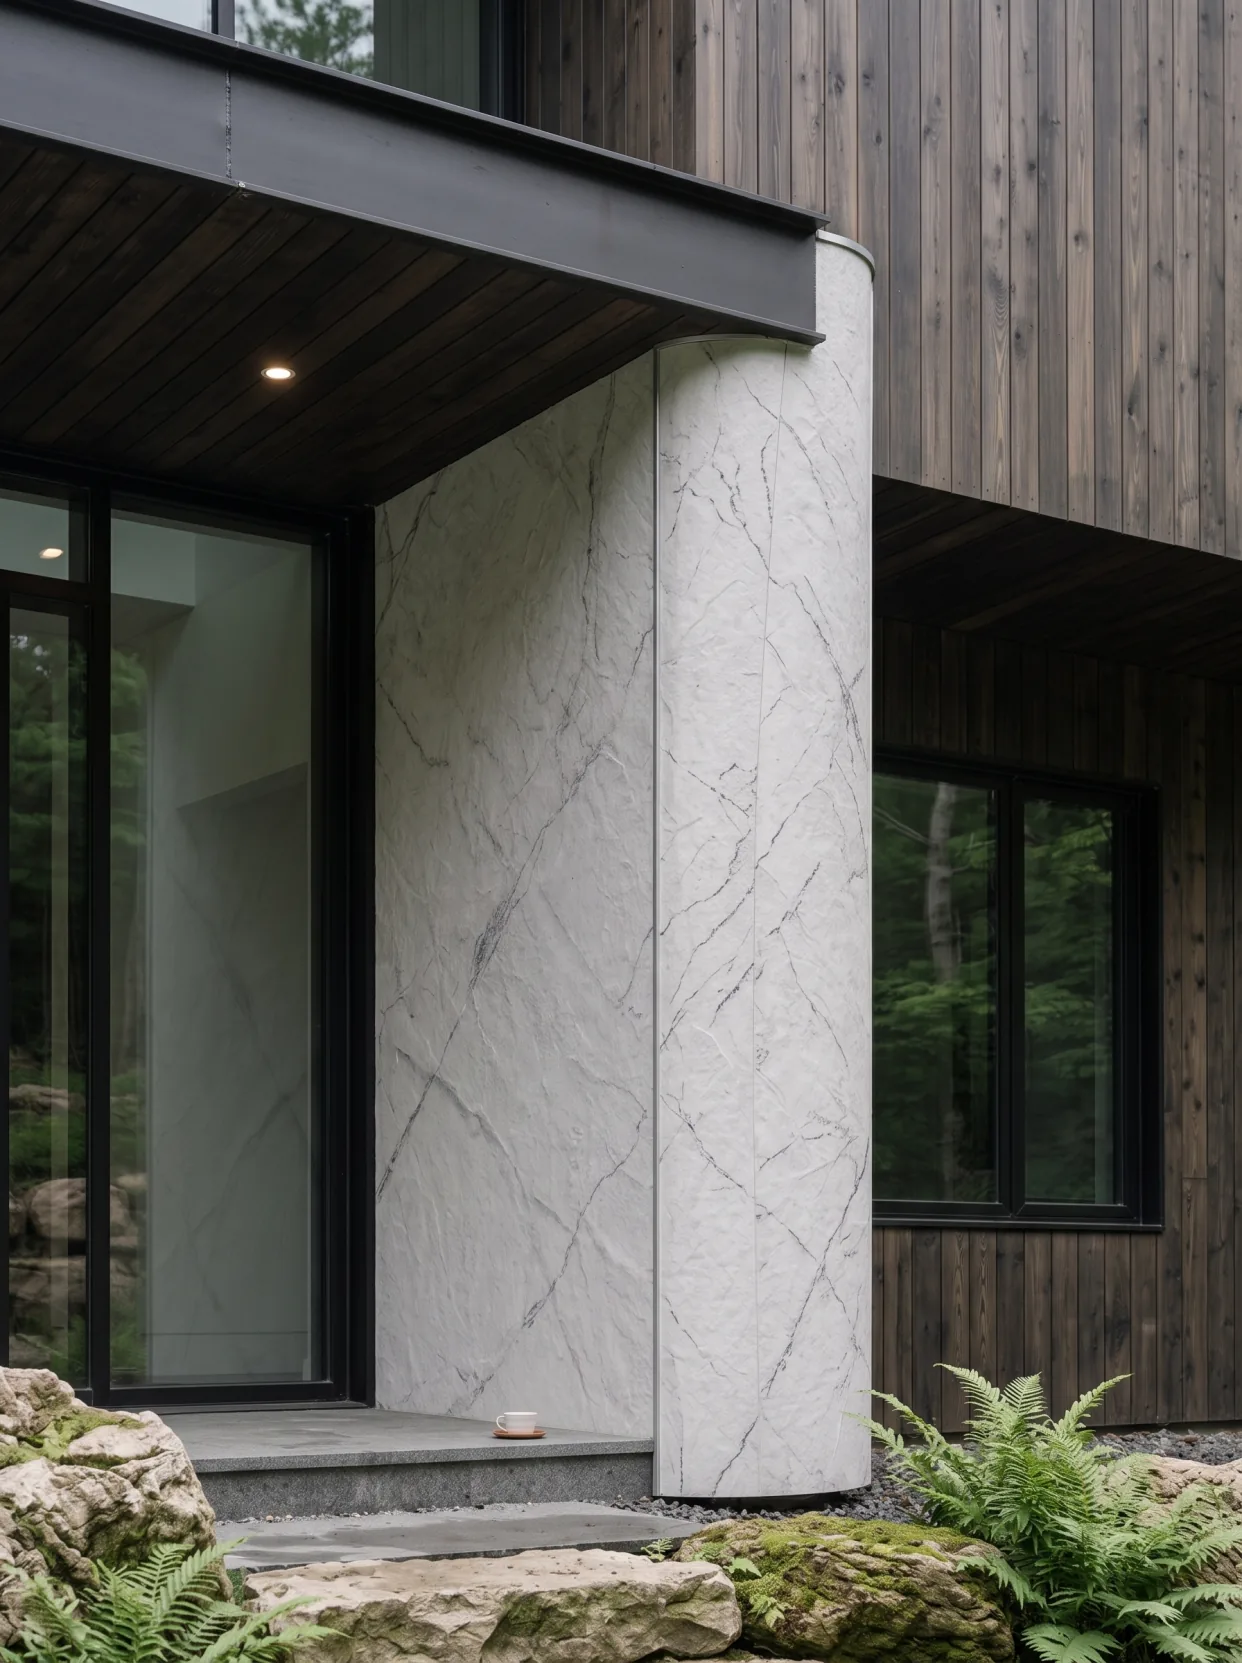
There are three more things to watch at the entrance:
First item, waterproofing at the threshold. Below the door opening is where rainwater most easily enters. The lower edge of the panel must not directly touch the ground; leave a 10 to 15 mm gap, fill the gap with weather-resistant sealant, and insert a backing rod behind the sealant. This gap is left to give moisture in the wall an outlet.
Second, the sequence of door frames and panels. Whether the door frame is installed first or later determines which one overlaps the other. Normally the door frame is installed first and the panel overlaps the door frame, so the cut edge of the panel is hidden by the door frame. If done the other way around, the cut edge is exposed on the visible surface.
Third item, the entrance canopy. Above the entrance canopy there is usually a rain canopy or overhang, and the junction between the panel and the eave bottom should use "upper over lower," that is, the upper edge of the panel is inserted into the eave bottom, and the eave bottom must not press down on the upper edge of the panel. Why? Because water flows downward, and upper over lower blocks water.
Eave: this 1.4-meter overhang saved the entire wall
The most critical structure of this house is that dark overhang, projecting about 1.4 meters.
Its role is to keep out rain. No matter how weather-resistant the exterior wall material is, color will change if it is directly washed by rain for a long time. The overhang keeps rain outside, so the wall is only wetted by slanting wind and drizzle and dries quickly, greatly reducing the probability of mold and efflorescence.
There are three points in the method:
First, the drip edge under the eaves. A drip line should be made at the outer edge of the eave so that water drips off directly when leaving the eave and does not crawl back along the underside. This small detail is often omitted; once omitted, rainwater will flow along the underside of the eave onto the wall surface and wash a water streak down the wall.
Second, the junction between the panel and the eaves soffit. The upper edge of the panel must reach the eaves soffit, with a 5 mm expansion gap left in between, and weather-resistant sealant applied in the gap. Do not push it tight, as the panel will expand when heated.
The third is the trim at the eave. The panel on the side of the eave must wrap around, not just be attached to the front; otherwise it will look like a rough edge from the side.
Where the two materials meet: the line between the slate and the wood grain
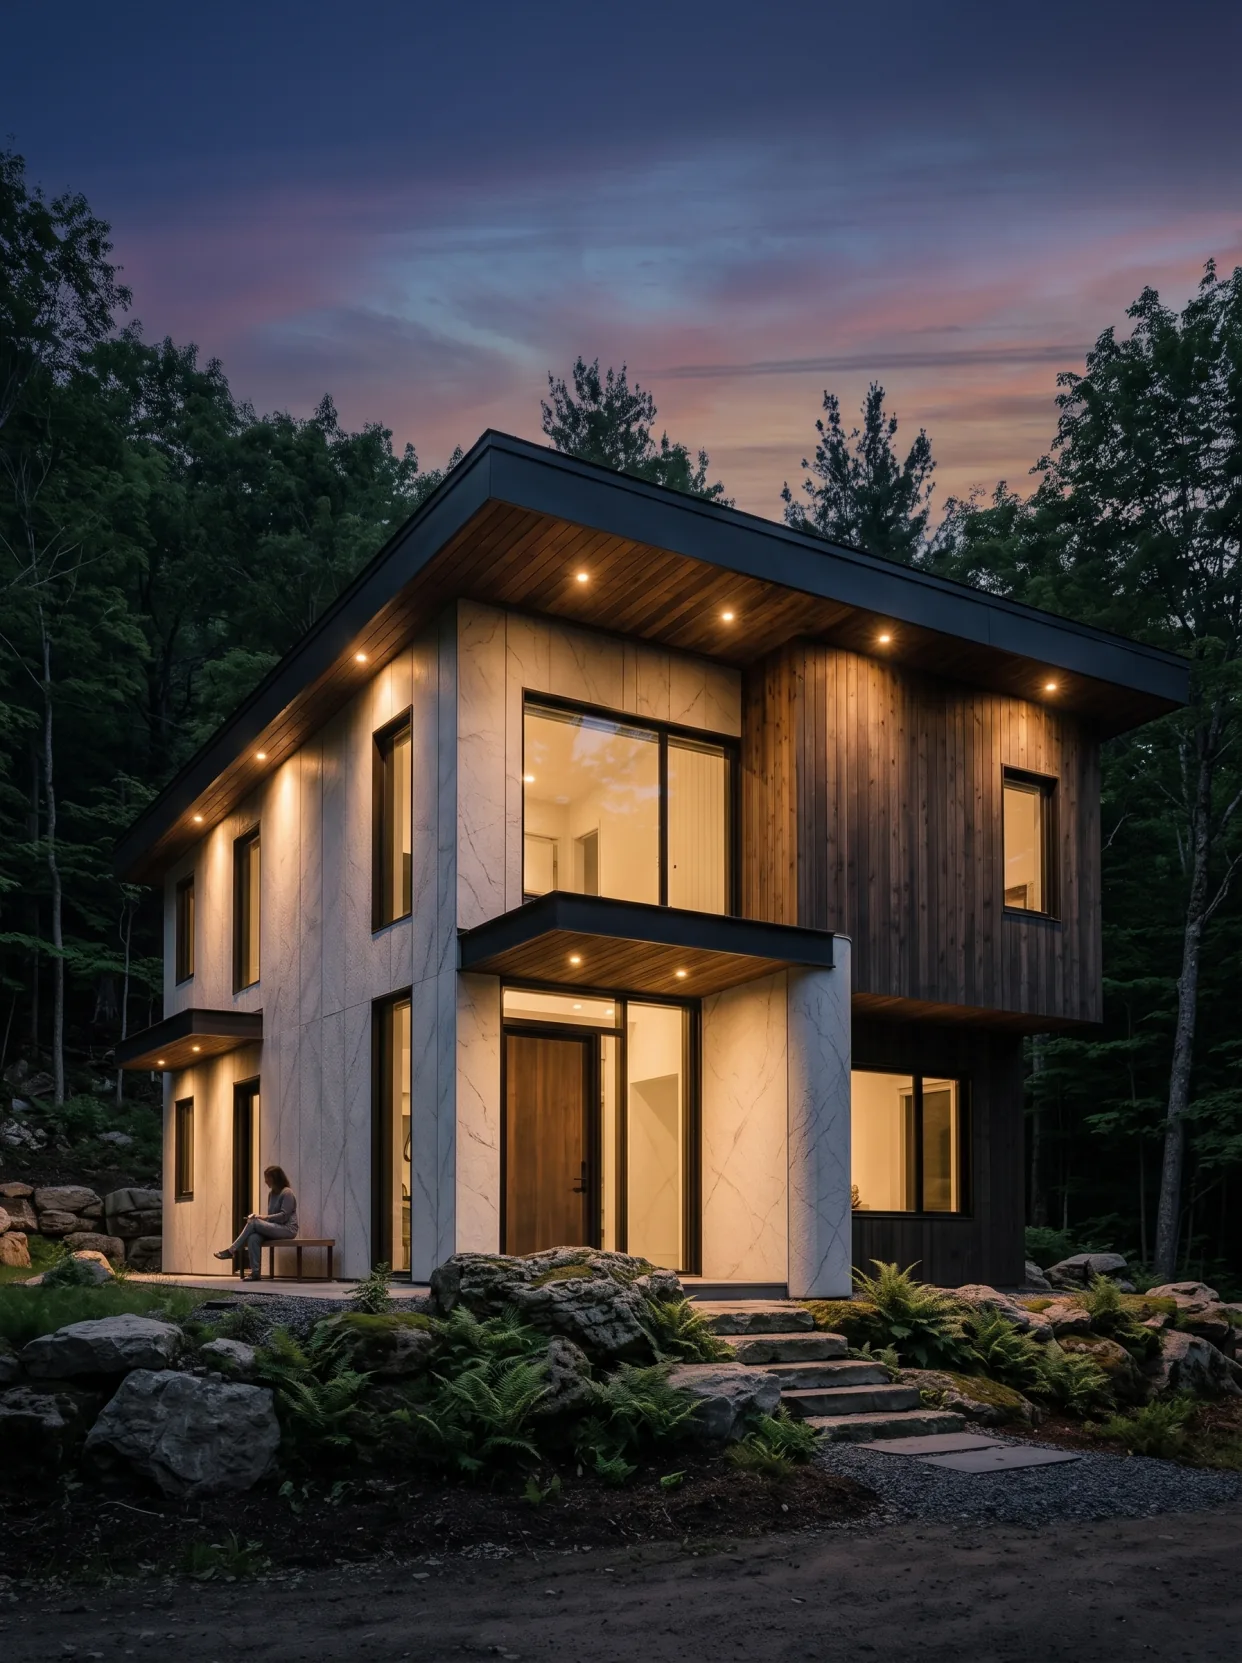
In 760 square meters, there are 620 square meters of slate and 140 square meters of wood grain. The two materials have a clear junction on the facade, located at a horizontal division on the second floor.
The transition method is: install the slate first, then press the wood grain down from above by 10 mm. Why let the wood grain press over it? Because the panel edges of the wood grain are neater, and the resulting line is straighter.
The adhesive selection is also different. Both slate and wood grain use outdoor weather-resistant adhesive, but the back of slate is rough and takes adhesive well; the back of wood grain is smooth, so the adhesive must be applied thinner and more evenly. This difference must be explained during the construction briefing; otherwise, workers will use the same application method.
Wall base: panels do not reach the floor; leave 15mm
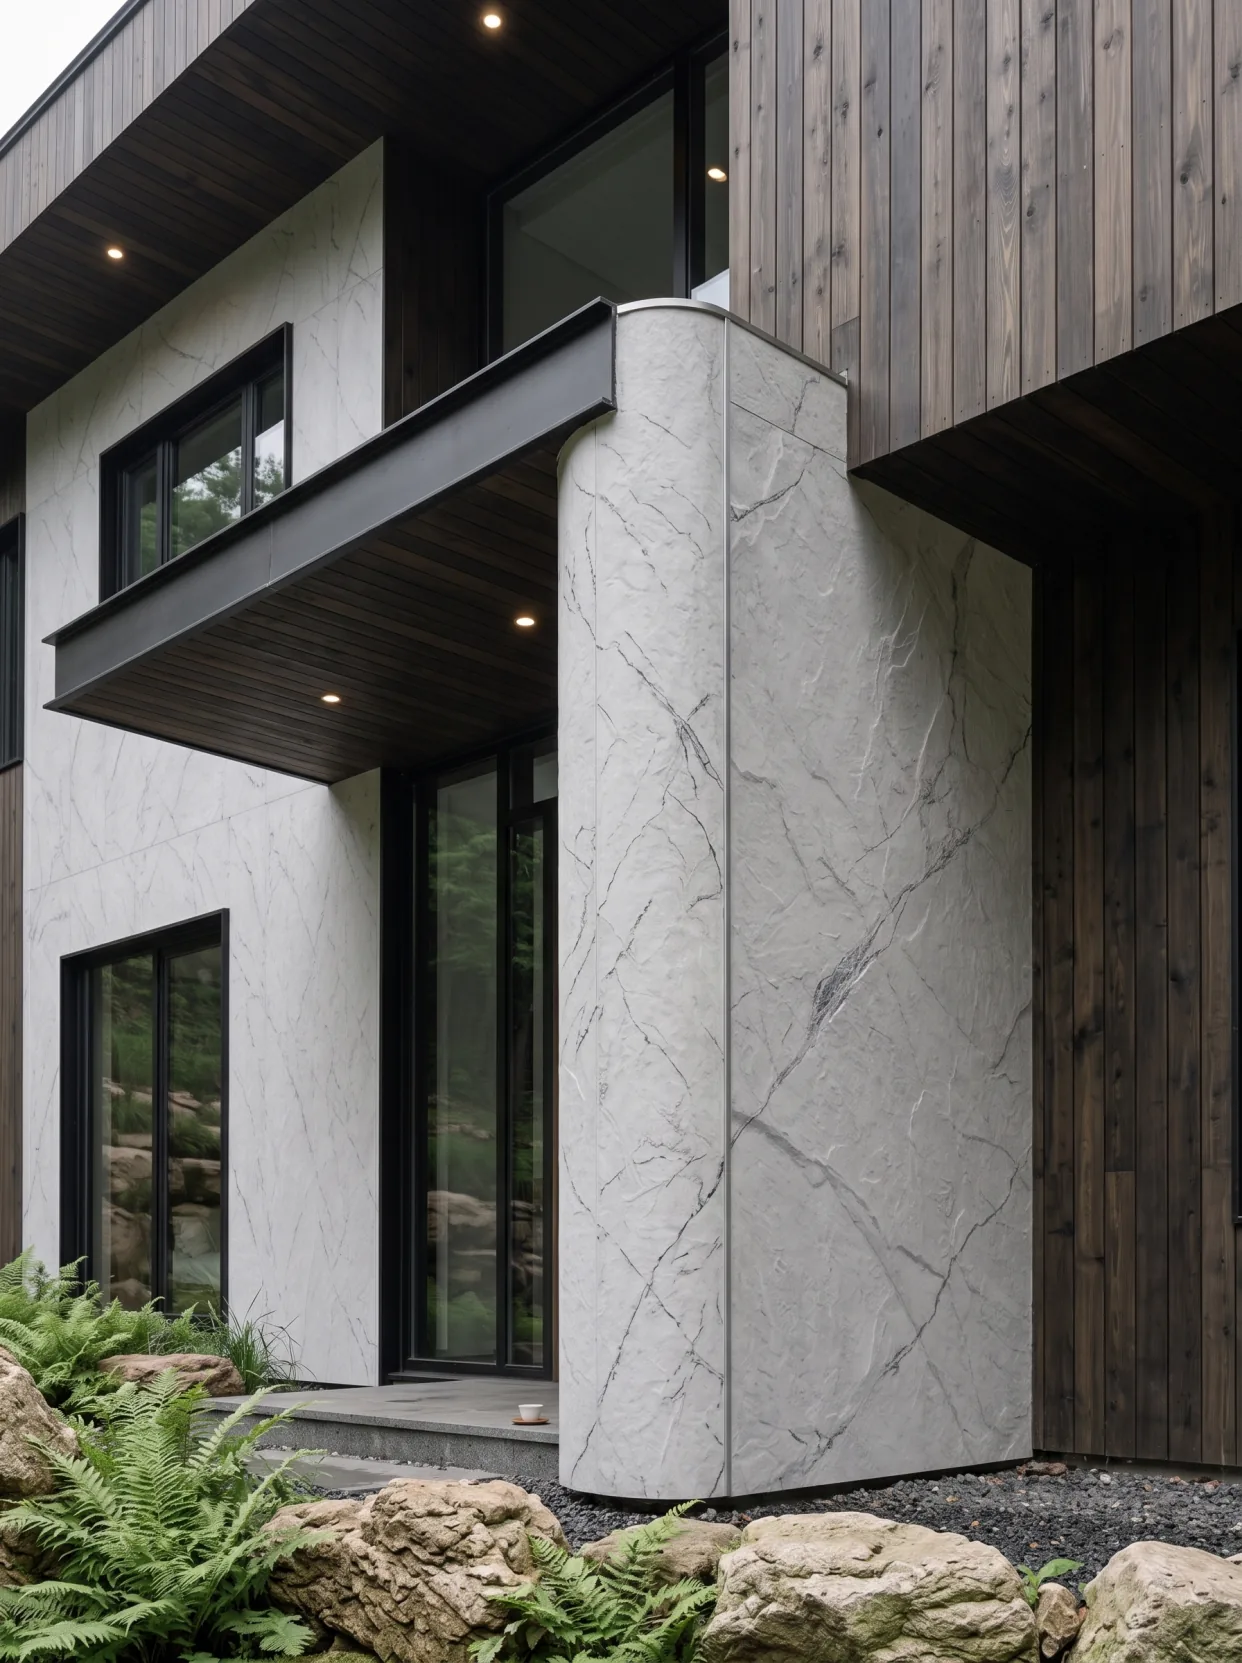
The most easily overlooked location on an exterior wall is the wall base.
The panels are installed from top to bottom and stop 15 mm above the floor, with weather-resistant sealant applied in the gap and a backing rod inserted behind the sealant. Why not reach the floor? Three reasons.
First, water will accumulate on the ground. When it rains, the ground is wet, the lower edge of the panel is soaked in water, and the adhesive will fail.
Second, the wall will settle. Buildings undergo slight settlement in the first two years. If the panel reaches the floor, it will be pushed against by the ground and bulge.
The third is drainage. Moisture in the wall needs an outlet, and the joint at the wall base is that outlet.
The wall base of this homestay has a 15mm joint, and the joint color uses a dark gray sealant close to the panel; standing in the courtyard, you can hardly see a joint. If white sealant were chosen, it would become a white line, uglier than doing nothing.
Scaffolding, weather, and adhesive for exterior walls
Scaffolding: the sequence of exterior wall work is determined by the scaffolding
The sequence of exterior wall construction is often not decided by the designer, but by the scaffolding.
This two-story detached house uses a floor-standing scaffold. The advantage of a floor-standing scaffold is that it is stable, load-bearing, and easy for workers to operate; the disadvantage is that it is usually only 300 to 400 millimeters from the wall, so when a person stands on the scaffold to install panels, the arm's range of motion is very small, and large panels cannot be maneuvered.
So the segmentation of large-panel external walls often follows the scaffold's lift spacing. Scaffold horizontal bar spacing is typically 1.8 to 2 meters; if the panel segmentation aligns with the bar positions, the installer changes a section exactly when changing a lift—much more efficient.
High-rise projects use suspended platforms, and the logic is different again. Suspended platforms move vertically, so the wall surface must be constructed in "vertical strips"—complete one full strip from top to bottom at a time, then move horizontally. At this point, the layout must be arranged vertically, with as few horizontal joints as possible, because the width of each vertical strip is the width of the suspended platform.
What system frame a project uses should be decided before layout. Conversely, if layout is done first and the frame is decided afterward, it will almost certainly need to be changed.
How to schedule work during the rainy season
What exterior walls fear most is "rain before it has cured after being applied."
The curing of weather-resistant adhesive requires time and humidity conditions. If rain falls within 24 hours after installation, the adhesive layer will be washed open, and the bonding strength will be directly compromised. This loss is hidden, cannot be seen during acceptance, and only becomes apparent after a year.
So the external wall construction schedule needs a "weather-watching" buffer. My approach: divide the 866 ㎡ material calculation area into three sections of about 290 ㎡ each, schedule three days per section, with one day of buffer between sections. When consecutive rainy days hit, the loss is contained to one day, not a full shutdown.
Why must the adhesive for exterior walls be calculated separately
The exterior wall of this house used 364 kg of weather-resistant adhesive, calculated at 0.42kg/㎡ times 866 square meters of material area, about 19 buckets (20kg/bucket).
364 kilograms is a number that many people don't have a concept of. The same 760 square meter indoor wall, using flexible glue is about 270 kilograms. What is the difference? The exterior wall needs to be coated twice: once fully adhered, and once sealed. The sealing side is the most expensive in glue, and also the most likely to be omitted.
The consequences of omitting edge sealing usually do not appear until the second rainy season. Panel edges begin to lift, from the bottom upward, one piece after another. By the time it is discovered, seven or eight pieces have often already lifted.
Counterexamples and one-year follow-up visit
A counterexample: applying interior methods to the exterior
I have seen a completely opposite approach on another project.
That was a street-facing commercial building; the exterior wall was clad with the same slate, but using an interior method: the adhesive was interior flexible adhesive, panel edges were butt-jointed with no gap, and openings were cut flush without folding the edges.
The first year looks very good, even "cleaner" than this homestay, because there are no closing strips and no seams.
After the rainy season the following year, problems appeared in concentrated form: more than 30 spots of panel edge lifting, blackening along the lower edge of window sills, and one section that fell off entirely, landing on the rain canopy.
During the rework, the entire 240 square meters of wall was scraped off and redone. There was almost no adhesive on the back of the removed panels, because the interior adhesive had not fully cured under low-temperature, high-humidity conditions—this was not a problem with the adhesive, but the wrong adhesive was chosen.
After this matter, at the pre-construction briefing meetings for all exterior wall projects, I emphasize only one sentence:Outdoor is a different method, not an extension of the same method.
Looking at this wall again after one year
The problem with exterior walls is not on handover day, but after the first rainy season.
I generally recommend that the client do a follow-up visit 12 months after delivery, checking only four things: whether the panel edges have warped, whether there is discoloration below the windowsill, whether there are water marks under the eaves, and whether there is bulging at the wall base. If all four are normal, this wall will most likely last its design life.
When this house was revisited last year, it looked a little better than at handover—the light-colored slate had been rained on several times, the surface dust was washed away, and the texture actually became more transparent. This is the advantage of a light-colored exterior wall, and also the risk: once there is a local stain, the contrast will be very obvious.
So a light-colored exterior wall needs a "washable wall." When cleaning, use a soft-bristle brush with a neutral cleaner and brush along the direction of the texture. Do not spray it head-on with a high-pressure washer; high-pressure water will force its way into the seams.
Walk through it yourself before handover
After the exterior wall is done, don't rush to accept it. Walk around the building, look from across the street, look from the side, and crouch down to look at the wall base.
I generally check six places:
- Check whether the external corner has lifted by brushing it with the back of your hand
- Whether internal corners have dark lines
- Check whether the panels under the window sill are hollow by tapping
- Whether the eave drip line is present
- Whether a gap is left at the termination between the panel and the floor
- Whether the line where the two materials meet is straight
Walking through the six spots takes ten minutes. The problems those ten minutes can reveal are more useful than a hundred checkmarks on an acceptance form.
To see the real photos and specifications of this slate,Slate seriesThere is a comparison of each color pattern in; the complete record of this house is inXi'an Chang'an homestay case, the positions and methods for 11 openings are all included.
Previous:How to pair flexible stone, wood veneer and WPC grilles? Wall material selection guide
Next:How to join flexible stone on full-height walls? Lobby jointing and column layout
Related articles
How to pair flexible stone, wood veneer and WPC grilles? Wall material selection guide
What wall materials are used for the entryway, TV background wall, corridor a...
How to choose white flexible stone? Star Moon Stone sampling, sealed samples and color difference control
What should be done if the color of white flexible stone samples differs from...

How to join flexible stone on full-height walls? Lobby jointing and column layout
How should full-height walls in a hotel lobby be laid out, and where is it mo...

How to construct flexible stone on curved walls? Arc-length cutting, trial bending and openings
How to measure and cut flexible stone for curved walls, and how to handle rou...