
For acceptance, most people "walk around and sign."
I am a bit different. When I go for acceptance inspection, I bring six things in a canvas bag: a 2-meter straightedge, a hollowing hammer, a flashlight, a feeler gauge, a color card, and a sheet of A4 paper.
The first five items are tools; the last sheet of paper is the record. Acceptance without records is no acceptance at all—three months later, if you say there is hollowing here and the contractor says it was fine at acceptance, neither side can produce evidence.
That wellness club in Wenjiang, Chengdu, 1450 square meters, including 6 wrapped columns totaling 198 square meters, calculated at 1610 square meters, with 465 pieces ordered. The wall has 3 recessed wayfinding signs and a full-length 60 mm wall-base light trough. I will use this project as an example and break down the acceptance inspection.
1. Six tools
Why these six?
2-meter ruler. Check flatness. Place a straightedge against the wall and look at the gap between the straightedge and the wall.
Hollowing hammer. Check hollowing. The hammer head is round; a sharp sound means hollow, a dull sound means solid.
Flashlight. Side light reveals every undulation invisible to the naked eye. This check is harsher than a straightedge, because a straightedge only checks a 2-meter range, while light can illuminate the entire wall.
feeler gauge. Measure the thickness of the gap and the width of the joint. For the gap between the straightedge and the wall, try feeler gauges one by one until none can be inserted; the reading is the gap value.
Color card. Color matching. It is not about comparing color numbers, but about comparing the color difference up, down, left and right on the same wall.
A4 paper. Record location, problem, and handling opinion. Paper is better than a phone because it can be posted on site and handed to the contractor for signature on the spot.
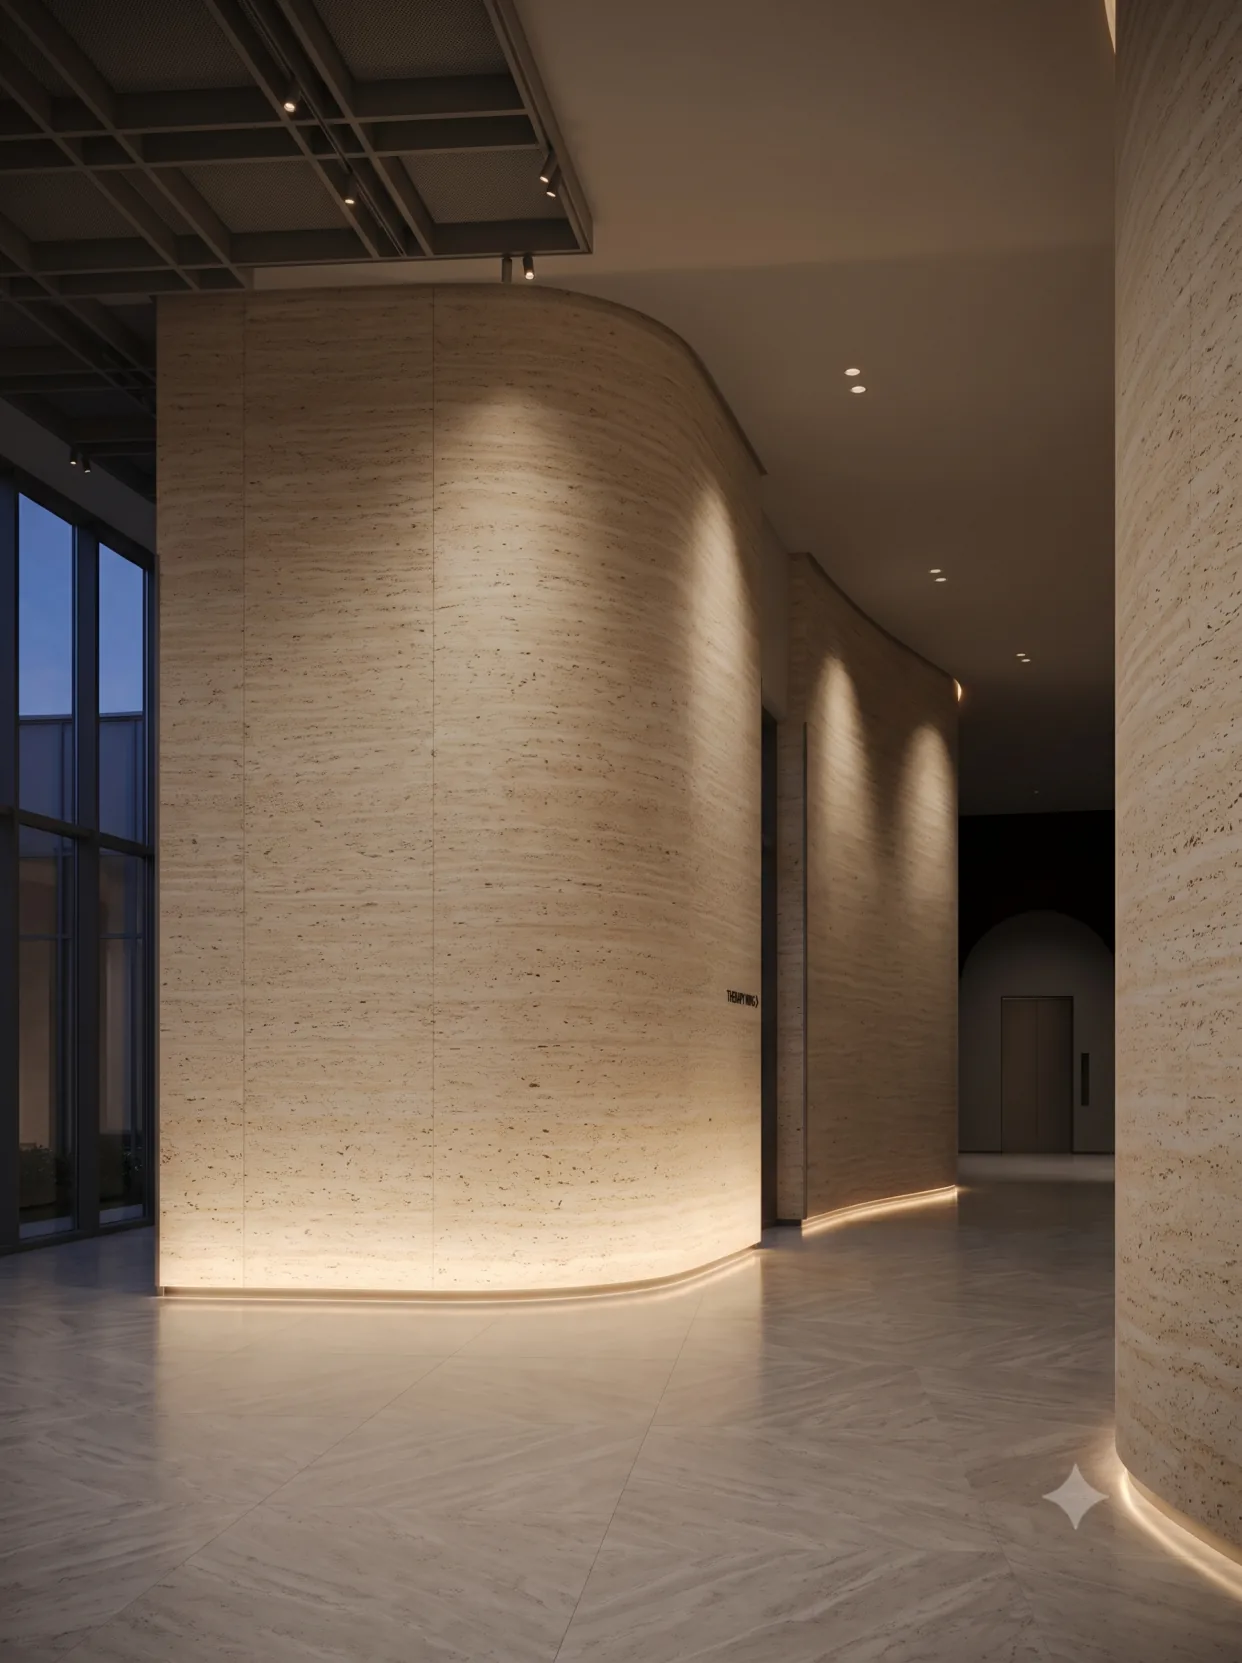
Photos of the finished surface can only assist in checking lines and appearance. The images do not show the hollowing detection process, nor do they clearly capture the fixings and signage nodes hidden behind the panels. Acceptance still requires item-by-item confirmation at the corresponding locations: look up close at the junction between panel edges and window frames, look from a distance at whether the wall surface is continuous, and recheck curved walls against the agreed sample. Recording the parts visible in the images separately from the measured items on the acceptance sheet will make communication clearer.
II. Sampling ratio: how much is enough
Sampling ratio: how many is enough
The specification has sampling ratio requirements for finish works, usually by inspection lot. In actual implementation, my own approach is:
- 5 samples taken within 100 square meters
- 100 to 500 square meters, 10 samples taken
- Above 500 square meters, 15 samples, and must cover every space type
For each area, check a 2-meter-long section (the length of a straightedge), and inspect all four sides.
1450 square meters have 15 spots, it sounds few. But the value of the random inspection is not in quantity, but in randomness - if the specified location, the contractor would have dealt with it long ago. So the spot I chose is decided temporarily when I go in, and it's not announced in advance.
In addition, there are four locations that must be checked every time, no matter where the sampling is done: external corners, door and window openings, wall bases, and column wraps. These four locations have the highest problem rates.
3. Seven criteria, gone through one by one
First item: hollowing
Hollowing is the most important item in the acceptance inspection of flexible stone, because it determines whether the panel will fall off in a few years.
How to tap: Tap lightly with a hollow-sounding hammer, with force like knocking on a door; do not strike hard. Listen to the sound: a solid sound is "da," a hollow sound is "pu."
Criterion: the hollowing area of a single panel shall not exceed 5% of the panel area, and hollowing is not allowed at panel edges and corners.
Why are panel edges and corners especially strict? Because panel edges are where stress concentrates. If a small area at the edge is hollow, moisture enters through the edge seam and spreads all the way inward.
For a 1450 square meter project, if the hollow rate exceeds 5%, I usually require a complete renovation rather than local patching. The reason is simple: local patching requires lifting the board, and in the process of lifting, adjacent boards will also be loosened, resulting in more patches in the end.
Second item: flatness
Place a straightedge against the wall; gaps within a 2-meter length must not exceed 3 mm.
Measuring method: place the straightedge horizontally, vertically, and diagonally once each. Placing it diagonally is the easiest way to find problems, because deviations in the two directions add up.
If the gap exceeds the limit, use a feeler gauge to measure the specific value, write it on paper, and mark it on the wall. Do not just say "this part is uneven"; say "4.5 millimeters here." Numbers drive rectification; adjectives do not.
One experience: locations with excessive flatness deviations are often related to the substrate. Whether the substrate is a masonry wall or concrete wall, a new wall or an old wall, the problem rate differs greatly. Therefore, when measuring, also note the substrate type; this is useful during rectification.
Third item: joints
Check three things at joints: joint width, lippage, straightness.
Joint width. On the same joint, the difference between the widest and narrowest should not exceed 1 mm. This requirement is strict, but necessary—uneven joint width looks like poor workmanship.
Staggered joints. The surfaces of the two panels are not on the same plane, forming a small step. Run your fingertip along the seam—if you can feel it, it fails. The danger of a misaligned step is dust accumulation: dust gets trapped in the gap and cannot be wiped away.
Straightness. Pull a long joint straight with a thin line to see whether the joint deviates. For a 5-meter-long joint, the deviation should not exceed 2 mm.
Most joint problems originate in the substrate, not the panels. If the substrate is uneven, the panels will be uneven once applied. So poor joints cannot be fixed by adjusting the panels alone.
Fourth item: color difference
Judging color difference is the easiest thing to get into disputes over.
My approach: on the same wall, find the three points farthest apart, place the color card next to them, step back 3 meters, take a photo with a phone (beauty mode and filters off), and compare side by side.
If the difference cannot be seen even in photos, there is basically no problem with the naked eye.
If it is visible but not obvious, record it as "slight color difference, acceptable," but still put it in the record.
If it is obvious at a glance, especially if it forms "block-like" differences (one whole patch dark, one whole patch light), then it is a batch issue, and the batch number must be checked.
The key to this item is "3 meters away." Looked at from 10 centimeters away, all materials have color variation; viewed from 3 meters away is the user's actual viewing distance.
Fifth item: embedded parts
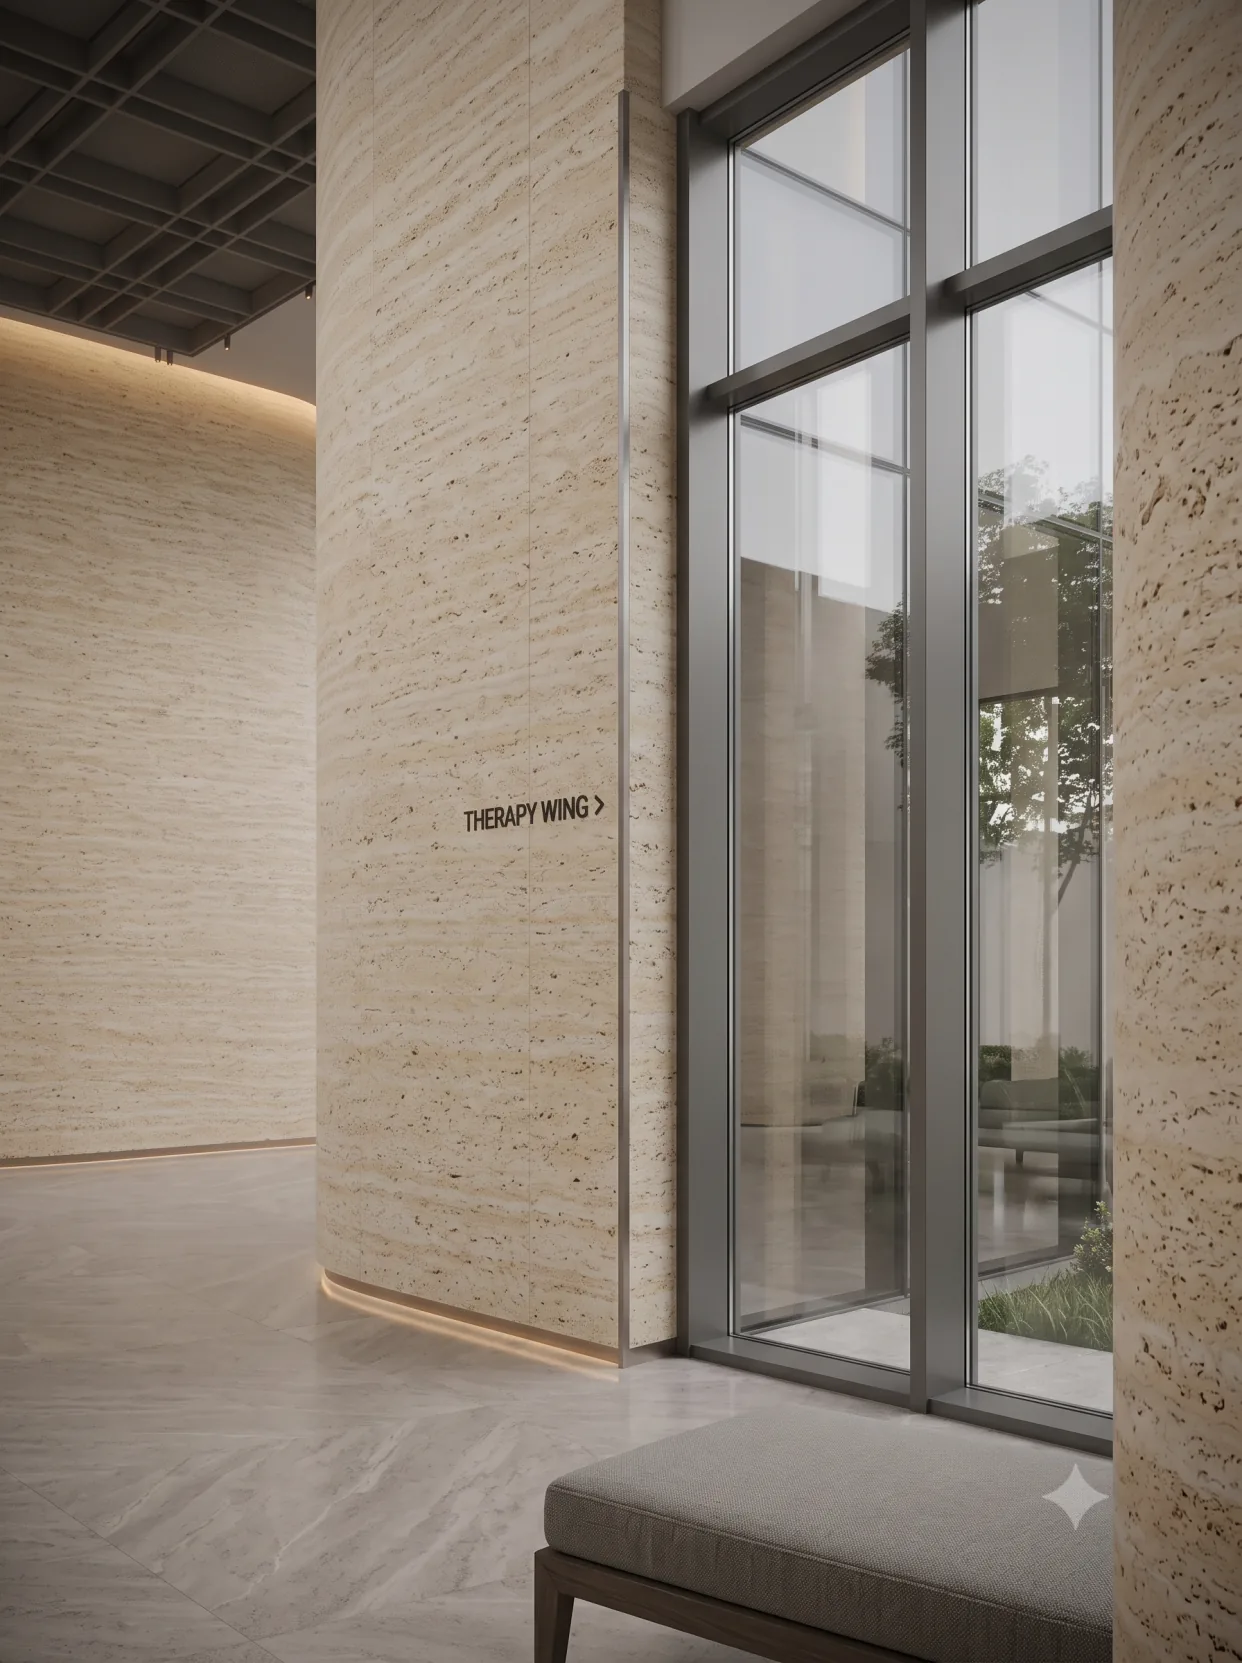
This project has 3 recessed wayfinding signs, with the sign bodies flush with the panel surface.
Flush mounting sounds simple, but it is difficult to execute. The sign body needs to be embedded into the panel; the opening in the panel should be 2 mm larger than the sign body; during installation, the sign body must be adjustable for leveling, and finally edged with same-color adhesive.
During acceptance, use a straightedge across the sign body and panel surface to see if there is any height difference. If it exceeds 1 mm and can be felt by hand, it is nonconforming.
One more detail: the 2 mm gap between the edge of the sign body and the drilled hole in the panel must be fully filled with adhesive, with no voids. If this gap is not filled solid, the panel edge will crack under the load of the sign body.

Sixth item: light trough
The wall base light cove runs the full 60mm length, concealed under the lower edge of the panel.
Inspect the light trough against four points:
First, whether the groove width is consistent. Use a tape measure every 2 meters; the error must not exceed 2 mm.
Second, the flatness inside the groove. The light strip is attached inside the groove; if the groove is uneven, the light will be uneven. Shine a flashlight into the groove to check for protrusions.
The third is whether the lower edge of the panel is neat. The upper edge of the light trough is the lower edge of the panel. If this edge is cut roughly, a jagged line will form under the light.
Fourth, the effect after the light strips are installed. Power on the light strips and stand 3 meters away to look; the light should be a continuous line with no bright-dark segments.
This item is the easiest to overlook because it is at the base of the wall and people do not often look there. But once the lights are on at night, the atmosphere of the entire corridor depends on it.
Seventh item: column wrapping
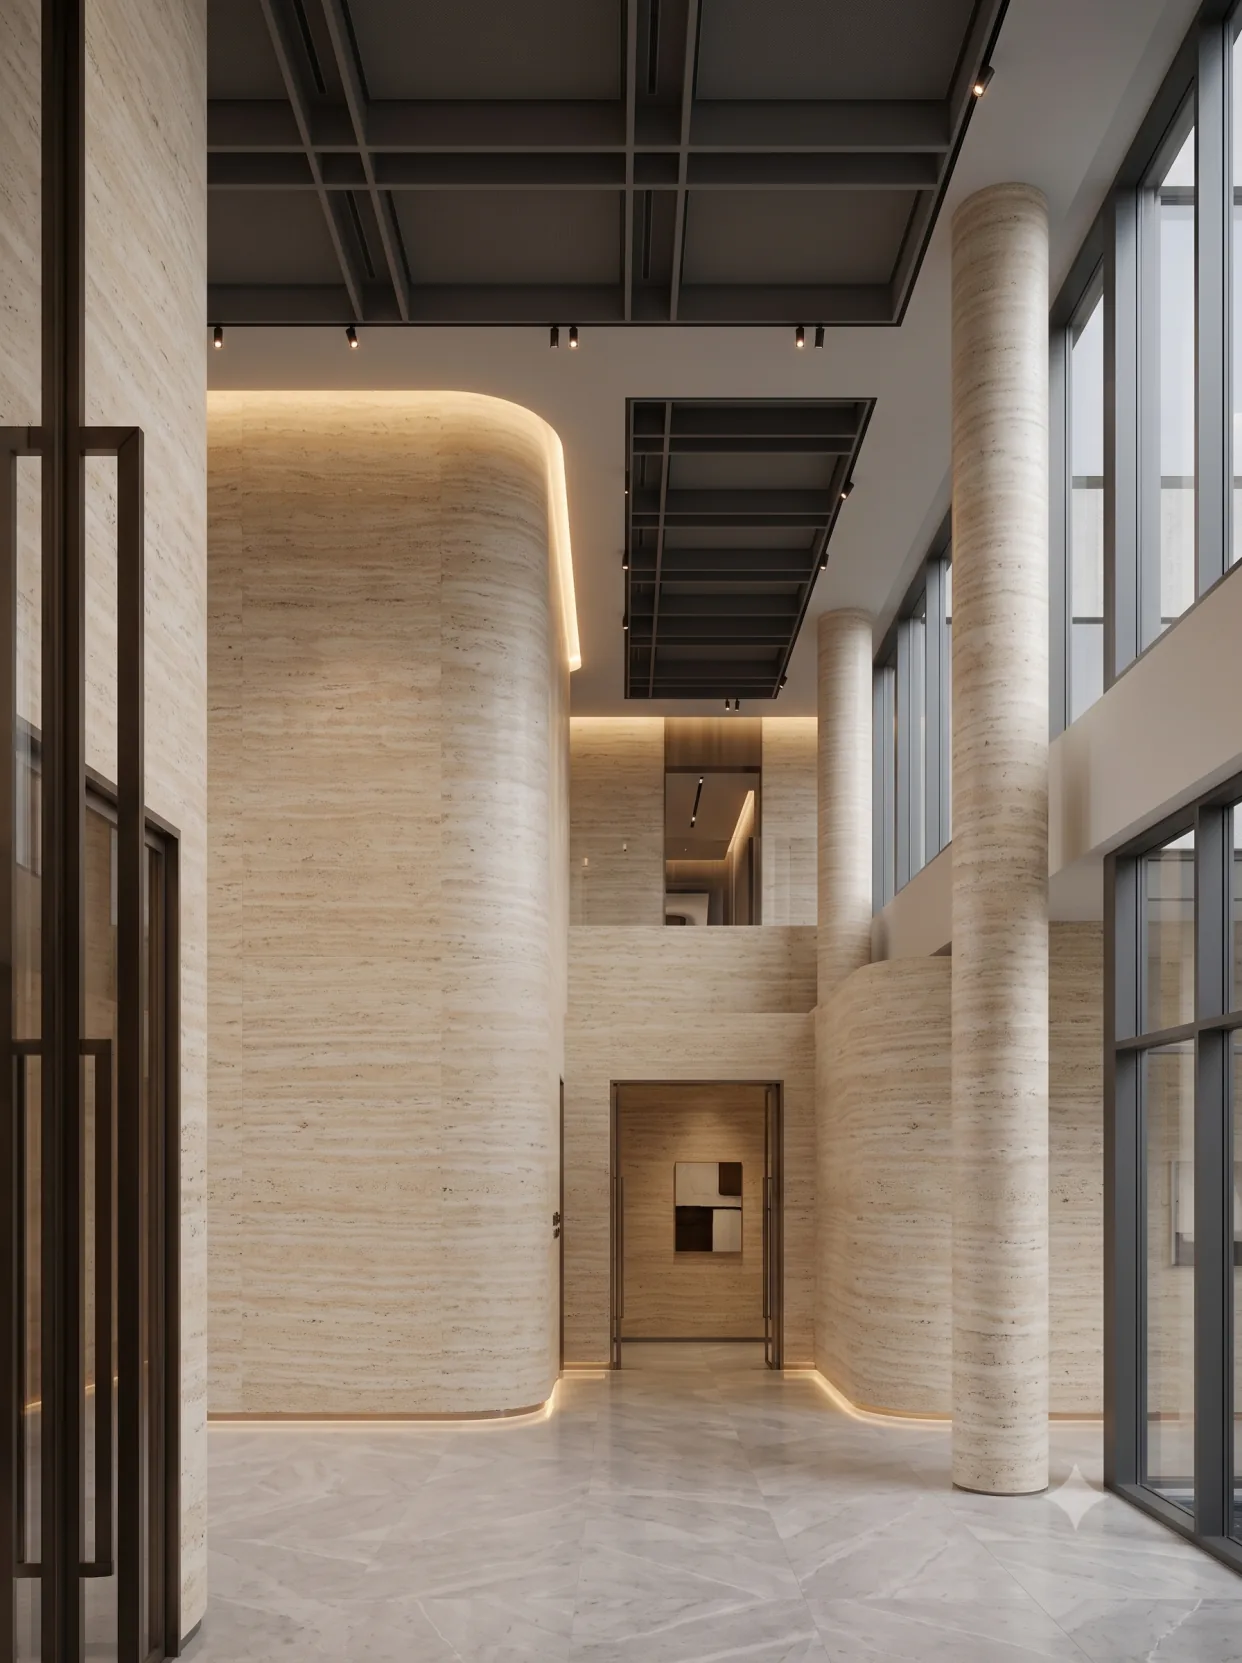
6 posts, 198 square meters, occupying one seventh of the entire project
Column acceptance checks three things: roundness, seams, and top and bottom closures.
For roundness, wrap a thin string around the column once, measure the circumference, and compare it with the theoretical circumference. For a column with a diameter of 1 meter, the circumference is 3.14 meters, and the error must not exceed 10 mm.
Joint placement depends on position: joints should be on the shaded side, that is, the side hidden by columns when viewed from the main entrance. If joints directly face the entrance, the layout is wrong, not the construction.
Check the joints at the top and bottom closures: between the column top and the ceiling, and between the column base and the floor, there should be a 3 to 5 mm joint each, filled with color-matched sealant. A column that is rigidly fixed at the top will bulge when it expands thermally.
IV. Timing and who should be present
When to conduct acceptance is more important than how to conduct it
Accepting right after installation is the easiest way to lose out.
The adhesive has not fully cured and the panel is still pressed down, so it sounds solid when tapped. After 48 hours, once the adhesive has cured, the panel rebounds and hollowing only then becomes apparent.
My requirement is:Accept only after a full 48 hours following application.Summer can be shortened to 36 hours, and winter can be extended to 72 hours because the low-temperature soft rubber solidifies slowly.
There is another timing point: inspect the light trough again after the light fixtures are installed. The appearance of a light trough can only be judged when it is powered on—check the trough width and flatness by day, and the light band at night.
Who should be present
Acceptance is not the responsibility of the client alone. Three parties must be present: the client (or client representative), the construction project manager, and the material supplier's technical staff.
Why does the material supplier need to be present? Because many problems cannot be distinguished as panel problems or installation problems. Hollowing may be caused by adhesive not applied properly, or by the substrate not being treated; color variation may be a batch problem, or a lighting problem. With the material supplier on site, judgments can be made on the spot, saving three rounds of back-and-forth later.
If the supervisor is present, please also ask them to attend. This is not to assign blame, but to have third-party witness for the record.
V. Records and conversations
How to use that A4 sheet
The record sheet I use is simple, four columns: location, issue, value, recommended action.
Write the location clearly: "Third-floor east corridor, 3.2 meters from the north wall corner, above the waistline." Do not write "east wall," because everyone on the construction site understands "east" differently.
Describe the phenomenon in the problem, not the judgment. Write "hollowing," not "construction quality problem."
Values must be present. 3.5 mm, 1.2 mm, 5%—all are fine. Problems without values will be discounted during rectification.
The treatment opinion should clearly state "who does it and when it will be completed." For example, "the construction party will apply sealant within 3 days, and the client will re-inspect after 3 days."
This sheet is photocopied on the spot in two copies, one for each party. What is signed is not "acceptance passed," but "the above issues have been confirmed."
How to discuss after discovering a problem
The place where acceptance most easily breaks down is "does this count as a problem?"
My principle is:Anything that can be touched by hand, measured with a ruler, or seen in photos counts as an issue. If any one of the three holds, it is not a subjective opinion.
Conversely, if it's simply “I don't think this color looks good,” that doesn't count as a problem—that's something to resolve during the design phase.
When negotiating, I generally do not say "you did it wrong"; I say "there is a 4.5 mm gap here, and the standard is 3 mm." Separating the people from the issue makes things easier to handle.
One more rule: don't list 50 items at once. List 5 to 8 items, all serious defects, and the contractor will make the corrections seriously. List 50 items, 40 of which are 1 mm trifles, and the other party will think you are nitpicking and won't change a single one.
VI. Materials that should be obtained at handover
Documents to obtain at handover
After acceptance is passed, there is still a set of documents to collect:
- Test reports for the material (corresponding model)
- Adhesive model and batch
- Layout drawing (final construction version)
- Photos of concealed works (substrate treatment, adhesive application process)
- Material preparation list (quantity and storage location of remaining panels)
- Maintenance instructions (how to clean, how to repair)
The last two items are the easiest to overlook and also the most useful. The material reserve list determines whether it can be replenished three years later; the maintenance instructions determine whether property management will use the wrong cleaning agent.
Seven, a project where acceptance was not done well
A project with poor acceptance work
A project the year before last went through acceptance as a mere formality; no one brought tools on signing day.
Half a year later, three months after the hotel opened, a section of corridor wall bulged, over two meters long. When it was opened up, almost no adhesive had been applied in that section—construction happened to coincide with material delivery, and the workers, aiming for speed, had only applied adhesive on the four edges.
If you bring a hollow-tile hammer on acceptance day, you can find it by tapping once. The loss for that section is: removing panels, scraping adhesive, repairing the substrate, re-installing, plus one day's lost business revenue.
Later I wrote this into the first line of my acceptance checklist:Do not enter the site without tools. Anyone can hold a signing pen, but the responsibility signed is supported by a hollow-sounding hammer and a straightedge.
To see the complete record of this project,Chengdu Wenjiang wellness club caseThere are item-by-item descriptions of column cladding, light troughs, and signage in; the color patterns of Printed Travertine are inTravertine seriesCan be compared.
Related articles

How to make openings in flexible stone walls? Sockets, vents, and installation sequence
Should flexible stone be cut with holes first or installed on the wall first,...

How to construct flexible stone on curved walls? Arc-length cutting, trial bending and openings
How to measure and cut flexible stone for curved walls, and how to handle rou...

How to leave joints for flexible stone in dry regions? Heating-season construction and joint treatment
How should joints be left for flexible stone during the northern heating seas...
What to do if flexible stone gets dirty or damaged—cleaning, repair and panel replacement
How to clean flexible stone walls, and can impact damage and defects be local...