
White exterior walls follow a cruel rule: the day of delivery is the best-looking day.
After that, it changes every year, in three ways—rain streaks, efflorescence, dirty joints. None of the three means the material is "broken"; it means the water path is wrong.
This article explains the causes and methods for the three types of problems clearly, using a set of white star-moon stone commercial exterior wall schemes for comparison. First, a note: everything below describes preventable practices, not remedial tricks.
Enemy one: rain streaks, lines "drawn" on the wall by water
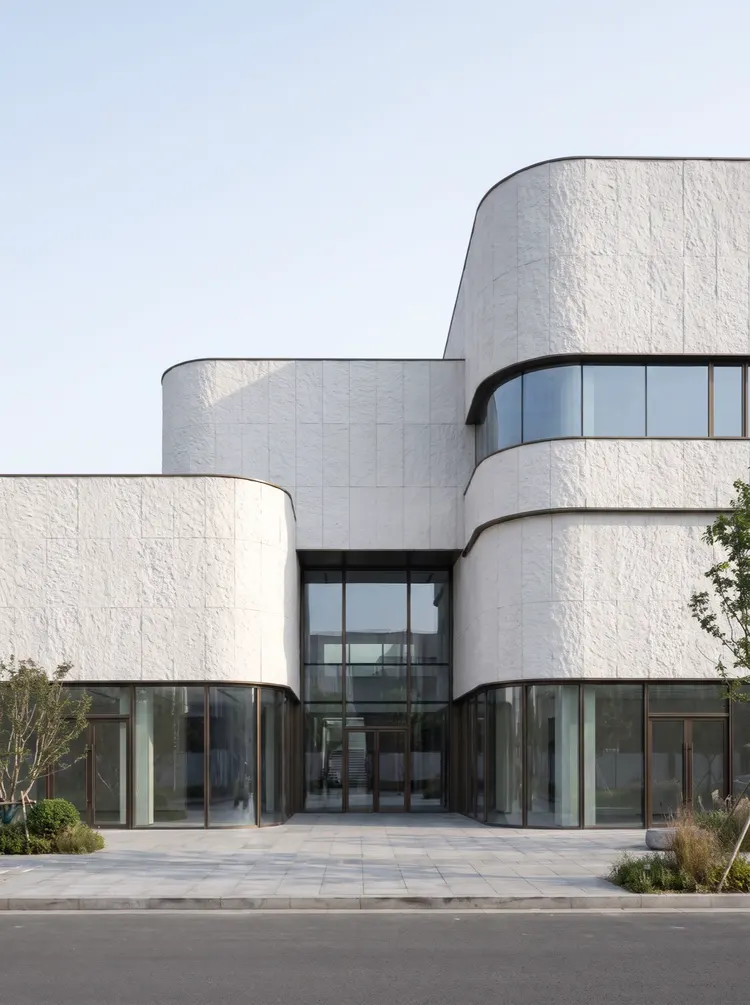
Rain marks are the most common problem on white exterior walls, with a very consistent pattern: starting from windowsills, parapets, and the lower edges of overhangs, light gray vertical streaks drag downward.
The cause is not "dirt," but "water stayed in one place for too long." Rain hits the wall and should quickly flow away; if it is blocked at some spot and pools for a while, the dust and minerals in the water deposit there, and when dry they form a streak.
Three positions most easily blocked:
Outer edge of window sill. If the window sill has no slope, or slopes inward, water will accumulate on the sill and then drip down along the sill edge; wherever it drips, it leaves a streak.
Parapet coping. If the coping does not have flashing (an upward-turned waterproof edge), water will seep in through the joint between the coping and the wall; it seeps in and then comes out, and when it comes out it carries dust.
Eave edge. If no drip line is made at the eave, water will crawl back along the underside of the eave, reach the wall, and then flow down.
The countermeasures are actually very simple, all about "letting water leave quickly": make the windowsill with an outward slope of more than 3% and a 10 mm drip edge on the outer edge; make the coping with flashing of more than 50 mm; make the cornice with a drip line.
These three things are just a few small details on the drawings and are easy to miss. Once missed, a band of vertical lines will appear on the wall in the third year, and it cannot be washed off—that is not surface dirt, but the surface having been "eroded" by water.
Enemy two: efflorescence, the ugliest kind of white on a white wall
Efflorescence appears as patches of white powdery substance on the wall, like frost; it comes back even after being wiped off.
The mechanism is: soluble salts in the substrate (cement mortar) are carried to the surface by water, and after the water evaporates, the salts crystallize. Therefore, efflorescence is not a material problem; it is a problem of "water moving within the substrate."
Three necessary conditions: there is salt in the substrate, there is water, and the water can evaporate to the surface. Cut off any one, and efflorescence will not occur.
In terms of method:
The substrate must be completely dry. Newly plastered walls have a very high moisture content. If boards are applied in a hurry, water is sealed behind the boards and can only slowly come out through the seams, bringing salt with it as it emerges. The conventional requirement is a moisture content below 8%, subject to actual measurement.
Apply an alkali-resistant sealer to the substrate. One coat of alkali-resistant primer to seal the salts inside the substrate.
Do not seal both sides completely. The panel is waterproof. If another layer of non-breathable material is applied to the back, moisture can only accumulate inside the wall. The correct approach is to give moisture a way out—this is also why exterior walls need expansion joints and breathable adhesive.
Once efflorescence occurs, the treatment order is: first find the water source (where water enters), then treat the surface. Brushing only the surface means it will reappear three months later.
Enemy three: dirty joints, where seams are the white "soft spot"
On a white wall surface, dark joints will form a net.
There are two causes of dirty joints: first, adhesive aging and surface chalking, which attracts dust; second, uneven joint width, with more dust accumulating in wider areas.
Three countermeasures:
Joint width must be consistent. Exterior wall expansion joints are controlled at 3 to 5 millimeters, with the difference between the widest and narrowest points on the same joint not exceeding 1 millimeter. Joints with uneven width visually appear as a "shaking" line.
Use weather-resistant sealant, not indoor sealant. Indoor flexible adhesive ages rapidly under UV, with the surface chalking and turning white, becoming a white line within a year. Exterior walls must use a weather-resistant type, with consumption of about 0.42 kg/㎡.
The adhesive should be applied in a concave arc. The adhesive surface is 1 to 2 mm lower than the panel surface, forming a small groove. In this way, when water flows over it, it will not treat the adhesive surface as a "step," nor will it accumulate a film of water at the junction between adhesive and panel.
The fourth enemy: ultraviolet light—white will "turn warm"
This is easy to overlook.
White exterior walls slowly yellow under ultraviolet light. You can't see it in one year, but you can in three; after five years, the sun-facing and shaded sides of the same wall will differ by one shade.
Flexible stone itself has UV resistance, but "resistant" does not mean "unchanged." For projects with high requirements, it is recommended to accept this fact at the planning stage and keep a set of "baseline photos" at acceptance—same angle, same time, same exposure, taken once a year—to judge whether the change is within an acceptable range.
If the difference between the sunny side and the shady side is already obvious, the solution is not partial cleaning but redoing the entire surface—partial treatment will create even uglier patchwork.
Curved corner: the best shape for drainage, and also the easiest to accumulate water
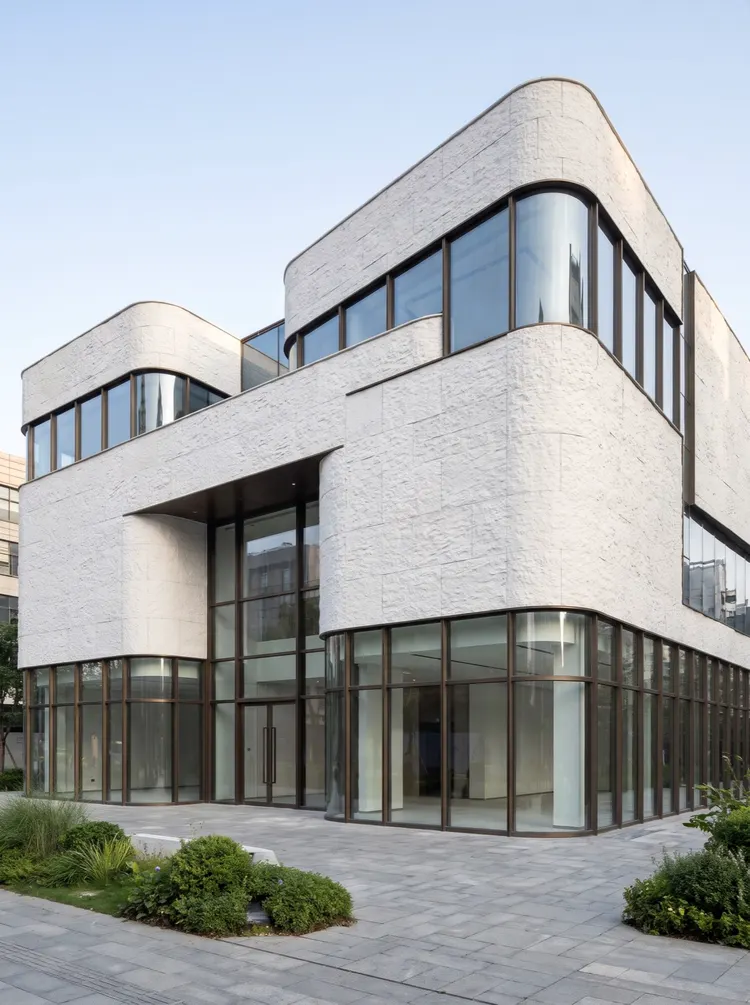
Curved corners are an advantage for drainage: with no right angles, water does not linger at the corner.
But the curved corner has another issue: the overlapping direction of the panels on the curved surface.
If the panels are stacked from top to bottom (the upper panel overlaps the lower panel), water will flow down the panel surface to the outer side of the next panel without entering; if stacked from bottom to top (the lower panel overlaps the outer side of the upper panel), water will pour in through the seam.
So panels in curved sections must be installed "upper over lower," and the seam adhesive must be applied to the lower edge of the panel, not the upper edge.
This must be clearly explained during the construction briefing. Workers are used to installing from the bottom up (it is easier to handle), and without specific instructions, it is easy to do it backwards.
Interlayer light trough: a trap for water accumulation
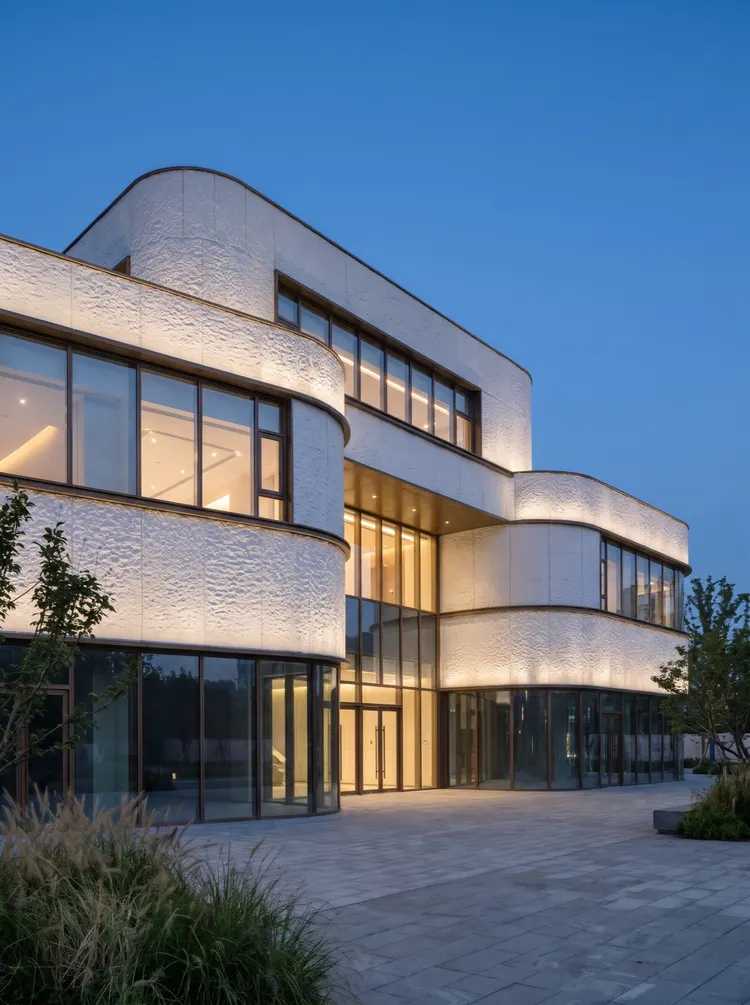
Commercial buildings often have concealed light coves between floors, with the opening facing upward or to the side.
An upward-facing groove is a water trap. When it rains, water gets in; if there are no drainage holes in the groove, water will accumulate inside and gradually seep behind the panel.
The method is: give the trough bottom a 2% slope, leave an 8 mm drainage hole every 3 to 5 meters, and avoid light fixture junction boxes when positioning the holes. Writing these three numbers in one line on the drawing can save rework three years later.
Cleaning: how you clean matters more than whether you clean
Washing exterior walls frequently does not mean washing them correctly. Three actions will damage white walls:
Direct frontal spray with a high-pressure water gun. Water will squeeze into the seams and soak the adhesive layer open. The correct method is low pressure, high flow, and angled rinsing.
Steel wool, stiff-bristle brush. These will leave scratches on the surface, and dust accumulating in the scratches turns into a dark patch.
Strong acids and strong alkalis. Products such as oxalic acid and toilet cleaner will cause mineral-based surfaces to lose gloss and turn white, leaving patchy spots.
The correct cleaning rhythm is: a comprehensive cleaning once a year, plus a local cleaning after the rainy season. The tools are a soft-bristle brush + neutral cleaner + low-pressure water. When cleaning, brush along the direction of the texture; do not scrub in circles.
Where water comes from: first draw a "water route map"
Before treating exterior walls, I usually first draw a water path diagram: mark the roof, canopy, windows, eaves, and plinth as the "water entry points," and use arrows to show where the water will go.
After this drawing was completed, many problems revealed themselves:
- If the canopy is wider than the window, water will be thrown off both ends of the canopy and land right beside the window
- The narrow gap between the two volumes is a "gutter"; rain will rush down along the gap
- Where the parapet is lower than the roof, it is the entry point for water seepage
- Air conditioning slabs, flower beds, and railing bases are all platforms where water accumulates
Once the water path drawing is complete, the node details are no longer "copied from the standard atlas" but "specific to the water in this building."
In the trade, this step is called "waterproofing design," and it is often simplified to "build to code." But the code gives the minimum requirement; for this specific building, where the water comes from has to be checked yourself.
What the South and the North fear is not the same thing
SouthThe concern is "long-term dampness." During the plum rain season, which lasts for a month, the wall remains damp, and efflorescence and mold are high-incidence problems. The countermeasure is to let the wall "breathe"—use an alkali-resistant base layer, leave joints in the adhesive, and do not seal the back of the panels completely.
NorthThe concern is "freeze-thaw." It thaws during the day and freezes at night; water expands as it freezes in the joints and gradually pushes the adhesive open. The countermeasure is to make the joint width sufficient (3 to 5 mm) and use an elastic adhesive (low-temperature flexible weather-resistant adhesive); do not use rigid adhesive.
For the same material, in Hangzhou and in Harbin, two things need to be adjusted: joint width and adhesive type. These occupy only a few lines on the quotation, but they determine whether the wall is still intact after the third winter.
There is a third situation: dry regions (such as the northwest). There is little rain there, but there is windblown sand, and walls mainly accumulate dust rather than showing water marks. In such regions, cleaning should be more frequent, but there is no need for excessive drainage design.
How to check these three things during acceptance
Exterior wall acceptance inspection is best scheduled after rain.
Check rain streaks. Inspect the day after rain. Wherever vertical lines appear, trace upward to find the "source"—windowsills, copings, eaves. Once found, repair the joints; do not just wipe the wall.
Check efflorescence. Check the wall for white powdery substances, paying special attention to the wall base, the lower edge of windows, and the junctions between two materials. If present, first measure the substrate moisture content.
Check joints. Crouch down and look horizontally along the seam line to see whether the width is uneven; press the adhesive surface with a finger to see whether it is soft or detached. If the adhesive rebounds slowly when pressed, it is time to replace it.
A walk-through of the three checks takes about two hours and can catch ninety percent of the problems. Those two hours are more useful than looking at a hundred renderings.
A failed white exterior wall
I have seen an office building whose white exterior wall was very beautiful when delivered, and the client was very satisfied.
In the third year, problems appeared in concentrated form: a patch of rain streaks on the east facade, local efflorescence on the west facade, and blackening along the lower edges of all windows.
Investigate the cause: all three nodes were missed—the windowsill has no outward slope, the coping has no flashing, and the cornice has no drip edge. Together, these three mean water has been "moving freely" on the wall for three years.
The remedy was: clean + locally scrape off the efflorescence areas + redo the windowsill slope and drip edge. Altogether it took more than two months, and the cost approached 30% of the original wall cost.
After this matter, I developed a habit: when reviewing exterior wall proposals, I do not look at the elevation renderings first; I look at three node detail drawings first. If the nodes are right, white can hold up.
Three confirmations during material selection
1. Confirm whether this material system has application instructions for outdoor use. It's not about "whether it can be used," but "how to use it"—the adhesive model, joint width, edge finishing, and weather resistance requirements.
II. Confirm how the color performs under outdoor light. The white you see indoors and the white you see outdoors are not the same thing. Look at large panels in daylight, not small samples under a light box.
3. Confirm the cleaning method. Some textures (deep relief) accumulate dust outdoors and have high cleaning costs; shallow relief is easier to maintain. This should be asked during selection, not remembered only at handover. When asking, also request a cleaning guide to give to property management later.
Closing remarks
The lifespan of a white exterior wall depends half on how water flows and half on whether anyone is willing to fuss over an invisible slope. Get the materials and details right, and leave the rest to time.
What the material can do is actually limited: it does not absorb water, is weather-resistant, and is UV-resistant. What really determines what this wall will look like in three years is the slope at the windowsill, the flashing at the coping, the drip line at the eave, and the sealant in the joint.
These are not expensive, but they require someone to care. The advantage of a white wall is that it is honest—where something was done well and where effort was saved is fully visible three years later.
See the outdoor methods and specifications of white star-moon stone atProduct page 169; These six comparisons of the commercial center facade are inArt commercial center exterior wall plan: ; the difference between the outdoor and indoor sets of specifications is inFlexible stone series.
Previous:How can one white color used across six spaces avoid looking perfunctory?
Next:How much can you trust a rendering: five deviations from design drawing to installed wall
Related articles
How can one white color used across six spaces avoid looking perfunctory?
A white Star Moon Stone used across six spaces in a hotel public area can eas...
Cloth texture, coarse cloth texture, hemp weave: how to choose among three kinds of "fabric-feel" wall surfaces comes down to the same thing
For the three fabric-feel textures—cloth texture stone, coarse cloth texture ...
How much can you trust a rendering: five deviations from design drawing to installed wall
Renderings are getting more and more realistic, but the five deviations betwe...
满粘、点贴、龙骨干挂:三种贴法的人工、辅材与返工概率
同一块 3 mm 的板,满粘、点贴、龙骨干挂三种做法,人工能差一倍,辅材能差一半,返工概率差别更大。差别不在"粘不粘得住",在三个地方:胶的覆盖面积、板背...