
This project was marked "cannot be late" on the schedule and "cannot exceed budget" on the budget sheet. With these two "cannot" constraints stacked on one wall project, the approach became a system of its own.
Having taken on many orders of this kind, our feeling is that,
The figures in the article all come from delivery archives; those marked "rough estimate" are inferred according to common industry magnitudes and are used to judge magnitude, not actual measured bills.First put the numbers on the table
No empty talk; the project basics are as follows.
| City | Shapingba District, Chongqing |
| Space type | Material actual shooting |
| Business type | Hotel guest rooms and office spaces |
| Main material. | Wood-grain flexible stone panel (light gray wood grain) |
| Construction area | Approx. 1240㎡ |
| Construction period | 21 working days |
| Schedule | 21 working days |
| Implementation standards | JG/T 540-2017 |
| Construction location | Guest room headboard walls, office area backdrop walls and corridor elevations |
The position of the joint is decided through discussion
The layout logic sounds simple: with 1220×2930 panels and a 1240㎡ wall, how to lay them without narrow strips. This project was done by "setting the starting point behind the furniture." Sockets and access panels on the same wall are incorporated into the joint lines during the layout stage and do not fall in the center of panels.
The question I was stumped by at the time
Q: Can it be applied directly when renovating an old wall?
Answer: It can be applied if the original wall is firm and free of hollow areas; old tile surfaces can also be directly covered. However, before construction, every wall must be checked for hollow areas, and hollow areas must be knocked out and redone—this step cannot be skipped.
Compared with natural stone, is the texture difference big?—Differences are visible up close: natural stone has naturally occurring random variations, while the texture of wood-grain panel flexible stone is formed by embossing or printing, giving higher consistency within the same style. From a distance, the overall look is similar. When placing natural stone and flexible material on adjacent walls in the same space, it is recommended to make a small sample comparison first.
Does the material have test reports? What standard does it follow?—It follows JG/T 540-2017 "Flexible Stone-like Decorative Facing Materials for Buildings" (issued by the Ministry of Housing and Urban-Rural Development). Environmental and combustion performance test reports for the corresponding model can be provided with the goods.
By the way, answering a frequently asked question: can curved walls and wrapped columns be done in one continuous piece?? Yes. The material has a certain flexibility and can be bent within a certain radius, so cylindrical columns, curved walls and irregular corners can be fully wrapped in one piece with continuous seams. The specific usable radius depends on the selected model, thickness and substrate conditions; it is recommended to first test-bend a physical sample at the corresponding curvature to confirm.
For business types with strict fire acceptance requirements (cinemas, KTVs, education and training), besides the finish itself, the construction method also matters: whether the cavity needs insulation fill and whether the keel needs a fire-retardant coating. Clarify the acceptance criteria at the material selection stage, rather than changing the plan after entering the site.
Do not buy loose pieces on an ad hoc basis for patching: only the same project and same batch number is meaningful. Keeping reserve material in the project owner's warehouse is more useful than keeping it in the material supplier's warehouse; when replenishment is really needed, the sample in your hand is the matching voucher.
Follow-up visit on usage status
Don't overcomplicate maintenance. Routine dust removal is enough; wipe up spills promptly and don't leave them overnight; place a piece of cardboard under furniture when moving it—that's all.
Two lessons learned and one mistake
To discuss the retrospective, this project has two lessons worth copying and one lesson not recommended to repeat: the starting point was moved to the corridor side, so the owner's circulation route happened to start from a complete board, and all narrow strips went behind the furniture.
When finishing pieces are used well, the facade grade immediately becomes stable. For supporting pieces such as corner pieces, skirting lines and door frame trim, whether the color follows the main surface or the floor must be finalized before ordering. The most common failure is that after the wall is finished, the line color is half a grade off, and patching either side looks bad.
Material photos: real project sites
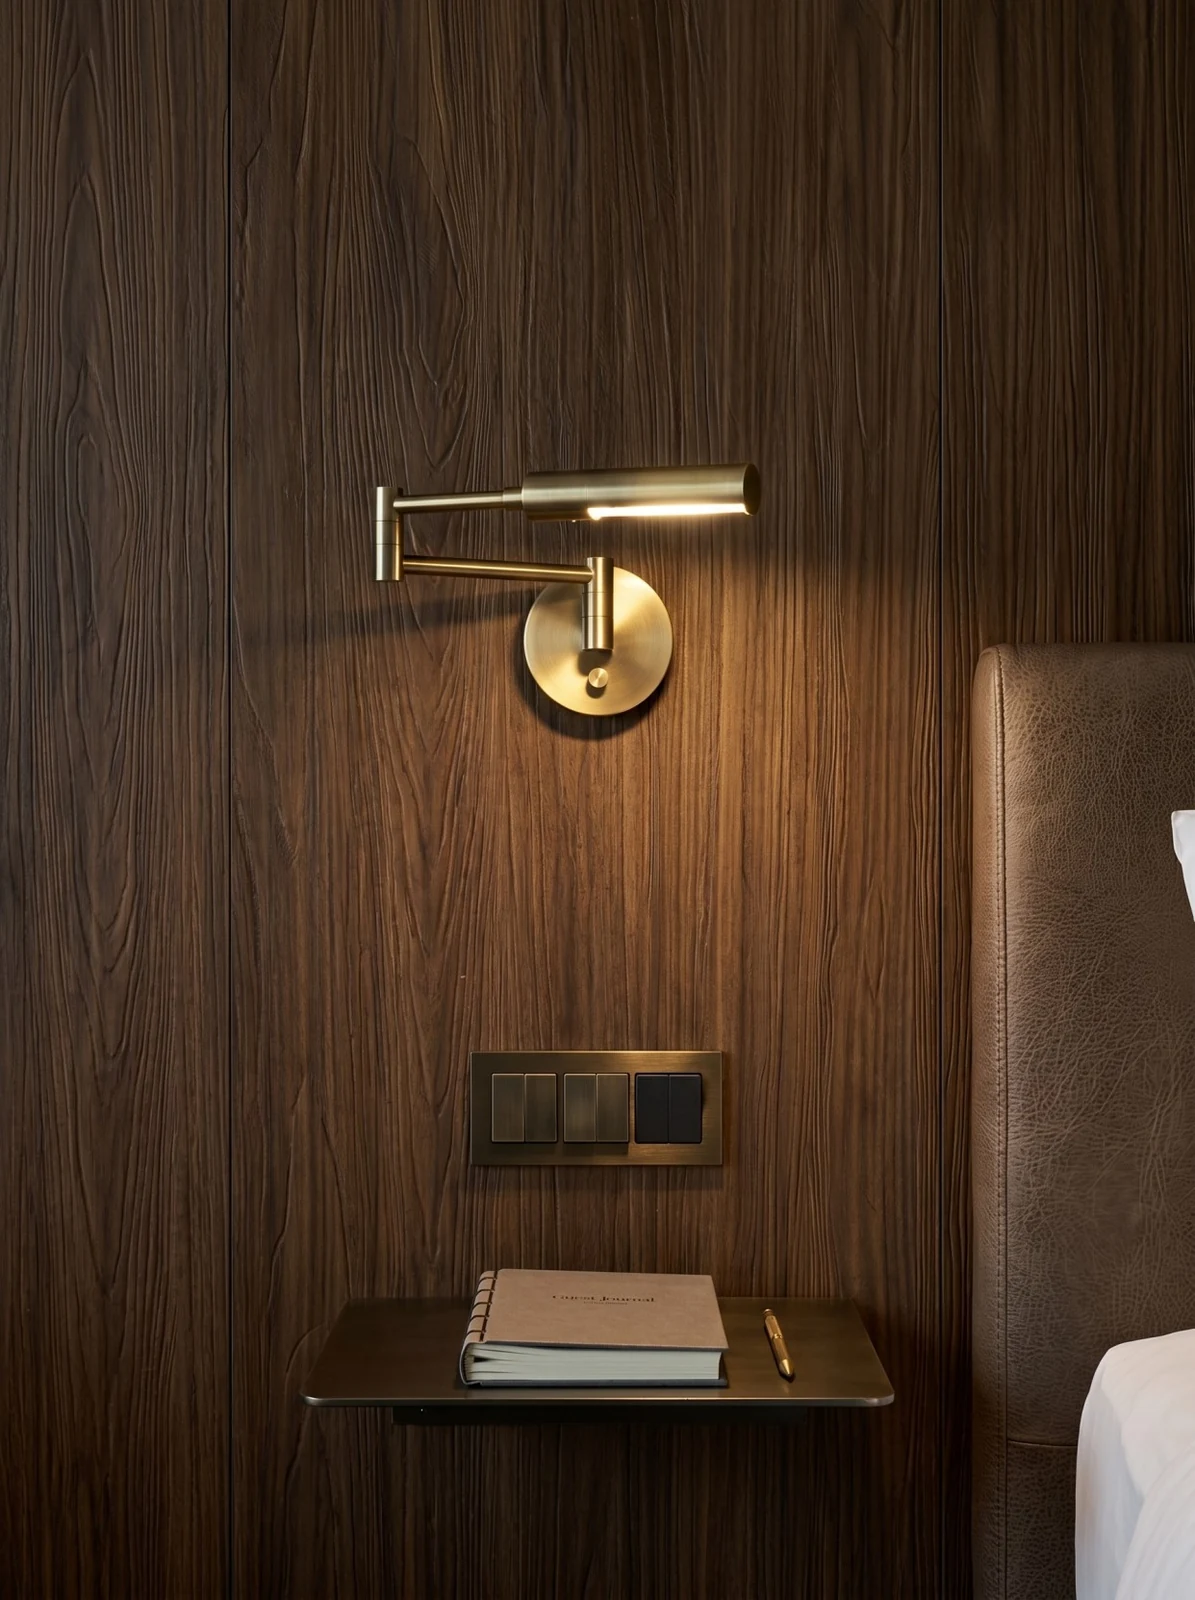
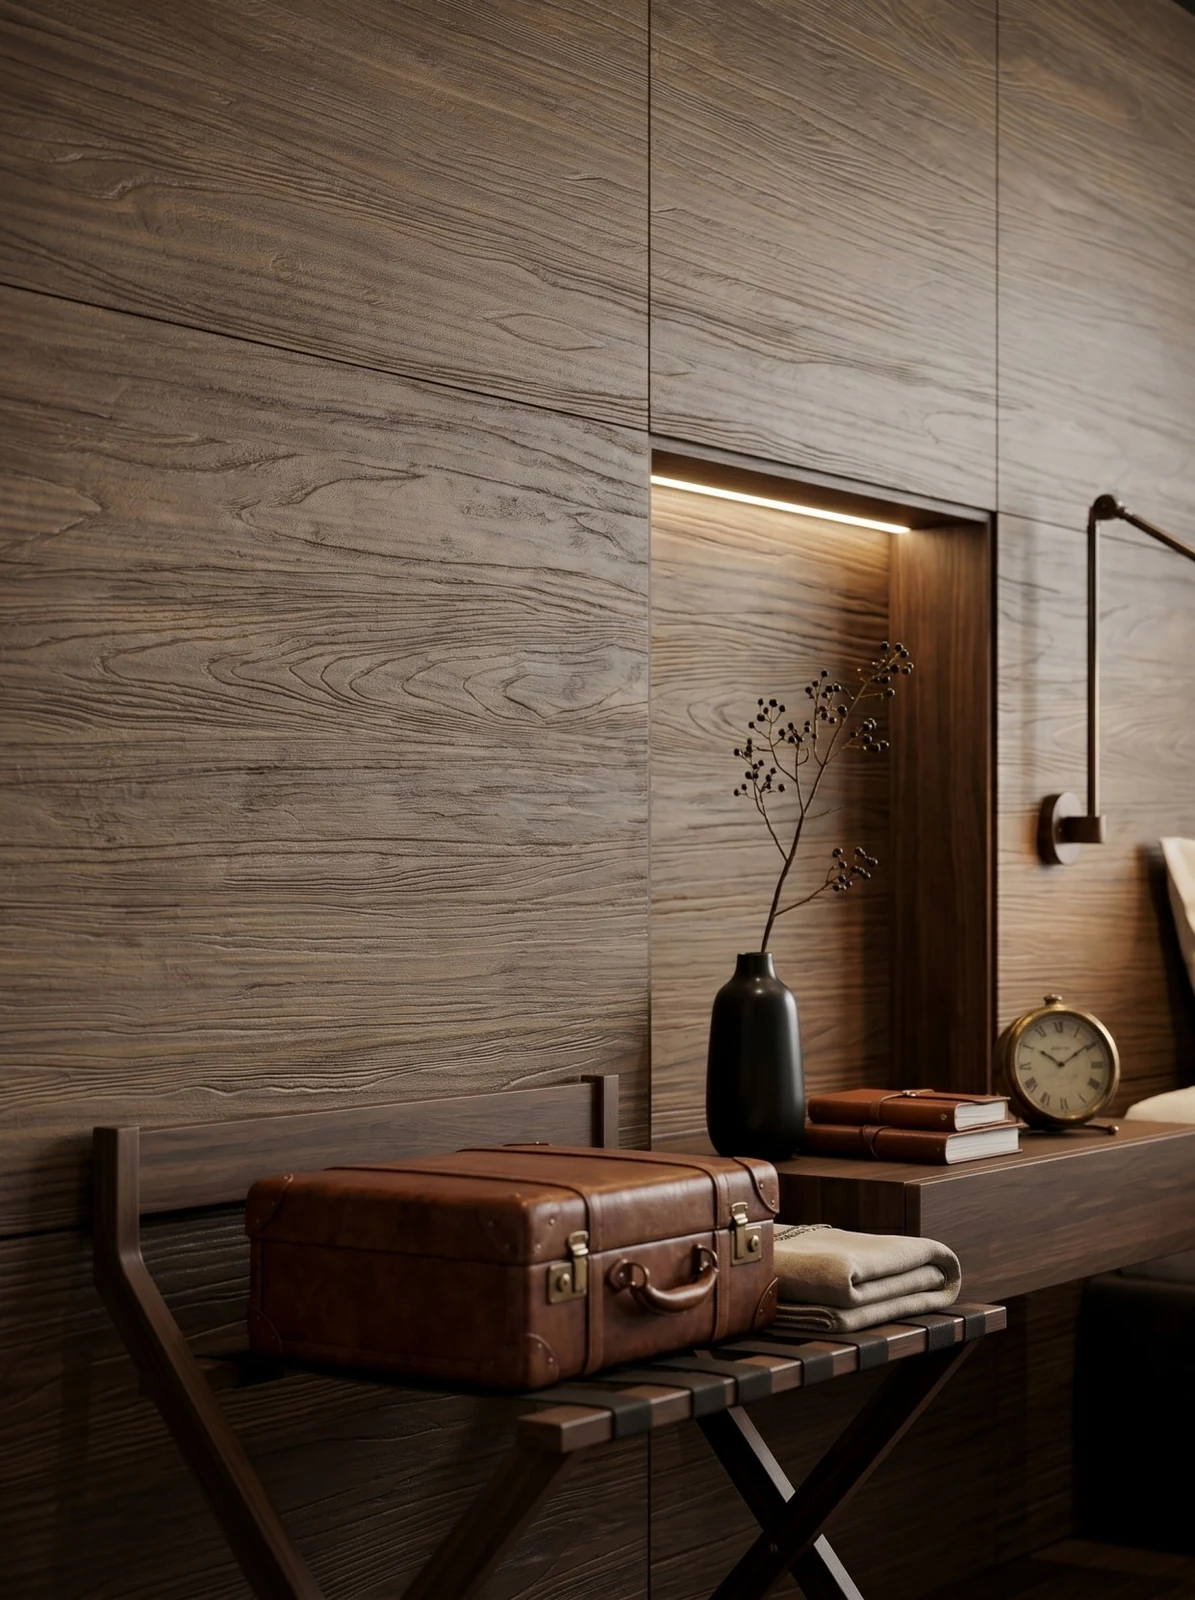
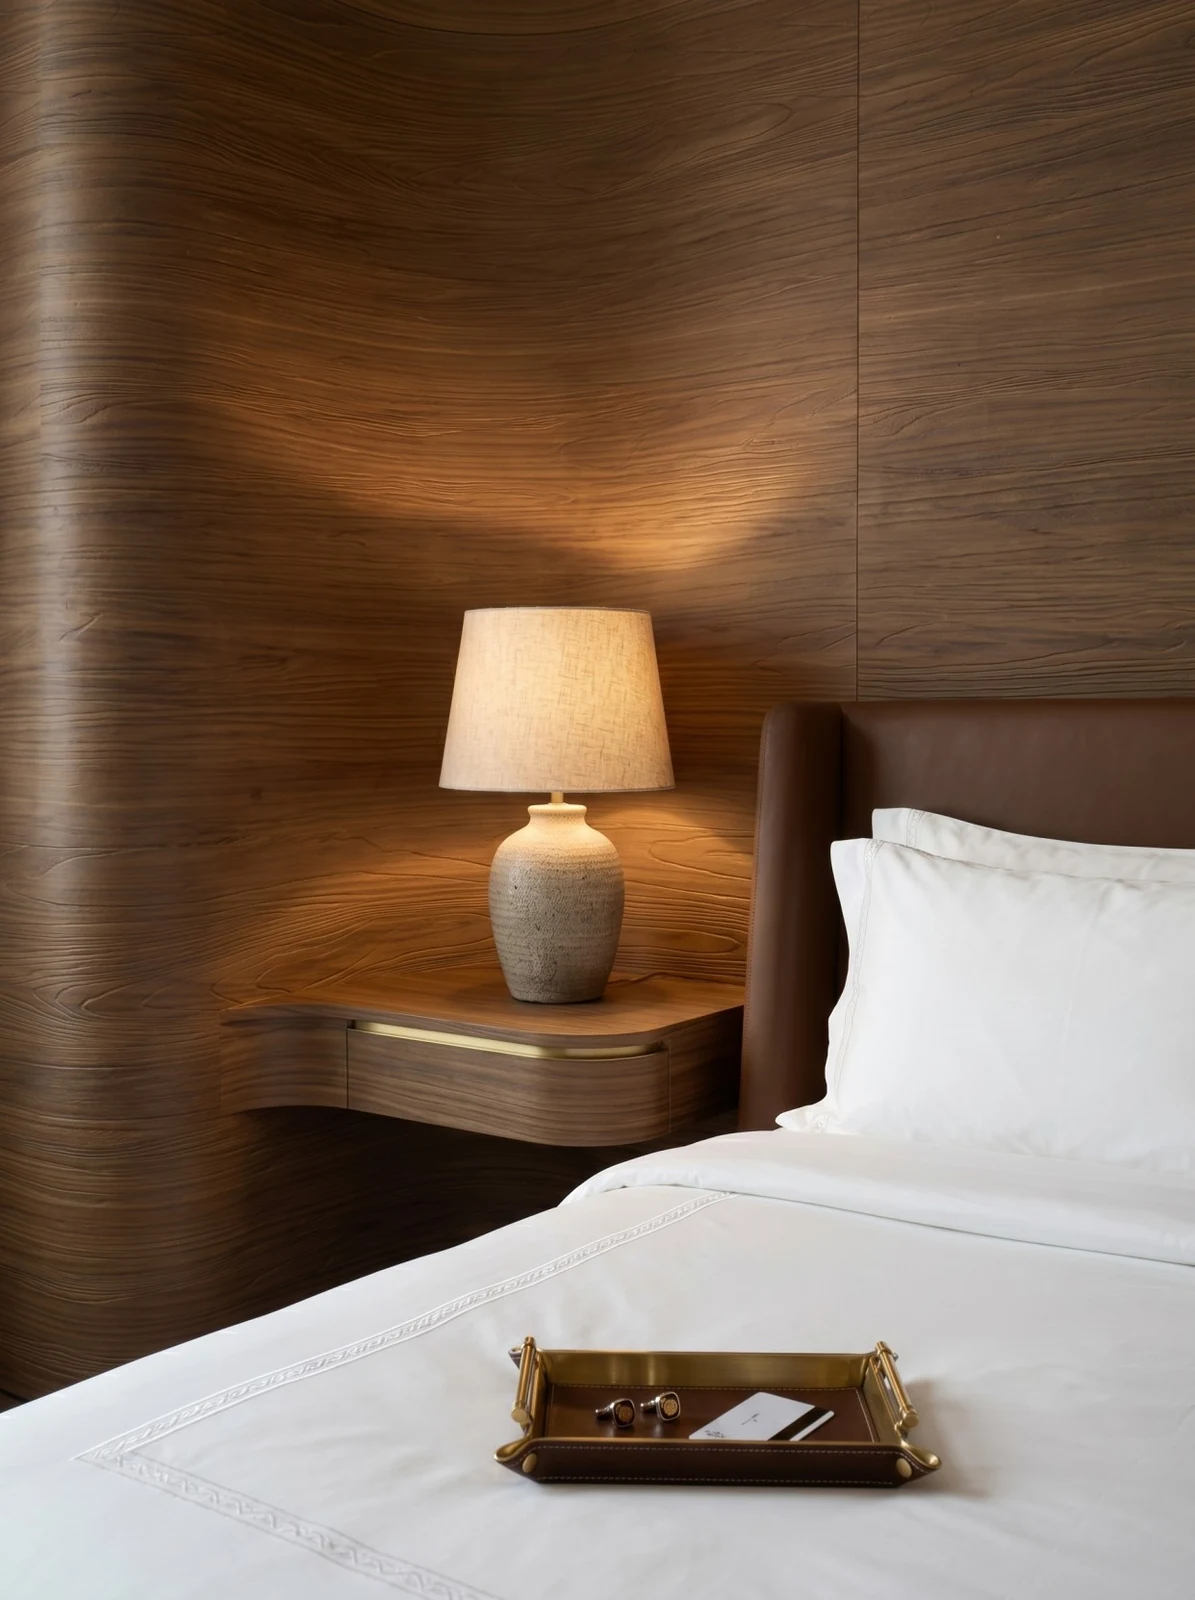
The images don't need retouching; it's enough to clearly see the seams, light and edge finishing:
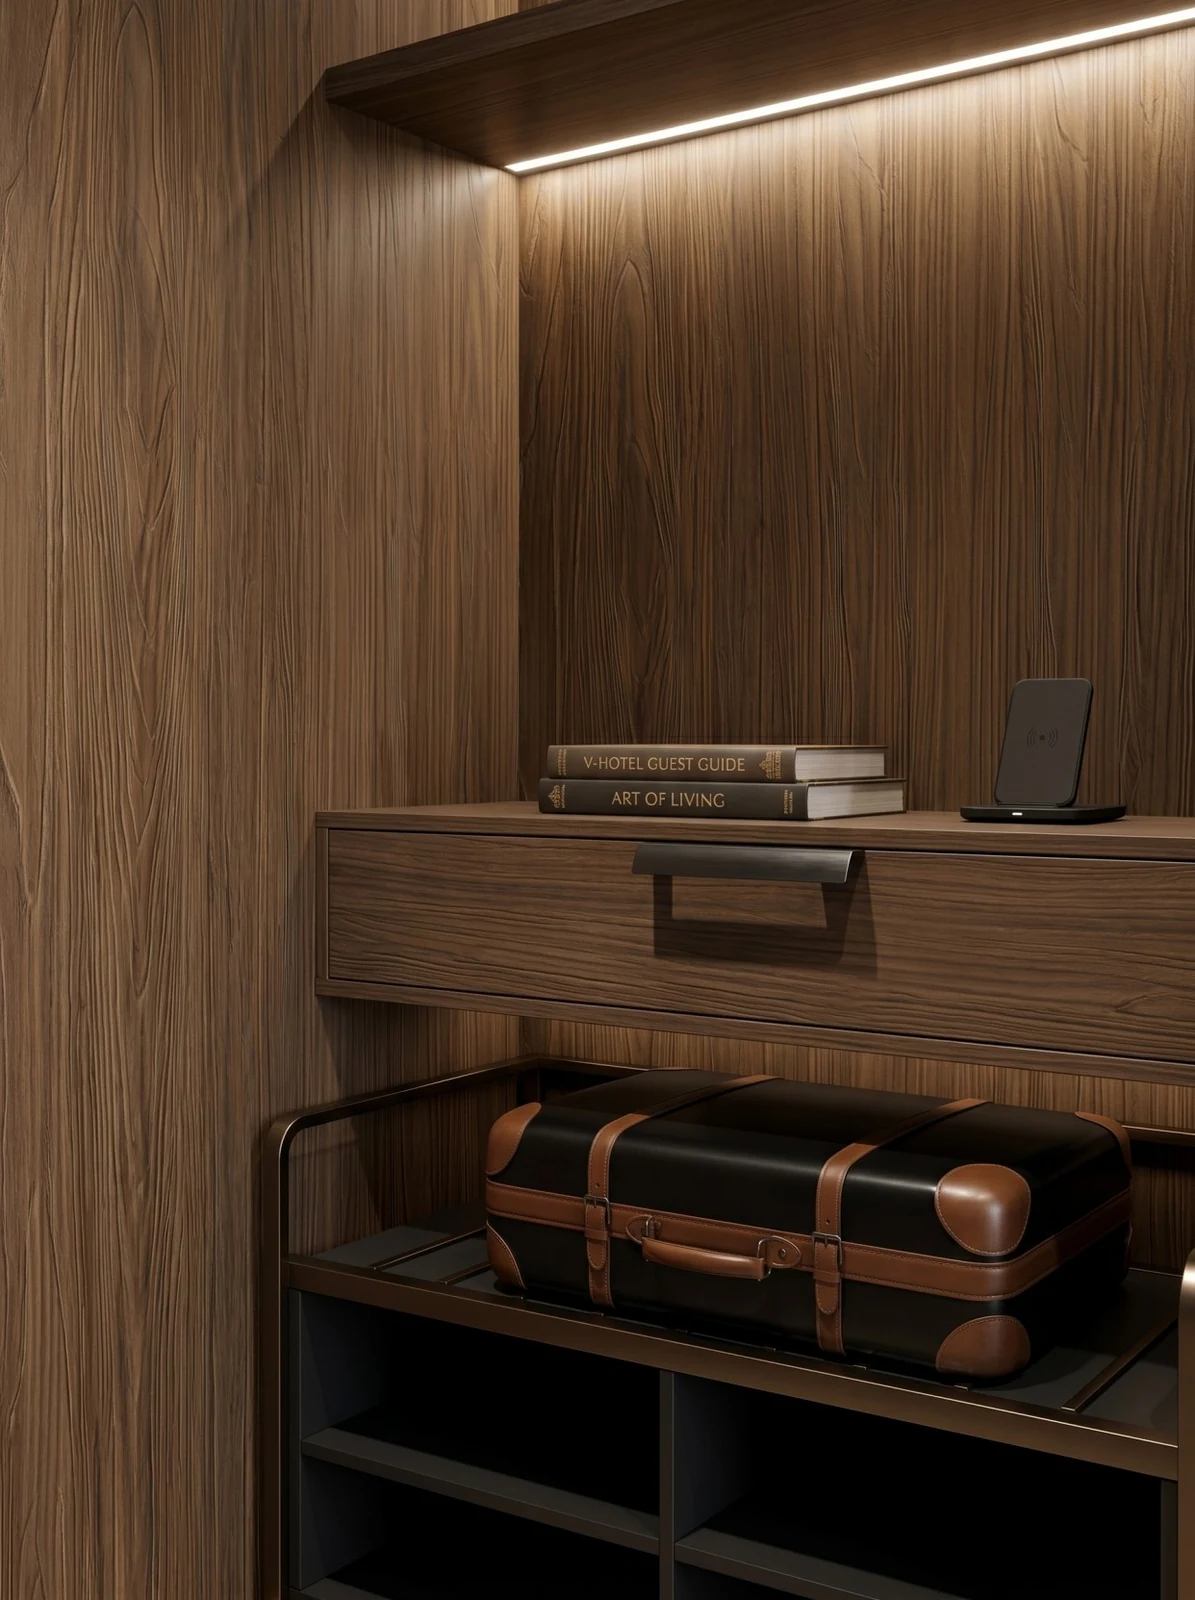
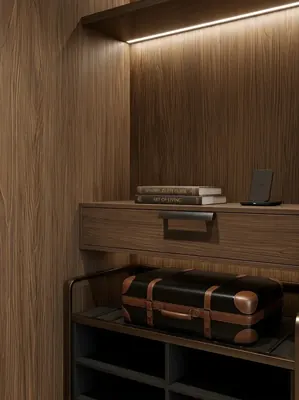
Note the cloakroom storage area, dark brown wood-grain wall surface and wood-colored cabinetry in this image: the edge trim color is most easily compared here
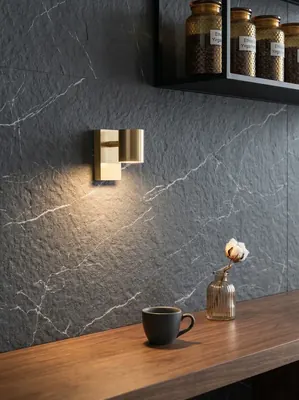
This photo was taken right after finishing a detail: bedside close-up, dark brown vertical wood-grain wall and gold wall lamp.
The most worthwhile investment at the plan reporting stage is a 1:1 mock-up wall. It moves the argument over "whether it looks good" forward to before money has been spent. Photos of the mock-up wall included in the plan attachment give the client more peace of mind when signing than renderings do.
Take this table with you
Before entering the site, print this checklist and post it at the project office:
- Brand and color of edge sealant
- Quantity of material preparation and batch number retention
- Hollowing rate (tap each panel), joint width uniformity (check with a string line), verticality of external corners (straightedge), panel color difference (inspect under side light)
- Joint feel (run a fingernail along to check for height difference), straightness of edge sealant, skirting transition, accuracy of switch panel openings
Handling of the three hurdles
Everyone can install the large surfaces; what really takes time on this project are a few inconspicuous edges: leave an access opening in the side panel of the light cove—whether hidden lighting looks good depends half on the side panel's reflection.
The ceremony on handover day actually has practical value: bring the owner, designer and contractor together on site and walk through the sample wall, tiled surfaces and patch locations together. Every item confirmed face to face is a no-argument clause for the future warranty period.
The quotation must be broken down to avoid being ripped off: material unit price, substrate treatment, auxiliary materials (adhesive, primer, edge trims), labor, loss, and transport and handling. If one of the six is missing, it may later become an added cost. For loss rate, 8%-12% for flat walls is the conventional range; curved surfaces, columns, and irregular patterns must be calculated separately by developed area.
The most valuable thing in construction organization is rhythm. Before the crew enters the site, the sample wall, layout marking, and material preparation should all be completed; the most commonly seen waste on site is boards not arriving, people waiting, and lights on. Organize transfer according to "materials never touch the ground," finish and clean the work area the same day, and the construction period will naturally be shortened.
A blunt statement in the archive
The most quoted line at the review meeting: 2.0 Why was wood-grain board flexible stone chosen? This wall area wanted the look of wood veneer, but it is located outside the bathroom and in a long-term high-humidity environment.
Records from that time, quoted verbatim
Three passages of original text from the handover file, placed here in the chapter order at the time, with numbers and wording unchanged:
Material comparison: why choose "wood grain panel flexible stone"
2.1 Three questions for selection Converge the selection into three questions, which can basically determine the direction: Is the wall curved or pillar-covered? If so → Prioritize flexible materials that can be bent; if not → Compare weight and time. Traditional wood veneer substrate will expand and mildew when it gets wet, while wood grain flexible stone does not absorb water or swell, and it is close to wood veneer in appearance, making it the appropriate choice for this part; 1180×3000 large panels are used for full-height laying, and there are also few longitudinal joints. 2.0 Why is Wood Grain Flexible Stone This wall wants the look of wood veneer, but it is located on the outside of the toilet, and it is in a high-humidity environment for a long time.
Customer industry use scenario: the real wall requirements for hotel guest rooms and office spaces
On-site access and board dimensions. Full boards of 1180×3000 have requirements for on-site access, and elevators often cannot accommodate them. Wanting a wood feel in damp areas is the core contradiction of this type of demand. Wood veneer will expand, mold and delaminate in damp environments, but the look of wood is what many spaces want. The wood grain surface is dense and does not leave fingerprints, which can reduce rework; never use solvent-based cleaners.
Communication and confirmation process
Design party: We want the look of wood veneer, but we're worried about moisture on the wall outside the guest bathroom. Hotel party: Will it be noticeable when placed next to real wood veneer? Us: There will be a difference; we suggest placing the two materials on different faces of the same space, or using the same color family for transition. The following are several questions confirmed by both parties during material selection and construction, organized in the order of the conversation.
Cylindrical column cladding is the part that most tests layout skills. The panels wrapping the column must either be bent as a whole sheet or joined in segments; segments inevitably mean vertical seams, and the seam positions should fall in dark areas where the column meets the wall, not directly facing the passage. For columns with small radii, first wrap a physical panel sample around the column to check springback, then decide between full wrapping and piecing.
For walls in spaces that remain open during business hours, maintenance costs deserve more consideration than initial construction cost. Restaurant walls cannot avoid cooking fumes; when choosing finishes, first ask, "Can oil stains be wiped off?" Retail walls cannot avoid shelf handling, so impact resistance at external corners and the 0-300 mm wall base should be prioritized. Factoring cleaning and repair into material selection is how you reduce the burden on the next store manager.
You only know whether you chose right when the light hits it
Choose the wrong color temperature, and the material choice is wasted. Lighting conditions for this project: gray tones are the most honest about light; the wall changes with whatever color temperature the lighting has. Be sure to bring a lamp when comparing on sample approval day.
The base layer — this point cannot be overstated. Hollowing, sanding, and moisture content are the three unavoidable safety gates for adhesive-applied finishes. Tap once to listen, run a straightedge once to check flatness, and on walls with heavy moisture, take several readings with a moisture meter. When the base layer is substandard, whatever facing material you apply is just putting a lid on the problem — the spots that bulge three months later are often exactly where the work was skipped at the time.
A low unit price does not mean low cost. The three hidden costs—auxiliary material usage (how many square meters per kilogram of adhesive), loss rate, and schedule occupation—are the real sources of price differences between similar materials. When comparing prices, add these three items to the table, and the result often reverses.
Same project, same batch is an iron rule. Batch variation of flexible finishes is controlled within the standard range, but when large surfaces are placed side by side, even half a grade of color difference still stands out. For projects with a single area exceeding 1000㎡, our approach is one-time production scheduling, unified batch numbers, and box numbering by floor or area, with panels taken by matching number during installation.
Why not natural stone
The owner's initial idea was to use microcement, and we talked them out of it. Reason: counting substrate preparation, waste and schedule, the overall cost stays under control. After switching to wood-grain board flexible stone, this color code does not look fake on large surfaces, and batch-to-batch color differences are within an acceptable range.
The three documents commonly required for project submission: fire performance, environmental limits, and physical performance. The three reports correspond to three standards systems; write the report numbers and models into the same ledger, and the submission desk will not ask you to supplement them a second time.
Execution of the acceptance checklist
Acceptance was not formalistic: hollowing rate (tap each panel), joint width uniformity (check with a string line), verticality of external corners (straightedge), and panel color difference (walk along with side light). Two small dents were picked out on the spot, repaired with patches, and half a day's work was deducted from the crew.
Walls in dark-scene spaces (cinemas, bars, clubs) absorb light severely. Dark colors will appear one level darker under low illuminance. To achieve the effect of "texture visible but material boundaries not visible," it is often necessary to choose a color number half a level lighter than the target color, or embed a wall-washing light at the finishing edge.
Waterproofing in indoor wet areas is not in the finish but at the floor junctions: the water-retaining upstand, floor drain slope, and the sealant at the wall-floor junction. The finish is only responsible for "not adding trouble"; these three points are what determine whether seepage occurs.
Material photos: construction rhythm
21 working days, this speed depends on 'materials not falling to the ground': the boards go directly from the truck to the work surface.
Wall base, external corners, door edges—the trade jokingly calls these the "three exposed zones." Material selection at these three locations should prioritize hard edge protection: corner guards, metal trim, stone threshold. Sacrifice a little of the pure decorative look in exchange for three years without cracking or chipping.
The iron grip on the adhesive mounting stage
The construction process is simple: full-surface bonding, install directly on the wall after the substrate is leveled. But for walls shown in actual material photos, the trouble is all in the joints and edges.
Related reading
Compare them side by side for more confidence:
Related articles
Commercial space (material actual photo) 180㎡ printed rough-face granite wall construction case
IGOODS provided printed rough-faced granite as wall material for a commercial...
Corporate reception and office space 520㎡ woven hemp flexible stone (vintage bronze) wall construction case
The corporate reception and office space project is located in Langzhong City...
Hotel guest rooms and office spaces 1240㎡ wood grain board (light gray wood grain) wall construction case
The hotel guest room and office space project is located in Shapingba Distric...
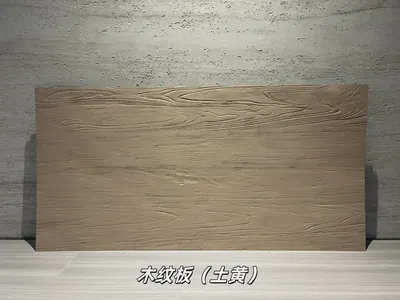
Earth yellow wood-grain panel flexible stone
Earth yellow wood-grain panel is a flexible stone in the wood-grain series, w...
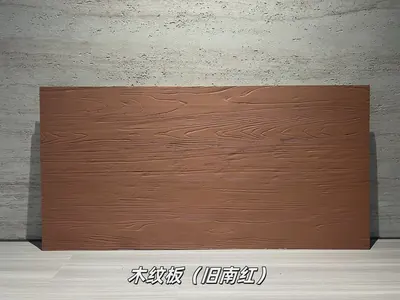
Old South Red Wood-Grain Board Flexible Stone
Old South Red Wood-Grain Board is a flexible stone in the Wood-Grain Series. ...
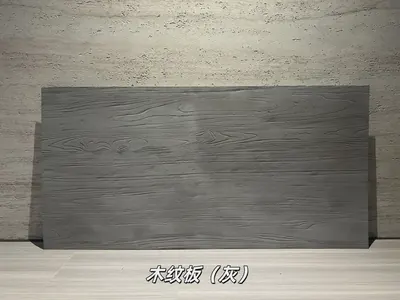
Gray wood grain board flexible stone
Gray wood grain board is a flexible stone from the wood grain series, with a ...
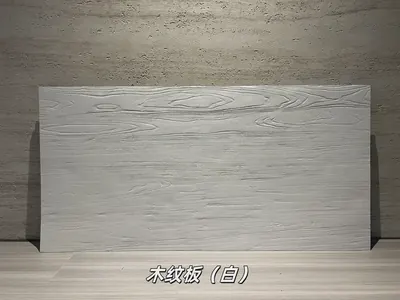
White Wood-Grain Board Flexible Stone
The white wood-grain board is a flexible stone in the Wood Grain series, with...
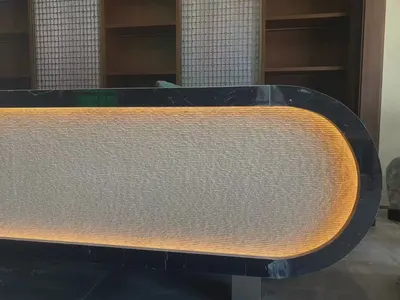
Commercial space (material actual photo) 90㎡ new-line stone (gray) wall construction case
The commercial space (material actual photo) project is located in Shenzhen, ...
cases related
Commercial space (material actual photo) 180㎡ printed rough-face granite wall construction case
IGOODS provided printed rough-faced granite as wall m...
View cases →
Corporate reception and office space 520㎡ woven hemp flexible stone (vintage bronze) wall construction case
The corporate reception and office space project is l...
View cases →
Hotel guest rooms and office spaces 1240㎡ wood grain board (light gray wood grain) wall construction case
The hotel guest room and office space project is loca...
View cases →
Commercial space (material actual photo) 90㎡ new-line stone (gray) wall construction case
The commercial space (material actual photo) project ...
View cases →