
Line Texture Travertine at the Emeishan project was a "semi-unfamiliar" collaboration: the material was familiar, but this was the first time this color was laid over a large area. What lies between the first time and the result—written for you to see.
Don't be misled by renderings,
Problems of the same space type are highly similar; the recording method in this article can be directly applied to your own project.In terms of color count, one main color, one secondary color, and one accent color per space is enough. Layering a third strongly contrasting color on a stone-texture wall instantly changes the look from "design" to "renovation."
The page of tables handed to the client
No empty talk; the project basics are as follows.
| Project location | Emeishan City, Sichuan Province |
| Project type | Hotel lobby |
| Materials used | Line Texture Travertine (Travertine Series) |
| Material specifications | 1220×2930mm | thickness 2.5–3.5mm | single piece about 17kg |
| Wall area | Approx. 560 ㎡ (◆ budget estimate) |
| Construction process | Full bonding method, direct wall installation after leveling, no keel required |
| Implementation standards | JG/T 540-2017 'Building Flexible Stone-faced Decorative Material' |
| Application location | Lobby main wall / welcome backdrop, round columns / curved column cladding, elevator hall / walkway, wall base 0–300mm |
Do not buy loose pieces on an ad hoc basis for patching: only the same project and same batch number is meaningful. Keeping reserve material in the project owner's warehouse is more useful than keeping it in the material supplier's warehouse; when replenishment is really needed, the sample in your hand is the matching voucher.
Photos don't lie
There were not many site photos kept at the time, but each one corresponds to a decision point:
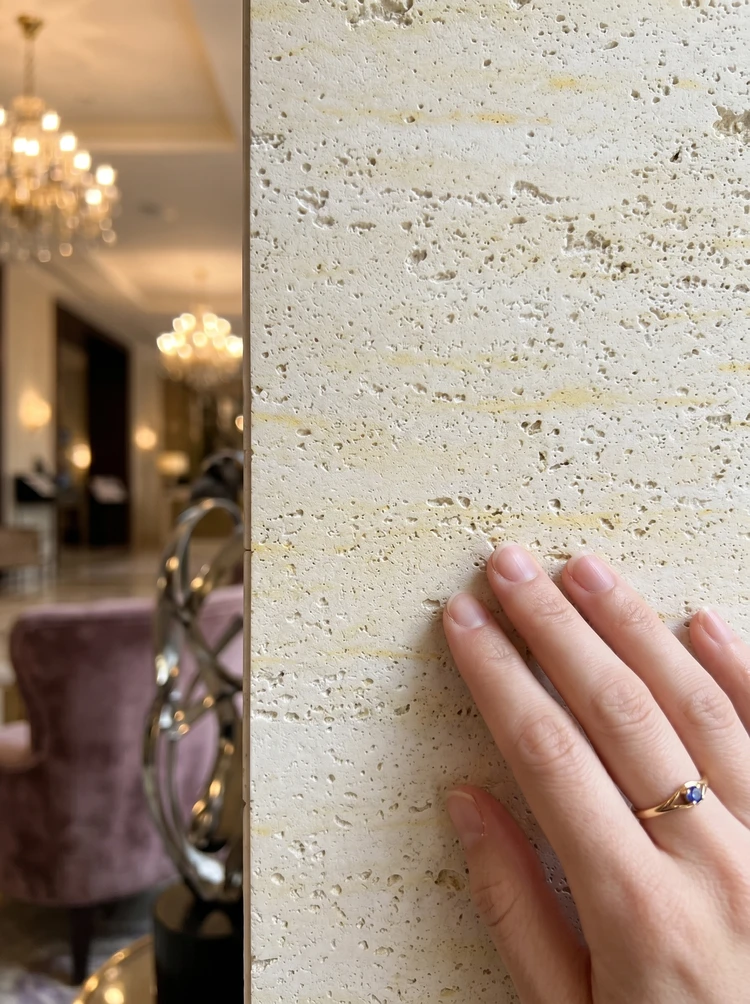
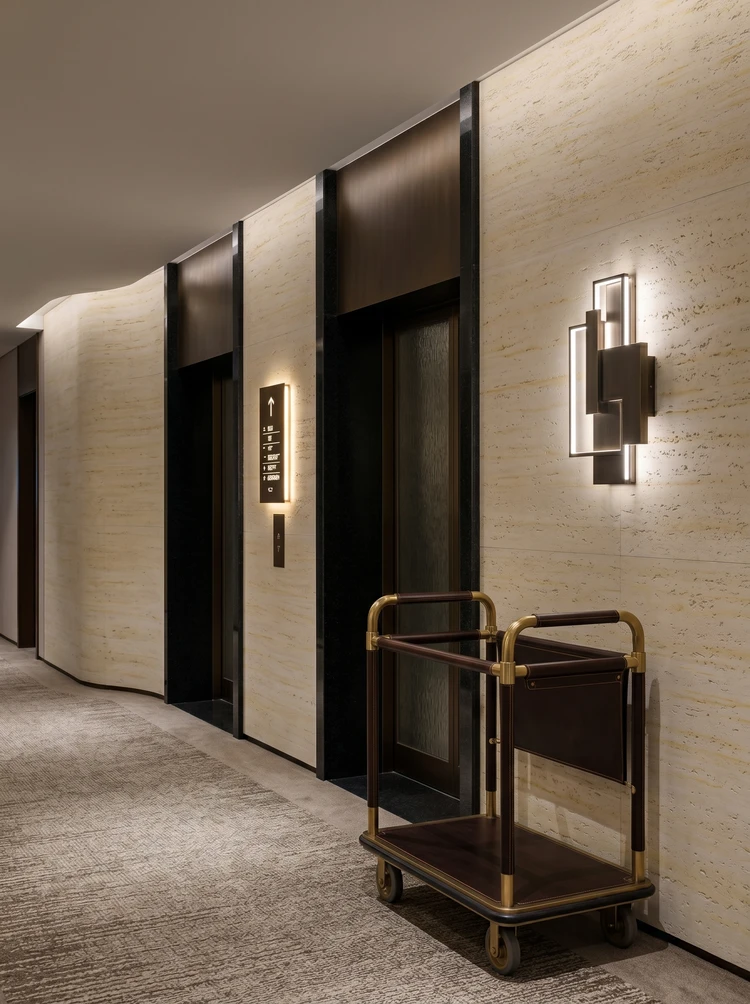
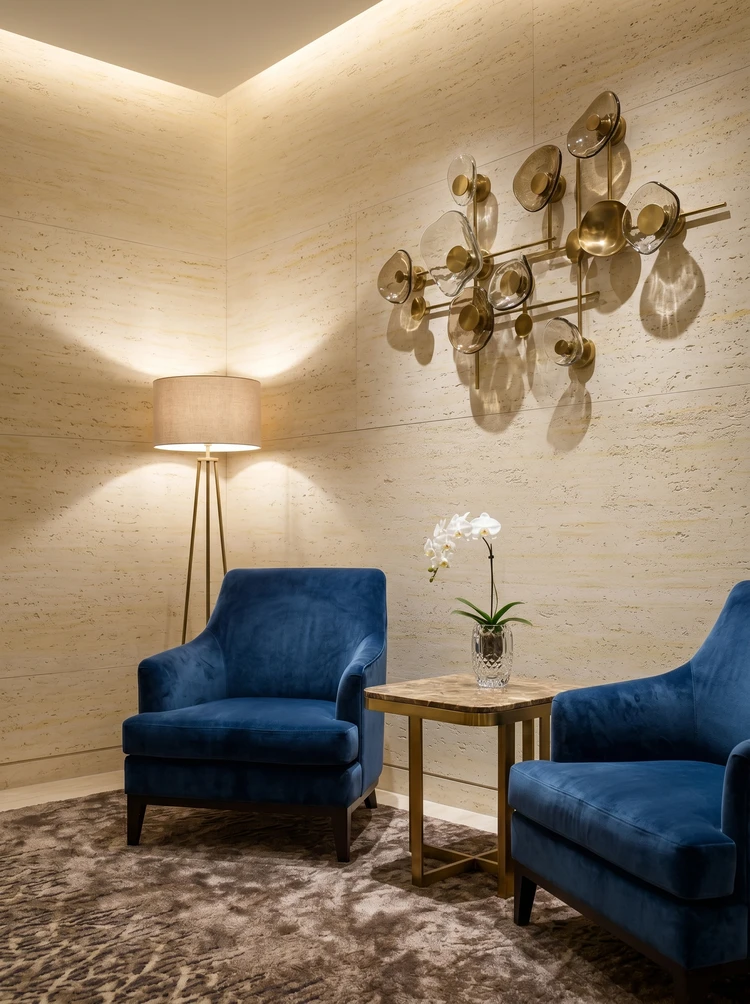
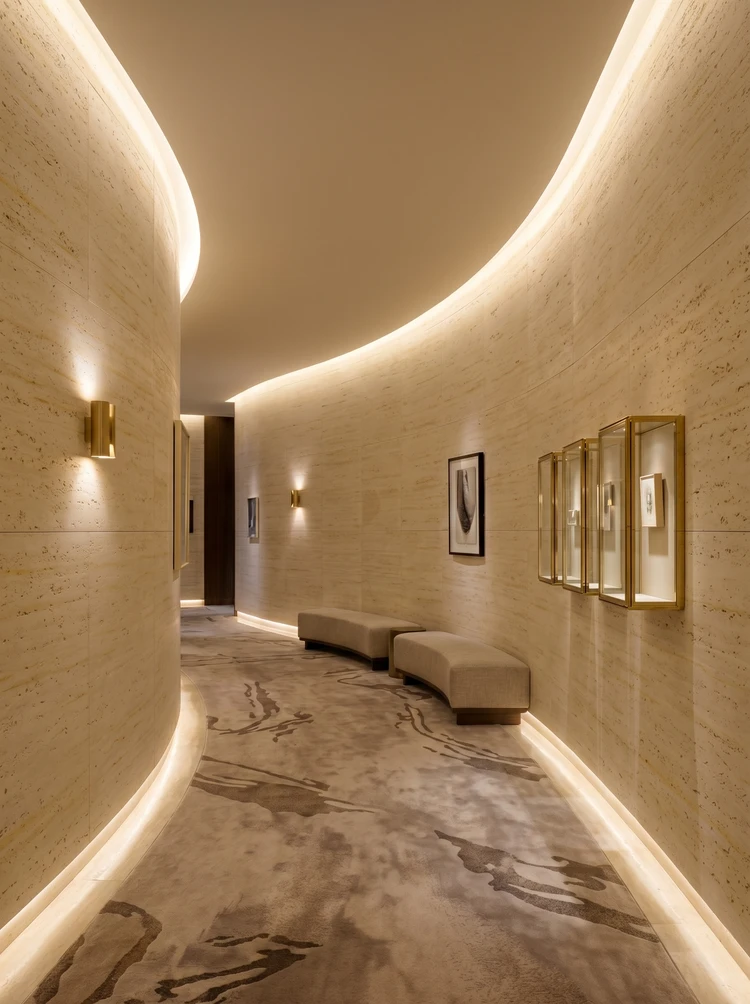
Note the close-up of the hand-touch sample, horizontal texture and pores on the light beige finish in this image: the light strip position was moved once after setting out
Elevator lobby, light beige horizontal-grain wall and dark door leaves. It is not noticeable from afar; only up close can you tell the layout follows 1220×2930 boards.
Experience and lessons not to repeat
Lessons learned written here: half a day was left extra on the day of setting out, and letting the column-position segmented joints into the internal corner was worth it; if the sample wall had been made two days later, the color difference dispute would have dragged all the way to the delivery day.
The cavity treatment behind the finish affects the acoustic perception more than the finish itself. For spaces that need quiet, fill the cavity with sound-absorbing cotton according to the drawings; where sound absorption is not needed, sealing the cavity to prevent resonance is sufficient. If this step is not done before closing the panels, it can only be remedied later at extra cost.
The travertine series under the lights in this space
Choose the wrong color temperature, and the material choice is wasted. Lighting conditions for this project: gray tones are the most honest about light; the wall changes with whatever color temperature the lighting has. Be sure to bring a lamp when comparing on sample approval day.
Many people blame the smell when new materials enter the site on the finish, but in fact about 80% comes from adhesive and base auxiliary materials. The environmental protection standard depends on the entire supply chain: if the main material meets the standard but the auxiliary materials are poor, there will still be odor. Having auxiliary materials also included in the acceptance checklist in projects is no longer an advanced practice; it is standard practice.
Daytime natural-light hours are the litmus test for concealed works. Color differences, misaligned joints, and adhesive marks all show up during this period. Scheduling an afternoon acceptance inspection is more practical than any sales pitch.
The mockup wall is for three parties: the owner sees the effect, the construction team sees the workmanship, and the supervisor sees the acceptance standard. A 2㎡ mockup wall is more useful than a ten-page proposal presentation. The processes used to install the mockup on the wall are the work instructions for large-area construction.
The iron grip on the adhesive mounting stage
The crew followed node-based acceptance: hollowing rate (tapping piece by piece), joint width uniformity (checked with a string line), verticality of external corners (straightedge), and panel color difference (inspected under side light). If a node failed, the next node did not start.
When receiving goods, do one thing first: check the batch numbers on the back of the panels against the packing list. If batches are mixed, do not argue—take photos on the spot for the record and distribute the mixed-batch panels across different facades. The cost of remediation is far lower than shrugging at the acceptance site.
Dampness in underground spaces is a slow-acting issue. The finish can resist mold, but when air humidity is high, condensation will still form water. For projects where fresh air and dehumidification are inadequate, removable inspection nodes should be reserved in the wall solution.
The ceremony on handover day actually has practical value: bring the owner, designer and contractor together on site and walk through the sample wall, tiled surfaces and patch locations together. Every item confirmed face to face is a no-argument clause for the future warranty period.
For business types with strict fire acceptance requirements (cinemas, KTVs, education and training), besides the finish itself, the construction method also matters: whether the cavity needs insulation fill and whether the keel needs a fire-retardant coating. Clarify the acceptance criteria at the material selection stage, rather than changing the plan after entering the site.
Original archive excerpt
The following passages come directly from project records and can serve as references when writing proposals:
Image display and application notes
This project has a total of 10 application photos, all taken on site, covering the elevator lobby, wall texture close-up, lounge area, curved walkway, arched corridor, cylindrical cladding, curved wall details, lobby lounge area, guest room corridor, elevator lobby passage, and other locations.
Customer industry use scenario: the real wall requirements for hotel lobbies
Lighting layering depends on a matte base. The lobby's lighting design (light strips, wall-washing lights, accent lighting) only achieves its effect on a matte, textured base; high-gloss surface materials reflect the light strips into streaks of light spots. Fire safety and environmental protection are hard thresholds. The lobby is a densely occupied place, so the material's combustion performance and environmental indicators must be supported by test reports, not just verbal descriptions. Delivery must be fast and must not affect the opening countdown. The lobby is one of the last areas completed before opening, and its schedule is compressed the hardest; solutions that can be directly applied to the wall without framing and curing have obvious advantages.
Material comparison: why linear travertine
Why choose linear vein stone The characteristics of linear vein stone are that the bedding is pulled into dense parallel lines, which are more regular than the holes of ordinary stone. The case has a large area and complex locations: elevator hall, continuous arched corridor, cylindrical covering, curved walkway, resting area, guest room corridor. The same material must be applicable to both the full-height archway and the 3-meter-high walkway wall, relying on uniform texture density + matte surface; any material with uneven texture depth and shallowness would expose the weakness of this project.
Configuration plan
For large-area projects, it is recommended to stock the full quantity at once and mix materials during layout; the same wall in the same space must use the same batch. A practical reminder: flexible stone is made from natural mineral raw materials, and slight tone differences may exist between different batches; this is a characteristic of the material itself.
The quotation must be broken down to avoid being ripped off: material unit price, substrate treatment, auxiliary materials (adhesive, primer, edge trims), labor, loss, and transport and handling. If one of the six is missing, it may later become an added cost. For loss rate, 8%-12% for flat walls is the conventional range; curved surfaces, columns, and irregular patterns must be calculated separately by developed area.
The document chain for export projects is longer than for domestic ones: CE conformity documents, RoHS, REACH, and pre-shipment inspection before sea freight, and what each market recognizes is not entirely the same. The EU recognizes the CE system, Southeast Asia and the Middle East often require SGS or national inspection reports, and South American customers may require Spanish labels. Check the list all at once before placing an order, and both the freight forwarder and the customs clearance agent will have an easier time.
For projects under construction while still operating, the time window matters more than labor hours. For night work sections, coordinate noise timing, freight elevator use, and fire access occupation with property management in advance. These coordination items cannot be scheduled into the process table, but they can determine whether the entire project is delivered several days late.
A checklist for the next project
Before entering the site, print this checklist and post it at the project office:
- Brand and color of edge sealant
- Batch verification (batch number on the back of the panel), tight joints in wet areas, wrinkle-free wrapping of columns, texture alignment on feature walls
- Measured record of substrate moisture content
- Joint feel (run a fingernail along to check for height difference), straightness of edge sealant, skirting transition, accuracy of switch panel openings
The ceiling junction is a detail hotspot. Where the wall meets the ceiling, either leave a reveal to conceal lighting or cover it with an internal corner trim. Where it butts directly against the plaster cornice, if a crack opens up, it is unclear whose responsibility it is. Writing the responsibility boundary clearly in the contract is more useful than anything else.
Follow-up visit on usage status
Follow-up visit after the warranty period, wall condition: color matches the design sample, with no visible batch variation. Daily care is simply cleaning at the usual frequency, with cleaners avoiding strong acids and alkalis; inspect the edge-sealing adhesive once a year and redo it if aged.
The material's character has boundaries. The porous feel of travertine works well with wabi-sabi, but looks dated in a CBD office tower lobby; the cold stratification of slate works well with metal and glass, but feels rigid in community retail with warm yellow lighting. Before choosing a wall, choose the spatial narrative first—material is part of the narrative, not an isolated aesthetic piece.
After working in this trade for a long time, you develop an intuition: when entering a space, touch the wall first. The moment your hand touches the texture, the density of the board, the fullness of the adhesive, and the quality of the joint treatment all become clear. Eyes are polite; hands are not.
The essence of layout is to avoid narrow strips. If, after aligning panels to the end, a narrow strip of less than 20 cm appears, cutting waste and edge chipping risk will soar. A mature layout method is to place the starting point at an inconspicuous internal corner, leave full panels for the first sight line when entering, and hide cuts behind furniture. The joint positions on the drawings should be checked against the soft furnishing points in advance.
The base layer — this point cannot be overstated. Hollowing, sanding, and moisture content are the three unavoidable safety gates for adhesive-applied finishes. Tap once to listen, run a straightedge once to check flatness, and on walls with heavy moisture, take several readings with a moisture meter. When the base layer is substandard, whatever facing material you apply is just putting a lid on the problem — the spots that bulge three months later are often exactly where the work was skipped at the time.
Lobby main wall / welcome termination detail
Everyone can install the large surfaces; what really takes time on this project are a few inconspicuous edges: corner guards with exposed joints at the edges—if something hits it, that is the corner guard's job, not the panel's.
The correct approach to knock and bump repair is to replace the panel rather than touch up the paint. Reserving 3%-5% spare material when ordering is for exactly this purpose: the real problem is when the replacement panel does not match the batch color difference. Spare material stored in the warehouse is much safer than loose panels left on site.
Questions received after the project ended
What is the difference between Line Texture Travertine and printed travertine?—Printed travertine retains the pores and irregular bedding of travertine, with a stronger texture and a closer resemblance to natural travertine; the bedding of Line Texture Travertine is processed into more regular parallel lines, looking cleaner from a distance and offering stronger perspective guidance, making it suitable for spaces such as walkways and corridors that need depth.
Q: Will the wall look oppressive if large slabs are used on the corridor wall?
A: Just the opposite. The clear width of the corridor is limited, the fewer the vertical joints, the more open it is. Small-sized tiles in a 1.5-meter-wide corridor form dense vertical lines, visually dividing the space into segments; dense splicing of large-size tiles reduces the number of vertical joints, and the horizontal stratification of the line patterned holes stone, on the contrary, extends the depth.
Will paintings and decorative strips on the wall disrupt the continuity of the texture?—No, but their positions must be reserved at the layout stage. Embedded points for paintings, decorative strips and wall lights must be marked on the layout drawing first, and seams should route around these points; otherwise the decorative pieces will press on the seams when installed and look awkward.
Q: How should the junction between the door frame and the wall be handled?
Answer: This is the position where corridor terminations are most concentrated. The method is to first locate the door frames, fire hydrants and access panels on the layout drawing, then determine the seam direction so that seams avoid these points. Deciding on site on the fly will make the terminations of a row of doors form an obvious jagged line—with nine doors in a row, a single 2mm deviation will be visible.
Related reading
Compare them side by side for more confidence:
Previous:Suining restaurant storefront about 260㎡ red rammed earth panels: closing and weather resistance
Next:About 560㎡ of woven hemp flexible stone in a Dazhou hotel guest room: texture and seams
Related articles
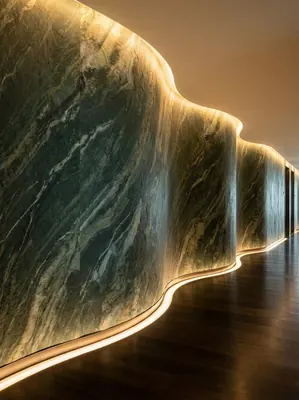
Hotel lobby 480㎡ printed granite (Glacier Green) wall construction case
IGOODS of AIGUOSI provides printed granite (Glacier Green) as wall material f...
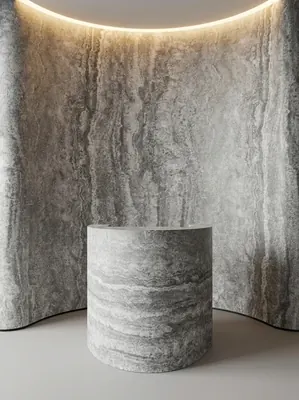
酒店大堂520㎡打印洞石(冰川灰)墙面施工案例
艾谷思IGOODS 为四川省西昌市一处酒店大堂项目提供打印洞石(冰川灰)作为墙面材料,采用满粘法直接上墙、无需龙骨基层。项目墙面概算约 520㎡,材料规格...
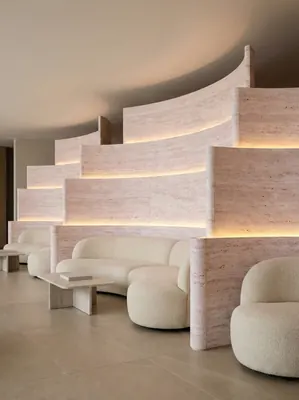
酒店大堂620㎡打印洞石(侘寂白)墙面施工案例
艾谷思IGOODS 为四川省雅安市一处酒店大堂项目提供打印洞石(侘寂白)作为墙面材料,采用满粘法直接上墙、无需龙骨基层。项目墙面概算约 620㎡,材料规格...
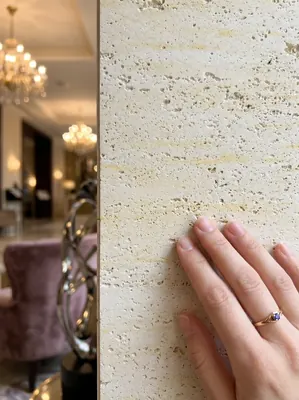
酒店大堂560㎡线纹洞石墙面施工案例
艾谷思IGOODS 为四川省峨眉山市一处酒店大堂项目提供线纹洞石作为墙面材料,采用满粘法直接上墙、无需龙骨基层。项目墙面概算约 560㎡,材料规格 122...
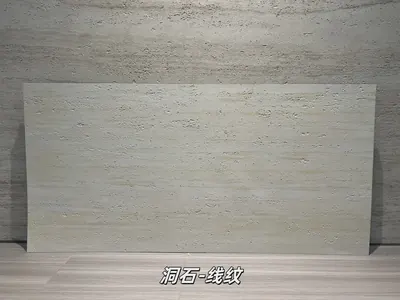
Line Texture Travertine Flexible Stone
Line Texture Travertine is a flexible stone in the Travertine series, with a ...
cases related
Hotel lobby 480㎡ printed granite (Glacier Green) wall construction case
IGOODS of AIGUOSI provides printed granite (Glacier G...
View cases →
酒店大堂520㎡打印洞石(冰川灰)墙面施工案例
艾谷思IGOODS 为四川省西昌市一处酒店大堂项目提供打印洞石(冰川灰)作为墙面材料,采用满粘法直接上墙、...
View cases →
酒店大堂620㎡打印洞石(侘寂白)墙面施工案例
艾谷思IGOODS 为四川省雅安市一处酒店大堂项目提供打印洞石(侘寂白)作为墙面材料,采用满粘法直接上墙、...
View cases →
酒店大堂560㎡线纹洞石墙面施工案例
艾谷思IGOODS 为四川省峨眉山市一处酒店大堂项目提供线纹洞石作为墙面材料,采用满粘法直接上墙、无需龙骨...
View cases →