
Is printed travertine really suitable for hotel lobbies? Rather than memorizing parameters, it is better to look at a real project that has already been delivered.
According to our project experience,
Rather than comparing parameters through a screen, it is better to see how a completed project answers these questions.The underlying account of this Meishan project
No empty talk; the project basics are as follows.
| Project location | Meishan City, Sichuan Province |
| Project type | Hotel lobby |
| Materials used | Printed travertine (wabi-sabi rice yellow) (travertine series) |
| Material specifications | 1220×2930mm | thickness 2.5–3.5mm | single piece about 17kg |
| Wall area | Approx. 1,850㎡ (◆Estimate) |
| Construction process | Full bonding method, direct wall installation after leveling, no keel required |
| Implementation standards | JG/T 540-2017 'Building Flexible Stone-faced Decorative Material' |
| Application location | Lobby main wall / welcome backdrop, round columns / curved column cladding, elevator hall / walkway, wall base 0–300mm |
Follow-up visit on usage status
Follow-up visit after the warranty period, wall condition: panel surfaces clean, seam lines free of accumulated dust and darkening. Daily care is simply cleaning at the usual frequency, with cleaners avoiding strong acids and alkalis; inspect the edge-sealing adhesive once a year and redo it if aged.
Light and dark pairing within the same color family is safer than contrasting colors. For example, within the same stone family, choose one shade darker for the wall base band and one shade lighter for the main surface; this creates layering with less risk—this is exactly the purpose of color families.
What to catch on the spot during acceptance
When the owner's side arrived on site, they asked only three things, and we answered in order: hollowing rate (tap each panel), seam-width uniformity (check with a string line), verticality of external corners (straightedge), and panel color variation (walk along with side light).
Wall materials and acoustics are opposing forces that balance each other. Hard, dense finishes reflect strongly and make a space sound hollow; porous structures absorb sound well but are vulnerable to grease and moisture. The mature approach is zoning: control reverberation where people stay longest, leave corridors and background walls to the finish, and account for the two separately.
A blunt statement in the archive
A record from that time is kept in the archive: The conventional method is to print the layout drawing at 1:1 and paste it onto the substrate for positioning.
The most common dispute at site handover is "floor protection." After the walls are finished, ceiling, flooring and furniture will come in next; whoever damages them pays. One handover form, one layer of protective film and one ring of warning tape can settle most conflicts.
Unretouched images are the most convincing
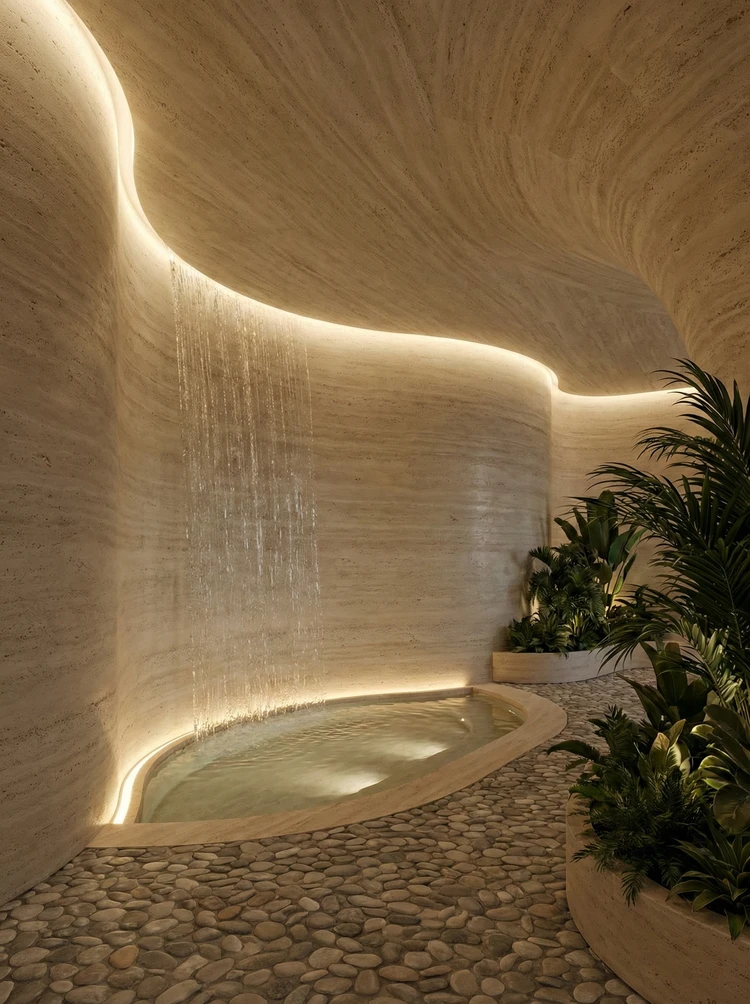
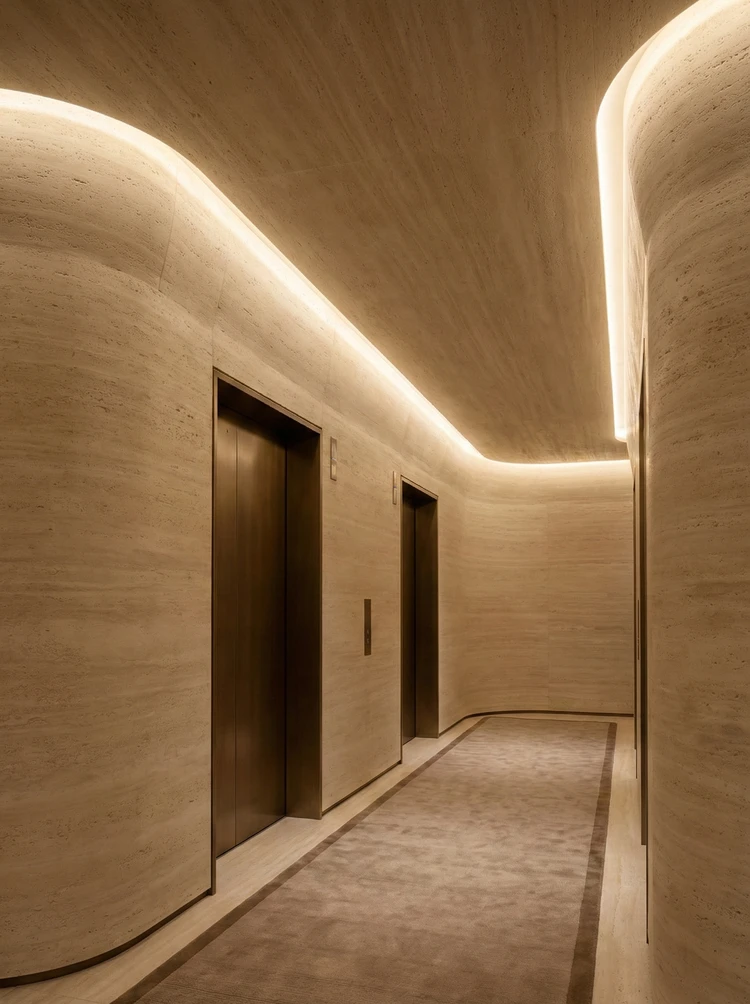
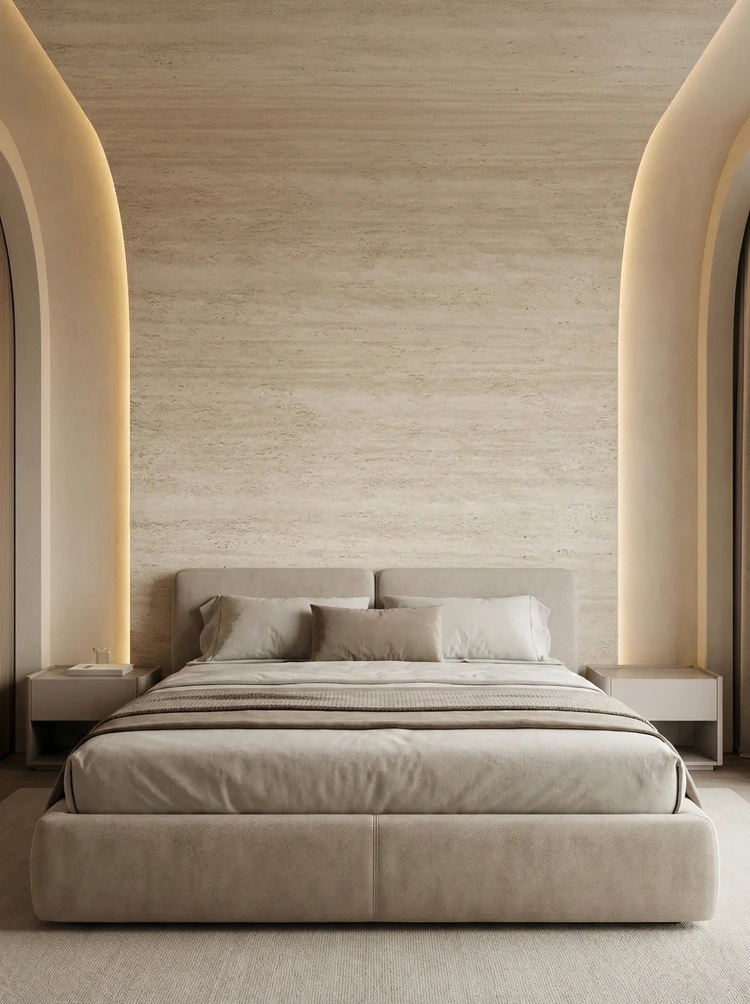
The photos were taken before acceptance, at random locations, and happen to show how things look in use:
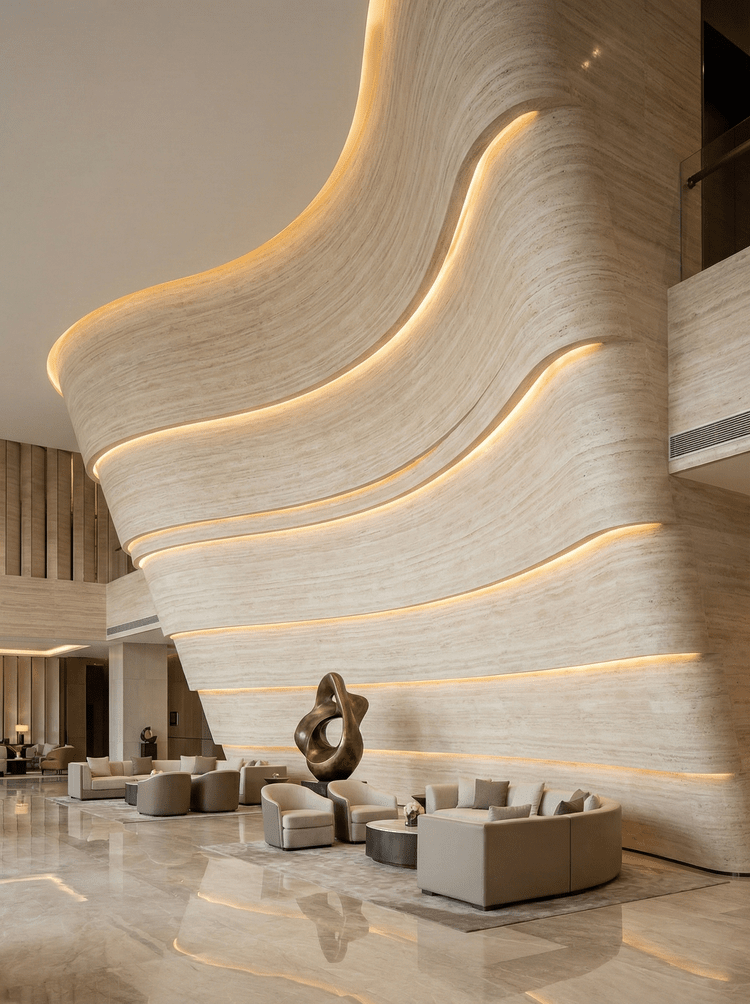
Full-height lobby, light beige wavy wall and lounge seating—this location is where rework costs are highest
Indoor water feature, light beige curved wall with warm-toned contour lighting. It is not obvious from a distance; only up close can you tell the layout follows 1220×2930 panels.
The biggest taboo in old wall renovation is "it looks fine." Whether the original tile surface or old latex paint surface can be directly covered depends on an adhesion test, not on visual inspection. Our standard procedure is to apply a sample piece in an inconspicuous corner and, after 48 hours, pry it off by hand; only if it cannot be pried off is large-scale work allowed to start. Skip this step and all that follows is rework.
How to finish joints, corners and ends
Everyone can install the large surfaces; what really takes time on this project are a few inconspicuous edges: leave an access opening in the side panel of the light cove—whether hidden lighting looks good depends half on the side panel's reflection.
When receiving goods, do one thing first: check the batch numbers on the back of the panels against the packing list. If batches are mixed, do not argue—take photos on the spot for the record and distribute the mixed-batch panels across different facades. The cost of remediation is far lower than shrugging at the acceptance site.
Experience and lessons not to repeat
Lessons learned written here: the starting point was moved to the corridor side, so the owner's circulation route began exactly from a full panel, and all narrow strips went behind the furniture.
Double-height spaces also raise a viewing-angle issue: what you see from above and from below are two completely different densities. Locations where "others look at you," such as lobby mezzanines and stair corners, deserve a separate sample review.
Area is not the order quantity
Area is not the order quantity. For a net wall of 1850㎡, plus the added allowance for curved-surface development, the final approach is to calculate material by developed area and prepare materials in separately sealed boxes. Book-match positions are marked on the drawings in advance; workers only take panels by number, and the layout team is responsible for the grain.
Hotel lobby general self-check page
Before entering the site, print this checklist and post it at the project office:
- Quantity of material preparation and batch number retention
- Joint feel (run a fingernail along to check for height difference), straightness of edge sealant, skirting transition, accuracy of switch panel openings
- Hollowing rate (tap each panel), joint width uniformity (check with a string line), verticality of external corners (straightedge), panel color difference (inspect under side light)
- Batch verification (batch number on the back of the panel), tight joints in wet areas, wrinkle-free wrapping of columns, texture alignment on feature walls
Four passages copied from the archive
Flipping the file back to those two weeks of construction, a few passages are quite candid:
Customer industry use scenario: the real wall requirements for hotel lobbies
Lighting layering depends on a matte base. The lobby's lighting design (light strips, wall-washing lights, accent lighting) only achieves its effect on a matte, textured base; high-gloss surface materials reflect the light strips into streaks of light spots. Mainly curved and shaped forms. The columns, curved partitions, and arched doorways common in lobbies can, with traditional ceramic tiles, only be achieved by small-format piecing with dense seams; flexible materials can be directly bent and wrapped around curves, with continuous shapes and no folded corners. Insufficient panel format leads to dense seams, fragmenting the sense of scale in large spaces.
Image display and application notes
This project has a total of 9 application photos, all taken on site, covering the lobby curved main wall and water feature, elevator lobby passage, guest room headboard feature wall, lobby irregular sculptural wall, lobby bar counter and wine cabinet, guest room corridor, semi-enclosed booth, atrium column, lobby wave main wall, and other locations.
Material comparison: why printed travertine (Wabi-Sabi Beige)
The same material simultaneously serves the two tasks of "large-scale overall coherence" and "close-up texture", relying on the kind of relief feel of travertine that is neither too light nor too deep—from afar it is a clean expanse of beige, and up close the shadows of pores and bedding planes are visible. This project has a very wide scope: the curved main wall of the lobby, the atrium columns, the elevator lobby, guest room corridors, headboard backgrounds, the bar counter, semi-enclosed booth seating, and even the walls of the indoor water feature pool. The travertine series offers colorways such as Wabi-Sabi Beige, Warm Beige, and Light Sand, with other colors customizable; the visual tone of this case is based on Wabi-Sabi Beige.
Communication and confirmation process
Owner: How should cutouts and joints be handled? IGOODS: This must be resolved at the layout stage. For the wall project of a hotel lobby, the communication mainly focused on three things: whether the material selection matches the spatial character, how to determine cutouts and layout, and whether the substrate conditions are satisfactory. Owner: Ours is a hotel lobby, and we want the walls to have the texture that a hotel lobby should have. What do you suggest? IGOODS: It is recommended to first clarify three things: gloss level (matte rather than high-gloss), texture intensity (subtle textures are more enduring), and whether curved shapes are needed.
For business types with strict fire acceptance requirements (cinemas, KTVs, education and training), besides the finish itself, the construction method also matters: whether the cavity needs insulation fill and whether the keel needs a fire-retardant coating. Clarify the acceptance criteria at the material selection stage, rather than changing the plan after entering the site.
The ceremony on handover day actually has practical value: bring the owner, designer and contractor together on site and walk through the sample wall, tiled surfaces and patch locations together. Every item confirmed face to face is a no-argument clause for the future warranty period.
For projects under construction while still operating, the time window matters more than labor hours. For night work sections, coordinate noise timing, freight elevator use, and fire access occupation with property management in advance. These coordination items cannot be scheduled into the process table, but they can determine whether the entire project is delivered several days late.
The quotation must be broken down to avoid being ripped off: material unit price, substrate treatment, auxiliary materials (adhesive, primer, edge trims), labor, loss, and transport and handling. If one of the six is missing, it may later become an added cost. For loss rate, 8%-12% for flat walls is the conventional range; curved surfaces, columns, and irregular patterns must be calculated separately by developed area.
The light position drawing was revised twice
The natural-light period and the lighting period are two different walls. Before delivery we specifically looked once in the morning and once in the evening: warm beige turns half a grade yellower under low-color-temperature lighting, and this is often where renderings and the site differ.
The correct approach to knock and bump repair is to replace the panel rather than touch up the paint. Reserving 3%-5% spare material when ordering is for exactly this purpose: the real problem is when the replacement panel does not match the batch color difference. Spare material stored in the warehouse is much safer than loose panels left on site.
Cylindrical column cladding is the part that most tests layout skills. The panels wrapping the column must either be bent as a whole sheet or joined in segments; segments inevitably mean vertical seams, and the seam positions should fall in dark areas where the column meets the wall, not directly facing the passage. For columns with small radii, first wrap a physical panel sample around the column to check springback, then decide between full wrapping and piecing.
The question I was stumped by at the time
Q: How do you ensure the seam lines are not crooked on a wavy curved wall?
Answer: Layout lines must be set out before installation on the wall. Every vertical seam on the wavy wall must have its landing point on the curved surface calculated in advance; it cannot be adjusted by eye on site. The conventional method is to print the layout drawing at 1:1 and paste it onto the substrate for positioning.
Someone asked this: how was the wall area for this project calculated? By accumulating the developed wall area of each area: lobby main wall and atrium, elevator hall and corridor, guest rooms (by number of rooms × wall area per room), dining and bar area, plus the increment from curved surface development. The budget estimate for this project is about 1,850㎡.
Q: Will there be any problems if the water feature pool wall is lined with travertine and soaked in water for a long time?
A: The material itself does not absorb water and is not prone to mildew, suitable for humid environments; but the key to the pool wall is the edge and waterproof construction - the methods above and below the water level need to be handled separately, and the water-facing surface needs to be coordinated with a waterproof layer. It is recommended to clarify the pool construction alone before construction.
Let me also answer a frequently asked question: If the same material runs from the lobby to the guest rooms, will the grade be lowered?? No, but it depends on construction precision. The same material is a full-height curved wall in the lobby and a headboard background in the guest room, with a scale difference of several times: in the lobby, check whether the joints are straight and the curved surface is smooth; in the guest room, check whether the openings are straight and the closures are detailed. The acceptance standards differ between the two locations, and the same set of practices cannot be copied.
Why does it land on this material?
Here is a counterintuitive point: what was finalized first in this project was not the material, but the color wabi-sabi beige. Once the color was set, the material was selected accordingly—test bending at small-radius positions showed no springback, so the curved surfaces in the rendering could be realized.
Walls in dark-scene spaces (cinemas, bars, clubs) absorb light severely. Dark colors will appear one level darker under low illuminance. To achieve the effect of "texture visible but material boundaries not visible," it is often necessary to choose a color number half a level lighter than the target color, or embed a wall-washing light at the finishing edge.
The iron grip on the adhesive mounting stage
The crew followed node-based acceptance: hollowing rate (tapping piece by piece), joint width uniformity (checked with a string line), verticality of external corners (straightedge), and panel color difference (inspected under side light). If a node failed, the next node did not start.
The ceiling junction is a detail hotspot. Where the wall meets the ceiling, either leave a reveal to conceal lighting or cover it with an internal corner trim. Where it butts directly against the plaster cornice, if a crack opens up, it is unclear whose responsibility it is. Writing the responsibility boundary clearly in the contract is more useful than anything else.
How the schedule was planned
Time account: a schedule converted from the daily installation area per person, with no full-segment idle time in between. For hotel lobbies, one day earlier delivery means one day earlier revenue; the owner calculates this account more clearly than we do.
Related reading
Related pages are placed here for easier verification:
Previous:About 620㎡ wabi-sabi white travertine in the lobby of a hotel in Ya'an: how to choose white walls
Next:Luzhou restaurant approx. 260㎡ red rammed earth panels: texture and wall edge finishing
Related articles
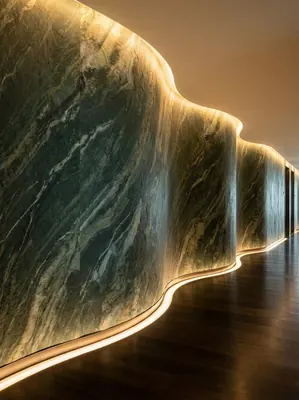
Hotel lobby 480㎡ printed granite (Glacier Green) wall construction case
IGOODS of AIGUOSI provides printed granite (Glacier Green) as wall material f...
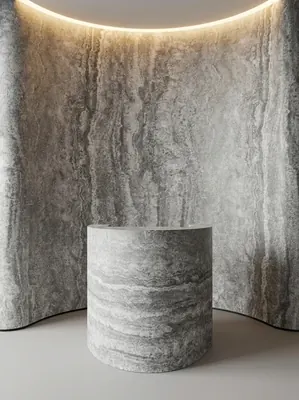
酒店大堂520㎡打印洞石(冰川灰)墙面施工案例
艾谷思IGOODS 为四川省西昌市一处酒店大堂项目提供打印洞石(冰川灰)作为墙面材料,采用满粘法直接上墙、无需龙骨基层。项目墙面概算约 520㎡,材料规格...
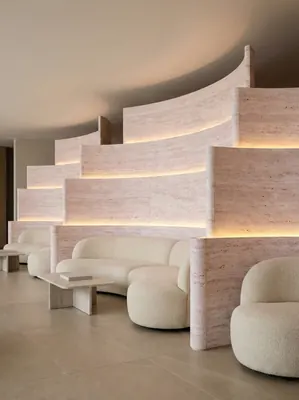
酒店大堂620㎡打印洞石(侘寂白)墙面施工案例
艾谷思IGOODS 为四川省雅安市一处酒店大堂项目提供打印洞石(侘寂白)作为墙面材料,采用满粘法直接上墙、无需龙骨基层。项目墙面概算约 620㎡,材料规格...
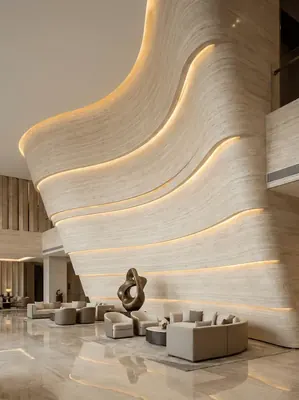
酒店大堂1850㎡打印洞石(侘寂米黄)墙面施工案例
艾谷思IGOODS 为四川省眉山市一处酒店大堂项目提供打印洞石(侘寂米黄)作为墙面材料,采用满粘法直接上墙、无需龙骨基层。项目墙面概算约 1,850㎡,材...
cases related
Hotel lobby 480㎡ printed granite (Glacier Green) wall construction case
IGOODS of AIGUOSI provides printed granite (Glacier G...
View cases →
酒店大堂520㎡打印洞石(冰川灰)墙面施工案例
艾谷思IGOODS 为四川省西昌市一处酒店大堂项目提供打印洞石(冰川灰)作为墙面材料,采用满粘法直接上墙、...
View cases →
酒店大堂620㎡打印洞石(侘寂白)墙面施工案例
艾谷思IGOODS 为四川省雅安市一处酒店大堂项目提供打印洞石(侘寂白)作为墙面材料,采用满粘法直接上墙、...
View cases →
酒店大堂1850㎡打印洞石(侘寂米黄)墙面施工案例
艾谷思IGOODS 为四川省眉山市一处酒店大堂项目提供打印洞石(侘寂米黄)作为墙面材料,采用满粘法直接上墙...
View cases →