
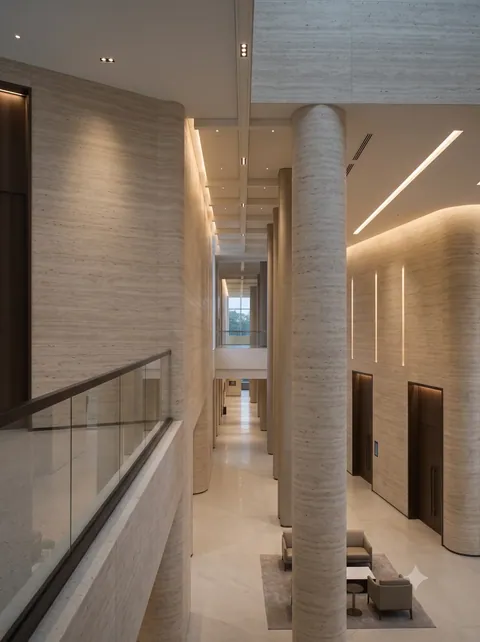
Why did the hotel banquet hall wall end up using printed travertine flexible stone (Milk white, horizontal stratification)? This article repeats the selection process at that time.
Anyone who has worked on projects knows,
Rather than comparing parameters through a screen, it is better to see how a completed project answers these questions.The underlying account for this Chongqing order
Lay out the numbers first, then opinions are easier to discuss. The following is taken from the project files.
| Project location | Yubei District, Chongqing |
| Space type | Hotel banquet pre-function (double-height pre-function hall + banquet hall anteroom + elevator lobby corridor) |
| Materials used | Printed travertine flexible stone (rice white, horizontal layering) |
| Material specifications | 1220×2930mm, thickness 2.5–3.5mm, single piece 3.5746 m², about 17kg per sheet |
| Wall area | Approx. 1,680 ㎡ (◆ preliminary estimate, including 370 ㎡ of cylindrical columns) |
| Construction process | Full bonding method, direct wall installation after leveling, no keel or dry hanging required |
| Construction period | 8 people, 26 working days (estimated) |
| Implementation standards | JG/T 540-2017 'Building Flexible Stone-faced Decorative Material' |
| Application location | Double-height folded wall, 12 full-height cylindrical columns, banquet hall pre-function wall, elevator lobby and corridor |
The biggest taboo in old wall renovation is "it looks fine." Whether the original tile surface or old latex paint surface can be directly covered depends on an adhesion test, not on visual inspection. Our standard procedure is to apply a sample piece in an inconspicuous corner and, after 48 hours, pry it off by hand; only if it cannot be pried off is large-scale work allowed to start. Skip this step and all that follows is rework.
The ceiling junction is a detail hotspot. Where the wall meets the ceiling, either leave a reveal to conceal lighting or cover it with an internal corner trim. Where it butts directly against the plaster cornice, if a crack opens up, it is unclear whose responsibility it is. Writing the responsibility boundary clearly in the contract is more useful than anything else.
The cost of dark colors is showing dust and absorbing light; the cost of light colors is showing seams and being prone to dirt. This should be said at the color selection stage. For high-traffic locations (cashier counters, self-service areas, corridor end walls), our recommendation is medium brightness: good-looking and durable.
It is recommended that the handover document package consist of five fixed items: layout drawings, batch number list, copies of test reports, maintenance instructions, and material storage location map. We have seen projects that used all five, and projects that argued for two extra weeks because one was missing.
The judgment sequence for wet-area walls (bathrooms, spas, pool surrounds) is: intact waterproofing layer → moisture-proof substrate → non-absorbent finish → dense joints. If all four pass, the finish is only the final layer of protection; if any one fails, no matter what is applied, problems will occur. The flexible finish itself does not absorb water, but it places higher demands on the honesty of the substrate.
Acceptance tools need not be complicated: a two-meter straightedge, feeler gauge, hygrometer, and strong flashlight. Use the straightedge to check flatness, the feeler gauge to check joints, and hold the flashlight close to the wall at a grazing angle—undulations and adhesive marks cannot hide under this light.
The key to panel logistics is "panels never touch the ground." Each additional transfer from truck to work surface increases the probability of edge chipping. Project entry conditions (freight elevator dimensions, corridor corners, elevator lobby height) must be reported to the loading coordination before ordering. Large panels such as 1220×2930 are as good as not allocated if they cannot fit into the elevator.
After working in this trade for a long time, you develop an intuition: when entering a space, touch the wall first. The moment your hand touches the texture, the density of the board, the fullness of the adhesive, and the quality of the joint treatment all become clear. Eyes are polite; hands are not.
The mockup wall is for three parties: the owner sees the effect, the construction team sees the workmanship, and the supervisor sees the acceptance standard. A 2㎡ mockup wall is more useful than a ten-page proposal presentation. The processes used to install the mockup on the wall are the work instructions for large-area construction.
Time account
In terms of schedule, 8 people, 26 working days (◆budget estimate). There was a power outage for maintenance in the middle, so the crew switched to setting out and did not let the days go empty.
With the same quote, whose money is spent where it matters most? When the material grade is the same, the difference usually comes down to two items: waste and substrate treatment. A crew willing to spend an extra half day on setting out can reduce cutting waste by two percentage points, which is far more respectable than cutting the material budget.
The question I was stumped by at the time
Someone asked this: how are the 12 cylindrical columns wrapped? The column diameter is 1.1 meters and the circumference is 3.46 meters. Three panels of 1.22-meter width wrap around one circumference. First divide the circumference evenly by the width of each panel so that the three vertical seams are evenly distributed on the sides and rear (facing away from the main sightline), then bend and bond each whole panel along the arc.
How to ensure safety during high-altitude construction?
A: 8.9 meters must be supported by full scaffolding or a lifting platform, and manual ladders are not allowed. The boards are 2.93 meters long and weigh 17kg, and two people are required to place the boards. The structure may not be overloaded with more boards than needed for the shift.
Why is 8.9 meters divided into three sections, can't it be customized to be longer?—The existing process of flexible stone has a maximum length of 2.93–3.0 meters. 8.9 meters must be spliced into three sections. Fortunately, the joint of the three sections can fall on the design elevation, align with the skirting, light groove, and door head, and visually does not count as 'interrupting'.
How many boards are needed for 1680 ㎡?——The net wall area is 1680 ㎡, with a 12% waste calculation of 1882 ㎡, which is equivalent to 526 sheets of 1220×2930mm boards, with an additional 16 sheets for reserves, and an order of 542 sheets. The weight of the wall is about 8.0 tons, and the same area of natural travertine is about 43.7 tons.
Three things separate a rendering from the real thing: vein density, seam method and gloss level. Stone-texture walls in rendering libraries are often 'density-amplified versions'; looking for materials by copying them directly will disappoint. The reliable path is to use the rendering to set the character, use samples to set specifications, and use a 1:1 sample wall to set final expectations.
Double-height spaces also raise a viewing-angle issue: what you see from above and from below are two completely different densities. Locations where "others look at you," such as lobby mezzanines and stair corners, deserve a separate sample review.
Curved walls and straight walls are two different trades. Curved wall setting-out must be marked according to developed dimensions, and panels must be cut according to arc length; panels cut according to flat-wall habits will have crooked lines once installed on the wall. The smaller the radius of the arc, the shorter the arc length a single panel can cover, and the higher the loss naturally is—this is also the physical reason why curved-surface projects are quoted higher than flat surfaces.
Half the beauty of large surfaces comes from the seams. If the seam is too narrow, there is no allowance for thermal expansion and contraction; if too wide, the eye is drawn entirely to the line. A common practice in indoor dry areas is a tight seam or a 1–2 mm process joint; at curved surfaces and complex junctions, it is better to leave a seam for routing than to force the panels together. Whether the seam color uses same-color adhesive or a contrasting line is up to the designer.
Log excerpts
The most quoted line at the review meeting: Standing in the double-height foyer and looking up, the line of sight travels up along the wall; any 3 mm deviation will be magnified into a visible arc at a height of 9 meters.
Same project, same batch is an iron rule. Batch variation of flexible finishes is controlled within the standard range, but when large surfaces are placed side by side, even half a grade of color difference still stands out. For projects with a single area exceeding 1000㎡, our approach is one-time production scheduling, unified batch numbers, and box numbering by floor or area, with panels taken by matching number during installation.
Layout and quantity accounting
This project's layout has only one theme: leave the complete surface for the first glance. Set the starting point behind the furniture, and push all other cut positions to the rear. Sockets and access panels on the same wall are merged into the seam lines at the layout stage and do not fall in the center of panels.
The conspiracy of lighting and color
Choose the wrong color temperature, and the material choice is wasted. Lighting conditions for this project: cool whites on large surfaces absorb the lighting color temperature; above 4000K they easily turn bluish-green. For warm-light projects, look at an on-wall sample first.
Walls in hotel public areas have a hidden KPI: they should photograph well and not retain traces of guest behavior. Luggage knocks in the lobby, leaning in elevator halls and dragging in corridors all test the 0–900 mm section at the base of the wall. Choosing the right materials and closures for this section can cut the property management repair requests in half.
The cavity treatment behind the finish affects the acoustic perception more than the finish itself. For spaces that need quiet, fill the cavity with sound-absorbing cotton according to the drawings; where sound absorption is not needed, sealing the cavity to prevent resonance is sufficient. If this step is not done before closing the panels, it can only be remedied later at extra cost.
The document chain for export projects is longer than for domestic ones: CE conformity documents, RoHS, REACH, and pre-shipment inspection before sea freight, and what each market recognizes is not entirely the same. The EU recognizes the CE system, Southeast Asia and the Middle East often require SGS or national inspection reports, and South American customers may require Spanish labels. Check the list all at once before placing an order, and both the freight forwarder and the customs clearance agent will have an easier time.
Two lessons learned and one mistake
To discuss the retrospective, this project has two lessons worth copying and one lesson not recommended to repeat: the starting point was moved to the corridor side, so the owner's circulation route happened to start from a complete board, and all narrow strips went behind the furniture.
Hotel banquet pre-function general self-check page
Before entering the site, print this checklist and post it at the project office:
- Quantity of material preparation and batch number retention
- Brand and color of edge sealant
- Hollowing rate (tap each panel), joint width uniformity (check with a string line), verticality of external corners (straightedge), panel color difference (inspect under side light)
- Relationship between starting point and column positions
Daytime natural-light hours are the litmus test for concealed works. Color differences, misaligned joints, and adhesive marks all show up during this period. Scheduling an afternoon acceptance inspection is more practical than any sales pitch.
There is a little trick in on-site management: after each wall is finished, take a "growth photo" with a mobile phone at a fixed position. Compare during acceptance, check batches during maintenance, and use as a case for the next project—one photo serves three purposes. Those photos in the project file that now seem redundant were all key evidence that saved the day at the time.
The logic of submission documents is "model corresponds to report." Combustion performance is classified according to GB 8624, and the sample name, specification, and production date in the test report must match the purchased model one-to-one. Using the report for model A to submit a project for model B, what is usually rejected is not the material, but the documents.
On the day the owner visited the site
When the owner's side arrived on site, they asked only three things, and we answered in order: feel of the seams (run a fingernail along them to check for height differences), straightness of edge-sealing adhesive, skirting junctions, and precision of switch-plate cutouts.
The most valuable thing in construction organization is rhythm. Before the crew enters the site, the sample wall, layout marking, and material preparation should all be completed; the most commonly seen waste on site is boards not arriving, people waiting, and lights on. Organize transfer according to "materials never touch the ground," finish and clean the work area the same day, and the construction period will naturally be shortened.
For walls in spaces that remain open during business hours, maintenance costs deserve more consideration than initial construction cost. Restaurant walls cannot avoid cooking fumes; when choosing finishes, first ask, "Can oil stains be wiped off?" Retail walls cannot avoid shelf handling, so impact resistance at external corners and the 0-300 mm wall base should be prioritized. Factoring cleaning and repair into material selection is how you reduce the burden on the next store manager.
Four passages copied from the archive
Flipping the file back to those two weeks of construction, a few passages are quite candid:
Vertical light slot: the 30mm slot opening must not chip at the edges
The front hall wall has vertical light troughs, 30mm wide and 20mm deep, running from the lower section all the way to the upper section. Conversely, if the panels are applied first and the grooves cut afterward, it is very difficult with any tool to ensure that an 8.9-meter continuous run does not chip. The method is to install the light trough substrate first, then apply the panels, and finally cut around: fix the aluminum profile of the light trough to the substrate first, apply the panels, then cut along the edge of the profile; after cutting, install the profile trim to press the cut edge inside.
Why printed travertine, not natural travertine?
When natural travertine and printed travertine are compared at a height of 8.9 meters, the difference is magnified very clearly. The horizontal bedding of natural travertine is randomly generated; when three sections are spliced together, the patterns do not match, and from a distance it looks like three different stones; printed travertine is produced in the same batch number, and the bedding can achieve approximately continuous patterns across sections—this is the direct reason it was chosen for this order.
Maintenance issues specific to the banquet pre-function hall
Cleaning method: for large wall areas, mop-style cleaning is mostly used, and water content must be controlled; immediately wipe dry with a dry cloth after wet mopping. Long-term moisture will leave water marks in the recessed areas of the bedding planes. It is recommended to leave a 5mm gap inside the carpet edge strip, and do not let the carpet press directly against the wall. For this order, a 15mm edge wrap was added in the lower section; after an impact, check the edge wrap first rather than the panel surface.
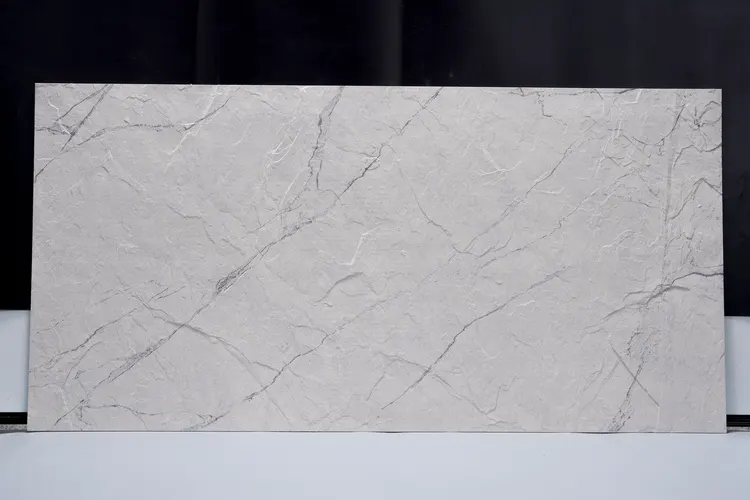
Understand the texture from images
Related reading
Follow the links below to trace every judgment in this article back to its source:
Related articles
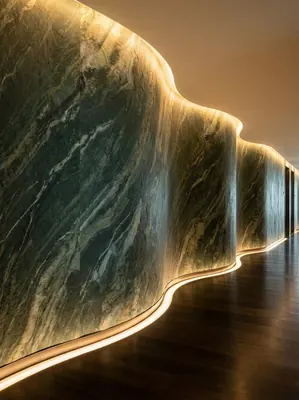
Hotel lobby 480㎡ printed granite (Glacier Green) wall construction case
IGOODS of AIGUOSI provides printed granite (Glacier Green) as wall material f...
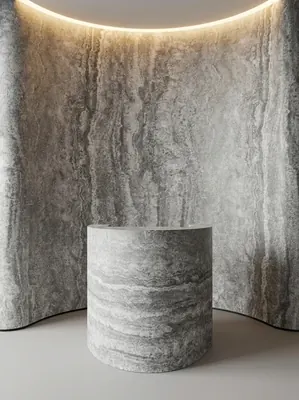
酒店大堂520㎡打印洞石(冰川灰)墙面施工案例
艾谷思IGOODS 为四川省西昌市一处酒店大堂项目提供打印洞石(冰川灰)作为墙面材料,采用满粘法直接上墙、无需龙骨基层。项目墙面概算约 520㎡,材料规格...
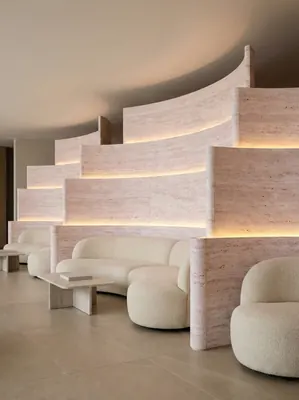
酒店大堂620㎡打印洞石(侘寂白)墙面施工案例
艾谷思IGOODS 为四川省雅安市一处酒店大堂项目提供打印洞石(侘寂白)作为墙面材料,采用满粘法直接上墙、无需龙骨基层。项目墙面概算约 620㎡,材料规格...
Case study: 1,680㎡ printed travertine wall at a Chongqing Yubei banquet pre-function hall | 8.9m full height and 12 round columns
IGOODS provided printed travertine flexible stone (off-white, horizontal bedd...
cases related
Hotel lobby 480㎡ printed granite (Glacier Green) wall construction case
IGOODS of AIGUOSI provides printed granite (Glacier G...
View cases →
酒店大堂520㎡打印洞石(冰川灰)墙面施工案例
艾谷思IGOODS 为四川省西昌市一处酒店大堂项目提供打印洞石(冰川灰)作为墙面材料,采用满粘法直接上墙、...
View cases →
酒店大堂620㎡打印洞石(侘寂白)墙面施工案例
艾谷思IGOODS 为四川省雅安市一处酒店大堂项目提供打印洞石(侘寂白)作为墙面材料,采用满粘法直接上墙、...
View cases →
Case study: 1,680㎡ printed travertine wall at a Chongqing Yubei banquet pre-function hall | 8.9m full height and 12 round columns
IGOODS provided printed travertine flexible stone (of...
View cases →