
After the project was completed, the owner mentioned a detail during the follow-up visit: configuration plan. This article works backward from that detail.
According to our project experience,
The figures in the article all come from delivery archives; those marked "rough estimate" are inferred according to common industry magnitudes and are used to judge magnitude, not actual measured bills.Acceptance tools need not be complicated: a two-meter straightedge, feeler gauge, hygrometer, and strong flashlight. Use the straightedge to check flatness, the feeler gauge to check joints, and hold the flashlight close to the wall at a grazing angle—undulations and adhesive marks cannot hide under this light.
The page of tables handed to the client
No empty talk; the project basics are as follows.
| City | Suzhou City, Jiangsu Province |
| Space type | Dining entrance facade |
| Business type | Korean BBQ restaurant |
| Main material. | PU stone skin (gray) |
| Construction area | Approx. 130㎡ |
| Construction period | 5 working days |
| Schedule | 5 working days |
| Implementation standards | JG/T 540-2017 |
| Construction location | Korean BBQ restaurant storefront (PU stone skin + grille) and entrance wall |
Waterproofing in indoor wet areas is not in the finish but at the floor junctions: the water-retaining upstand, floor drain slope, and the sealant at the wall-floor junction. The finish is only responsible for "not adding trouble"; these three points are what determine whether seepage occurs.
End treatment documentation
Everyone can install the large surfaces; what really takes time on this project are a few inconspicuous edges: leave an access opening in the side panel of the light cove—whether hidden lighting looks good depends half on the side panel's reflection.
The mockup wall is for three parties: the owner sees the effect, the construction team sees the workmanship, and the supervisor sees the acceptance standard. A 2㎡ mockup wall is more useful than a ten-page proposal presentation. The processes used to install the mockup on the wall are the work instructions for large-area construction.
There is an unspoken consensus in the industry on the common defect grading of panel surfaces: only what is visible to the naked eye at a distance of one meter counts as a defect; what can only be seen under oblique light is considered process variation. Before acceptance, writing "what is acceptable" into the sample wall confirmation form is much cheaper than arguing on site afterward.
When receiving goods, do one thing first: check the batch numbers on the back of the panels against the packing list. If batches are mixed, do not argue—take photos on the spot for the record and distribute the mixed-batch panels across different facades. The cost of remediation is far lower than shrugging at the acceptance site.
A checklist for the next project
The checklist below is one we always go through on restaurant storefront projects:
- Batch verification (batch number on the back of the panel), tight joints in wet areas, wrinkle-free wrapping of columns, texture alignment on feature walls
- Brand and color of edge sealant
- Joint feel (run a fingernail along to check for height difference), straightness of edge sealant, skirting transition, accuracy of switch panel openings
- Measured record of substrate moisture content
Excerpting a few passages from the handover file
What I like doing most during reviews is going through the records from that time. Excerpting four passages:
Material comparison: why choose "PU stone veneer"
Can the base layer bear the dead weight of stone? No (lightweight partition walls, old walls, insulated walls) → prioritize flexible materials; Yes → natural stone is also an option. The three-dimensional stone blocks of PU stone veneer create light-and-shade contrast under the entrance spotlights, giving high visibility at night. 2.0 Why PU stone veneer? The three-dimensional stone blocks are molded from casts, with rounded edges and light dead weight, and can be applied directly even to masonry walls.
Customer industry usage scenario: the real requirements for walls in a barbecue restaurant
It is recommended to use the same material continuously for the facade and interior. Two materials with noticeably different appearances will give customers a sense of disconnection, as if they had "entered a different place." The height differences in texture create light-to-dark transitions under wall-washing lights, which is more important than in daytime. Signage, light boxes, and canopies all need to be fixed to the facade wall. These points must be reserved during the layout stage; fasteners pass through the panels into the substrate and should not land exactly on panel seams.
Introduction
This article explains the material selection rationale, quantity and schedule estimates, construction control points, application photos, and FAQs all at once. The barbecue restaurant project is located in Suzhou, Jiangsu Province. The main wall material is PU stone veneer (gray), used for the barbecue restaurant's storefront (PU stone veneer + grille) and entrance walls. The construction area is approximately 130 ㎡, completed by 3 people in 5 working days.
There are two schools of internal/external corner treatment: full-sheet wrapping and mitered corners. Full-sheet wrapping looks good but demands strict right-angle precision from the substrate; mitered corners are safer, and the eye can accept a slightly offset seam position. External corners in public spaces have a high probability of being hit; better to use mitered corners plus corner guard edging than to gamble for appearance.
How to arrange a 130㎡ into one image
Panel count, waste, and reserve stock—only by calculating these three separately can you keep things straight. The calculation at the time: material calculation area and piece count recorded separately. Both sides of the door opening are laid out from the door center outward, with narrow strips left for the outer internal corner.
The material's character has boundaries. The porous feel of travertine works well with wabi-sabi, but looks dated in a CBD office tower lobby; the cold stratification of slate works well with metal and glass, but feels rigid in community retail with warm yellow lighting. Before choosing a wall, choose the spatial narrative first—material is part of the narrative, not an isolated aesthetic piece.
Those two hours before handover
When the owner's side arrived on site, they asked only three things, and we answered in order: batch verification (batch numbers on the back of panels), tightness of joints in wet areas, wrinkle-free wrapping of columns, and pattern alignment on the feature wall.
Questions received after the project ended
Someone asked this: can old walls be directly covered during renovation? Yes, if the original wall is firm and free of hollow areas; old tile surfaces can also be directly covered. However, before construction, each surface must be checked for hollow areas, and hollow areas must be knocked out and redone—this step cannot be skipped.
Q: Is PU stone skin suitable for spaces like catering entrances?
A: Suitable. The three-dimensional stone blocks are molded into shape, with rounded edges and light weight, and can be directly pasted on masonry walls. This project is used for the entrance of the barbecue shop (PU stone skin + grille) and the entrance wall, with the three-dimensional stone blocks of the PU stone skin forming light and dark under the headlight, with high recognition in the evening.
Someone asked this: does the material have test reports? What standard does it follow? It follows JG/T 540-2017 "Flexible Imitation Stone Decorative Materials for Buildings" (issued by the Ministry of Housing and Urban-Rural Development). Environmental and combustion performance test reports for the corresponding models can be provided with the goods.
Can curved walls and column cladding be done in one continuous piece? — Yes. The material has a certain flexibility and can be bent within a certain radius, so columns, curved walls and irregular corners can be fully wrapped in one piece with continuous seams. The specific usable radius depends on the selected model, thickness and substrate conditions; it is recommended to first test-bend a physical sample at the corresponding curvature to confirm.
The quotation must be broken down to avoid being ripped off: material unit price, substrate treatment, auxiliary materials (adhesive, primer, edge trims), labor, loss, and transport and handling. If one of the six is missing, it may later become an added cost. For loss rate, 8%-12% for flat walls is the conventional range; curved surfaces, columns, and irregular patterns must be calculated separately by developed area.
The packing plan for whole-cabinet transport affects on-site loss. Wooden crates placed upright and laid flat have different rates of edge damage; the last mile from project port to site (mountain roads, ferries, manual handling) must be clarified in advance, and packaging strength should be set according to the worst section of the route.
Grey in this space under the light
The natural-light period and the lighting period are two different walls. Before delivery we specifically looked once in the morning and once in the evening: gray tones are the most honest about light, and the wall changes with whatever color temperature the lighting has; be sure to bring a light to compare on the day of sample confirmation.
The correct approach to knock and bump repair is to replace the panel rather than touch up the paint. Reserving 3%-5% spare material when ordering is for exactly this purpose: the real problem is when the replacement panel does not match the batch color difference. Spare material stored in the warehouse is much safer than loose panels left on site.
Construction rhythm for dining entrance facades
In terms of schedule, 5 working days. There was a power outage for maintenance in the middle, so the crew switched to setting out and did not let the days go empty.
It is recommended that the handover document package consist of five fixed items: layout drawings, batch number list, copies of test reports, maintenance instructions, and material storage location map. We have seen projects that used all five, and projects that argued for two extra weeks because one was missing.
On-site real shots, explained one by one
On-site photos are more honest than renderings. Here are a few photos taken at the time; look at the images first, then we'll discuss the details:
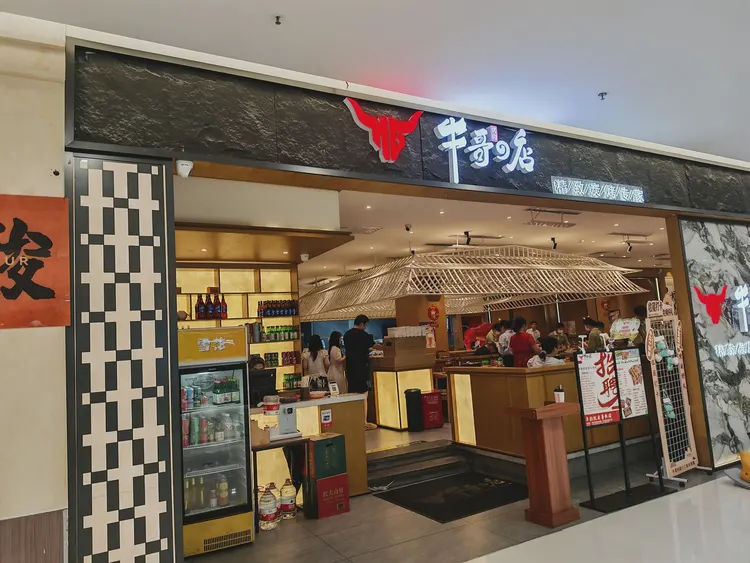
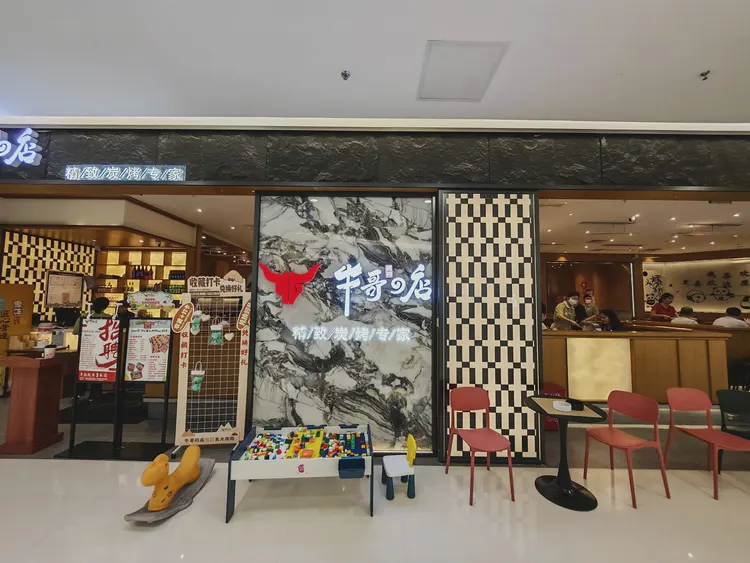
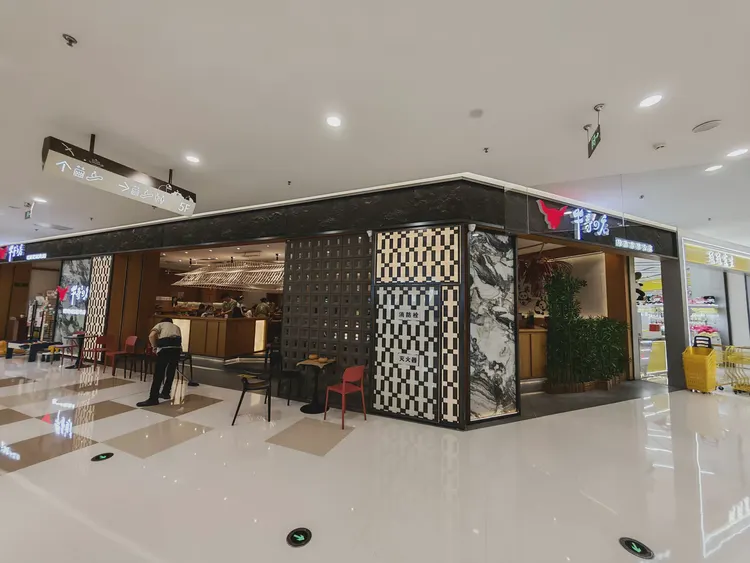
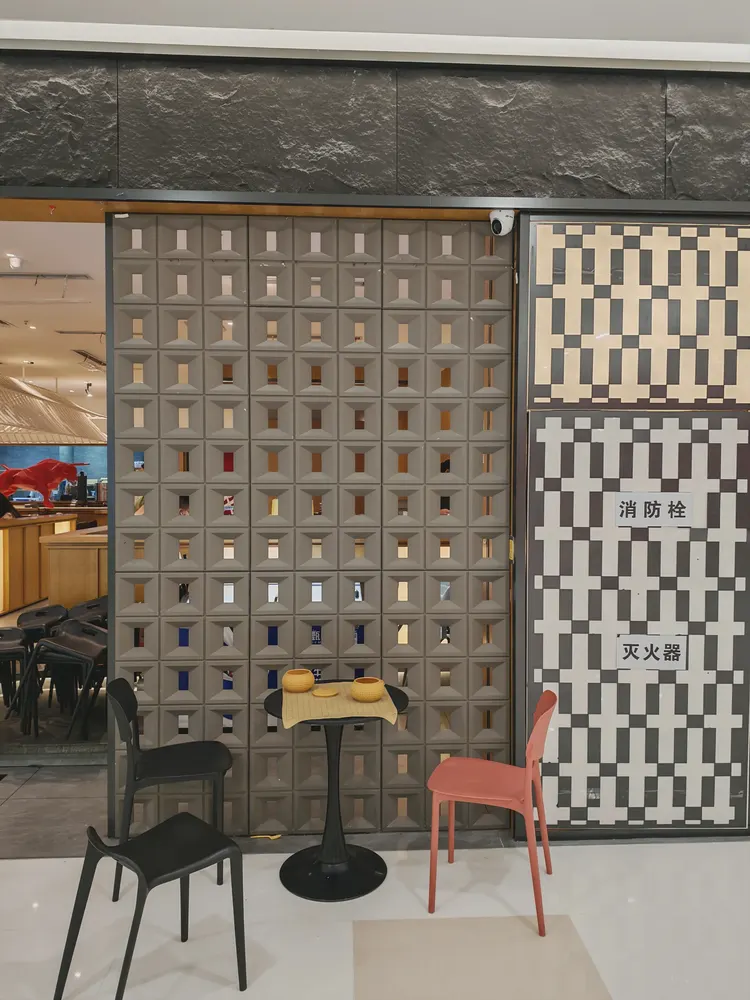
This photo was taken right after finishing a detail: barbecue restaurant entrance, dark stone-textured storefront and decorative walls on both sides.
Side of the Korean BBQ restaurant entrance, stone-texture column, signboard and waiting seats—this is the spot with the least presence in the renderings and the most labor-intensive on site
For new projects, look at renderings; for renovation projects, look at the medical records. In a space that has been lived in for ten years, the walls have far more stories behind them than bare walls: modified electrical points, added partition walls, and water seepage spots patched again and again. Wall inspection before entering the site is more important than any material selection meeting.
How construction proceeds
The crew followed node-based acceptance: hollowing rate (tapping piece by piece), joint width uniformity (checked with a string line), verticality of external corners (straightedge), and panel color difference (inspected under side light). If a node failed, the next node did not start.
The base layer — this point cannot be overstated. Hollowing, sanding, and moisture content are the three unavoidable safety gates for adhesive-applied finishes. Tap once to listen, run a straightedge once to check flatness, and on walls with heavy moisture, take several readings with a moisture meter. When the base layer is substandard, whatever facing material you apply is just putting a lid on the problem — the spots that bulge three months later are often exactly where the work was skipped at the time.
Archive excerpt
A record from that time is kept in the archive: How long does the work usually take? This project is about 130 ㎡, with a crew of 3, completed in 5 working days (including substrate preparation and finishing).
The essence of layout is to avoid narrow strips. If, after aligning panels to the end, a narrow strip of less than 20 cm appears, cutting waste and edge chipping risk will soar. A mature layout method is to place the starting point at an inconspicuous internal corner, leave full panels for the first sight line when entering, and hide cuts behind furniture. The joint positions on the drawings should be checked against the soft furnishing points in advance.
Record of one material selection meeting
The owner was "won over" by the samples: on the day the three candidates were compared on the wall, once the layering of PU stone veneer emerged under angled light, the other two columns were never mentioned again. Corner chips can be replaced panel by panel without redoing the entire wall.
Walls in dark-scene spaces (cinemas, bars, clubs) absorb light severely. Dark colors will appear one level darker under low illuminance. To achieve the effect of "texture visible but material boundaries not visible," it is often necessary to choose a color number half a level lighter than the target color, or embed a wall-washing light at the finishing edge.
The most valuable thing in construction organization is rhythm. Before the crew enters the site, the sample wall, layout marking, and material preparation should all be completed; the most commonly seen waste on site is boards not arriving, people waiting, and lights on. Organize transfer according to "materials never touch the ground," finish and clean the work area the same day, and the construction period will naturally be shortened.
Maintenance after move-in
Follow-up visit after the warranty period, wall condition: panel surfaces clean, seam lines free of accumulated dust and darkening. Daily care is simply a soft cloth with clean water, and a neutral cleaner for stubborn stains; do not use steel wool; if bumped, do not repair it yourself—take a photo and send it back for a matching panel replacement.
The judgment sequence for wet-area walls (bathrooms, spas, pool surrounds) is: intact waterproofing layer → moisture-proof substrate → non-absorbent finish → dense joints. If all four pass, the finish is only the final layer of protection; if any one fails, no matter what is applied, problems will occur. The flexible finish itself does not absorb water, but it places higher demands on the honesty of the substrate.
For business types with strict fire acceptance requirements (cinemas, KTVs, education and training), besides the finish itself, the construction method also matters: whether the cavity needs insulation fill and whether the keel needs a fire-retardant coating. Clarify the acceptance criteria at the material selection stage, rather than changing the plan after entering the site.
Experience and lessons not to repeat
If we could start over, we would allow half a day more for material preparation quantities. The rest of the process can stay the same and still be delivered.
Related reading
Related pages are placed here for easier verification:
Previous:About 110㎡ of light-colored Star Moon Stone in Hangzhou: actual material analysis
Next:Indonesia Semarang pool villa slate: analysis of terrace and poolside walls
Related articles
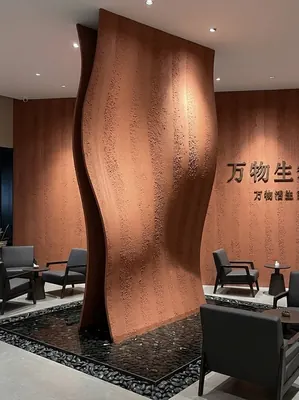
餐饮门头260㎡红色夯土板墙面施工案例
艾谷思IGOODS 为四川省遂宁市一处餐饮门头项目提供红色夯土板作为墙面材料,采用满粘法直接上墙、无需龙骨基层。项目墙面概算约 260㎡,材料规格 122...

Wall construction case study of 860㎡ coarse rammed earth (warm brown) for a standalone hot pot restaurant (including exterior facade)
The standalone hot pot restaurant (including exterior facade) project is loca...
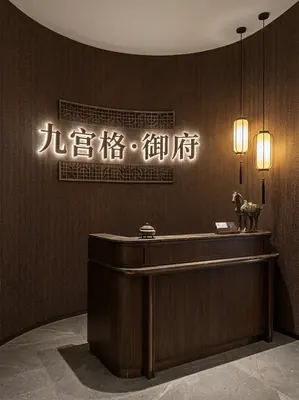
Wall construction case of 1180㎡ hemp-woven soft stone (warm brown) in a hot pot restaurant
The hot pot restaurant project is located in Kaili City, Guizhou Province, an...
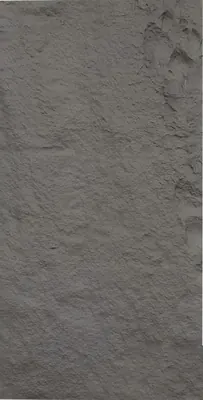
Ultra-thin PU stone veneer wall panel HCP-101A
Ultra-thin PU stone veneer wall panel HCP-101A is a PU three-dimensional wall...
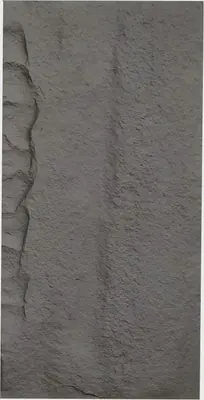
Thin PU Stone Veneer Wall Panel HCP-101B
Thin PU Stone Veneer Wall Panel HCP-101B is a PU 3D wall panel from the IGOOD...
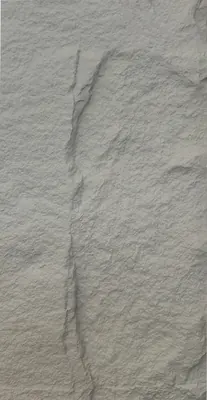
Thick version PU stone-skin wall panel HCP-101C
The thick version PU stone-skin wall panel HCP-101C is a PU three-dimensional...

Large Panel Stone Veneer Relief-600mm PU Stone Veneer Wall Panel HCP-102A
Large Panel Stone Veneer Relief-600mm PU Stone Veneer Wall Panel HCP-102A is ...
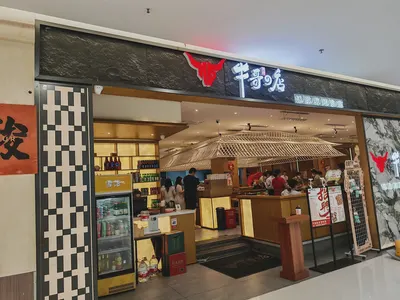
Korean BBQ restaurant 130㎡ PU stone skin (gray) wall construction case
The Korean BBQ restaurant project is located in Suzhou City, Jiangsu Province...
cases related
餐饮门头260㎡红色夯土板墙面施工案例
艾谷思IGOODS 为四川省遂宁市一处餐饮门头项目提供红色夯土板作为墙面材料,采用满粘法直接上墙、无需龙骨...
View cases →
Wall construction case study of 860㎡ coarse rammed earth (warm brown) for a standalone hot pot restaurant (including exterior facade)
The standalone hot pot restaurant (including exterior...
View cases →
Wall construction case of 1180㎡ hemp-woven soft stone (warm brown) in a hot pot restaurant
The hot pot restaurant project is located in Kaili Ci...
View cases →
Korean BBQ restaurant 130㎡ PU stone skin (gray) wall construction case
The Korean BBQ restaurant project is located in Suzho...
View cases →