
Peers will probably wonder about two things: why a clothing retail space of this scale did not choose natural stone, and how a color like Sunward Yellow dares to be used on a large surface. Let's address them one by one.
To sum up in one sentence:
Problems of the same space type are highly similar; the recording method in this article can be directly applied to your own project.The quotation must be broken down to avoid being ripped off: material unit price, substrate treatment, auxiliary materials (adhesive, primer, edge trims), labor, loss, and transport and handling. If one of the six is missing, it may later become an added cost. For loss rate, 8%-12% for flat walls is the conventional range; curved surfaces, columns, and irregular patterns must be calculated separately by developed area.
The underlying account for this Liuzhou order
First present the verifiable information; the subsequent analysis will all revolve around this table.
| City | Liuzhou City, Guangxi Zhuang Autonomous Region |
| Space type | Clothing retail |
| Business type | Clothing retail (customer return photos) |
| Main material. | Travertine flexible stone (Sunward Yellow) |
| Construction area | Approx. 160 ㎡ |
| Construction period | 5 working days |
| Schedule | 5 working days |
| Implementation standards | JG/T 540-2017 |
| Construction location | Clothing store feature wall and storefront wall |
Wall section under a reverse-scheduled construction timeline
In terms of schedule, 5 working days. There was a power outage for maintenance in the middle, so the crew switched to setting out and did not let the days go empty.
Two lessons learned and one mistake
To discuss the retrospective, this project has two lessons worth copying and one lesson not recommended to repeat: 3% extra material was reserved, and it was exactly used in the end; if the waste rate had been reported according to the conventional flat surface, material would have run out once midway.
On-site real shots, explained one by one
There were not many site photos kept at the time, but each one corresponds to a decision point:
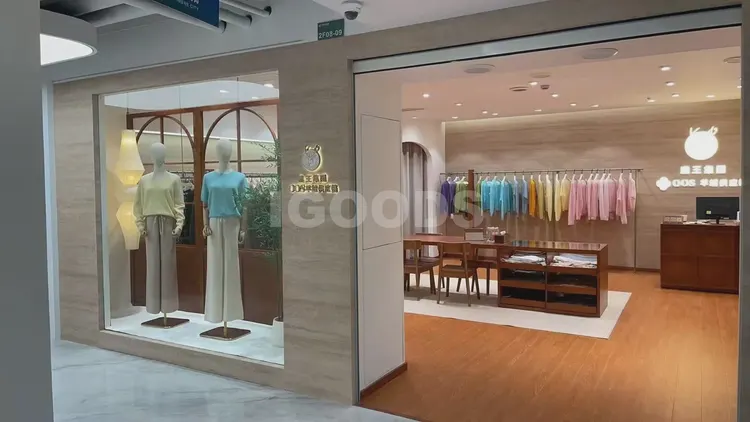
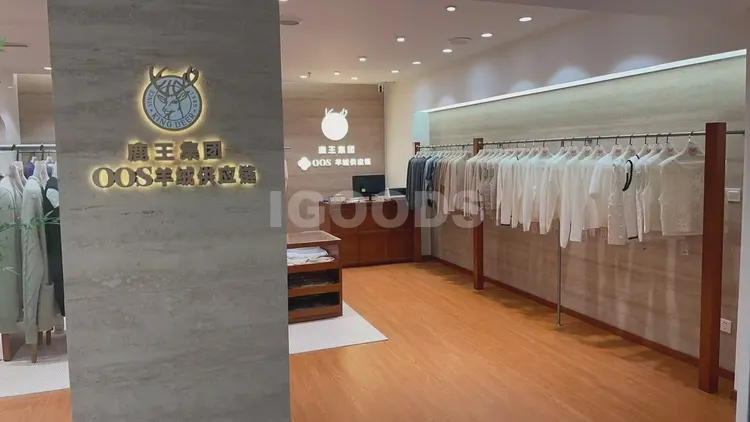
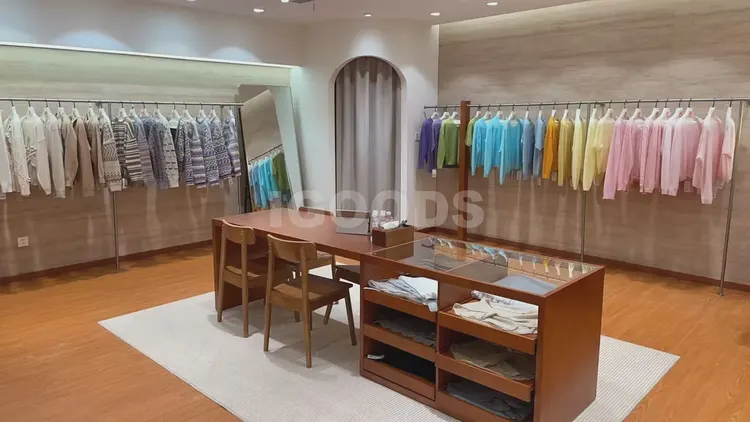
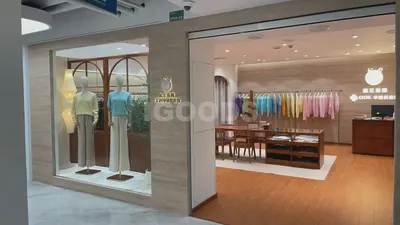
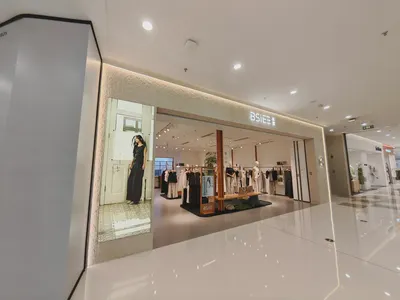
Note the full view of the clothing store entrance, light-colored horizontal-grain finish and glass display window in this image: the light strip position was moved once after setting out
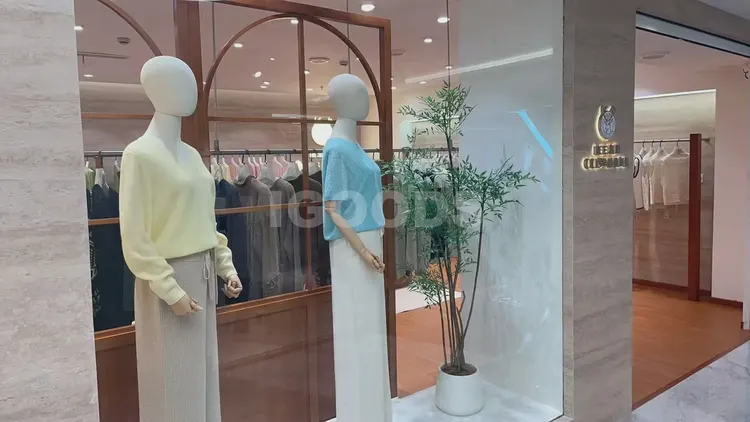
Close-up of display window, light-colored stone texture background with clothing mannequin—this location was a key point of questioning during acceptance
When finishing pieces are used well, the facade grade immediately becomes stable. For supporting pieces such as corner pieces, skirting lines and door frame trim, whether the color follows the main surface or the floor must be finalized before ordering. The most common failure is that after the wall is finished, the line color is half a grade off, and patching either side looks bad.
The essence of layout is to avoid narrow strips. If, after aligning panels to the end, a narrow strip of less than 20 cm appears, cutting waste and edge chipping risk will soar. A mature layout method is to place the starting point at an inconspicuous internal corner, leave full panels for the first sight line when entering, and hide cuts behind furniture. The joint positions on the drawings should be checked against the soft furnishing points in advance.
A regional first store is worth spending an extra two weeks on: it validates all the assumptions—lighting, foot traffic, substrate, logistics routes. The more detailed the first-store file, the cheaper the subsequent stores.
There is an unspoken consensus in the industry on the common defect grading of panel surfaces: only what is visible to the naked eye at a distance of one meter counts as a defect; what can only be seen under oblique light is considered process variation. Before acceptance, writing "what is acceptable" into the sample wall confirmation form is much cheaper than arguing on site afterward.
For walls in spaces that remain open during business hours, maintenance costs deserve more consideration than initial construction cost. Restaurant walls cannot avoid cooking fumes; when choosing finishes, first ask, "Can oil stains be wiped off?" Retail walls cannot avoid shelf handling, so impact resistance at external corners and the 0-300 mm wall base should be prioritized. Factoring cleaning and repair into material selection is how you reduce the burden on the next store manager.
End treatment documentation
Closings reveal true quality. At the clothing store backdrop wall and storefront walls, each position corresponds to a specific closing method; leave a 3 mm process gap where glass meets panels, so the thermal expansion and contraction of the two materials do not fight each other.
The biggest taboo in old wall renovation is "it looks fine." Whether the original tile surface or old latex paint surface can be directly covered depends on an adhesion test, not on visual inspection. Our standard procedure is to apply a sample piece in an inconspicuous corner and, after 48 hours, pry it off by hand; only if it cannot be pried off is large-scale work allowed to start. Skip this step and all that follows is rework.
The decision made on setting-out day
This project's layout has only one theme: leave the complete surface for the first glance. Lay out from the centerline of the door opening to both sides, and push all other cut positions to the rear. Vein-matching positions are marked on the drawing in advance; workers only take panels by number, and the layout is responsible for the veining.
For business types with strict fire acceptance requirements (cinemas, KTVs, education and training), besides the finish itself, the construction method also matters: whether the cavity needs insulation fill and whether the keel needs a fire-retardant coating. Clarify the acceptance criteria at the material selection stage, rather than changing the plan after entering the site.
Walls in retail stores must follow shelving logic: hanging rails, shelves, and advertising positions will all eventually be mounted on the wall. Applying finishes first and then drilling expansion anchors amounts to damaging a newly delivered wall. Marking hole positions on the layout plan and drilling accurately in one pass is standard practice for chain-brand engineering departments.
Daytime natural-light hours are the litmus test for concealed works. Color differences, misaligned joints, and adhesive marks all show up during this period. Scheduling an afternoon acceptance inspection is more practical than any sales pitch.
Pre-entry checklist
Before entering the site, print this checklist and post it at the project office:
- Joint feel (run a fingernail along to check for height difference), straightness of edge sealant, skirting transition, accuracy of switch panel openings
- Batch verification (batch number on the back of the panel), tight joints in wet areas, wrinkle-free wrapping of columns, texture alignment on feature walls
- Relationship between starting point and column positions
- Flatness with a 2-meter straightedge, squareness of internal and external corners, alignment of door opening trim lines, and a quick light check along the inside of light troughs
The most valuable thing in construction organization is rhythm. Before the crew enters the site, the sample wall, layout marking, and material preparation should all be completed; the most commonly seen waste on site is boards not arriving, people waiting, and lights on. Organize transfer according to "materials never touch the ground," finish and clean the work area the same day, and the construction period will naturally be shortened.
Execution of the acceptance checklist
When the owner's side arrived on site, they asked only three things, and we answered in order: batch verification (batch numbers on the back of panels), tightness of joints in wet areas, wrinkle-free wrapping of columns, and pattern alignment on the feature wall.
Same project, same batch is an iron rule. Batch variation of flexible finishes is controlled within the standard range, but when large surfaces are placed side by side, even half a grade of color difference still stands out. For projects with a single area exceeding 1000㎡, our approach is one-time production scheduling, unified batch numbers, and box numbering by floor or area, with panels taken by matching number during installation.
Dampness in underground spaces is a slow-acting issue. The finish can resist mold, but when air humidity is high, condensation will still form water. For projects where fresh air and dehumidification are inadequate, removable inspection nodes should be reserved in the wall solution.
The question I was stumped by at the time
Let me also answer a frequently asked question: How long does the schedule generally take? This project is about 160㎡, with 3 workers, completed in 5 working days (including substrate treatment and closure). Installation itself accounts for about 2 working days, and the rest is substrate, layout, and acceptance. The main variable in the schedule is substrate conditions—substrate rework will directly eat up the time saved by installation.
Can curved walls and column cladding be done in one continuous piece? — Yes. The material has a certain flexibility and can be bent within a certain radius, so columns, curved walls and irregular corners can be fully wrapped in one piece with continuous seams. The specific usable radius depends on the selected model, thickness and substrate conditions; it is recommended to first test-bend a physical sample at the corresponding curvature to confirm.
Does the material have test reports? What standard does it follow?—It follows JG/T 540-2017 "Flexible Stone-like Decorative Facing Materials for Buildings" (issued by the Ministry of Housing and Urban-Rural Development). Environmental and combustion performance test reports for the corresponding model can be provided with the goods.
Someone asked this: what about fire performance? The material has flame-retardant performance; the specific combustion performance rating is subject to the valid test report for the selected model. If the project has clear fire rating requirements, please state them before ordering.
Archived text, the part not changed by a single character
Three passages of original text from the handover file, placed here in the chapter order at the time, with numbers and wording unchanged:
Configuration plan
Texture and light note: The pore texture has actual relief, producing layered shadows under angled light. The table below breaks down the actual space of a clothing retail store (customer photo) and explains why each part is specified this way. 3.2 Allocation by space In the same project, different parts have different requirements for materials.
Usage effect and daily maintenance
7.1 Perceptual and lighting environment: The holes and textures have actual undulations, and shadows appear under oblique light. The same wall has different perceptions under different color temperatures: warm light makes it feel warmer, and cool light makes it feel neutral. This is also the reason why it is recommended to send physical samples for comparison under actual lighting. This article does not provide a single quotation to avoid misguidance; if you need a project quotation, please provide the area, color, and delivery location.
Construction process and acceptance control points: on-site method for "Travertine Flexible Stone"
Layout setting-out: Put the layout drawing onto paper before starting work, and mark the positions of door and window openings, switches and sockets, and internal and external corners; try to align the joint lines of different wall surfaces in the same space. Closing treatment: Use matching closing pieces for internal and external corners; execute the junctions with door frames, ceilings, and floors according to the node drawings. Substrate treatment: For walls with high moisture content, apply a sealing primer first; choose different interface agents for different substrates.
A single sentence in the inquiry—"quote per square meter including waste"—can filter out most communication noise. Projects with standardized quotation sheets are likely to have standardized construction as well—this is a relevant correlation in the industry.
Record of one material selection meeting
The selection table has three columns: ceramic tile, natural stone, and travertine flexible stone. Stack the on-site costs of the three columns, and the answer emerges on its own: factoring in substrate treatment, waste, and schedule, the overall cost remains manageable.
The correct way to use samples is the "three comparisons": compare with the rendering to set the character, compare with on-site lighting to determine color temperature response, and compare with a substrate mockup to determine the wall installation method. Projects that only hold the sample, take a photo and send it via WeChat have a noticeably higher rework rate—the screen will not tell you about curved-surface rebound.
Three things separate a rendering from the real thing: vein density, seam method and gloss level. Stone-texture walls in rendering libraries are often 'density-amplified versions'; looking for materials by copying them directly will disappoint. The reliable path is to use the rendering to set the character, use samples to set specifications, and use a 1:1 sample wall to set final expectations.
The packing plan for whole-cabinet transport affects on-site loss. Wooden crates placed upright and laid flat have different rates of edge damage; the last mile from project port to site (mountain roads, ferries, manual handling) must be clarified in advance, and packaging strength should be set according to the worst section of the route.
Maintenance after move-in
Follow-up visit after the warranty period, wall condition: two slight impact marks at external corners, restored to zero after panel replacement. Daily care is simply not directing a steam mop at the seams; when the sofa is occasionally moved, check the hanging hardware behind it.
How construction proceeds
The construction process is simple: full-surface bonding method, install directly on the wall after the substrate is leveled. But for clothing retail walls, the trouble is all in the joints and edges.
There is a little trick in on-site management: after each wall is finished, take a "growth photo" with a mobile phone at a fixed position. Compare during acceptance, check batches during maintenance, and use as a case for the next project—one photo serves three purposes. Those photos in the project file that now seem redundant were all key evidence that saved the day at the time.
The conspiracy of lighting and color
Choose the wrong color temperature, and the material choice is wasted. Lighting conditions for this project: yellow tones absorb light noticeably; dark spaces either need added wall-washing light or a one-step reduction in saturation.
Related reading
Compare them side by side for more confidence:
Previous:About 210㎡ White New Line Stone in a Zhuhai Clothing Store: Display Wall Analysis
Next:Analysis of approximately 560㎡ original wood grain flexible stone wall at Quanzhou Children's Hall
Related articles
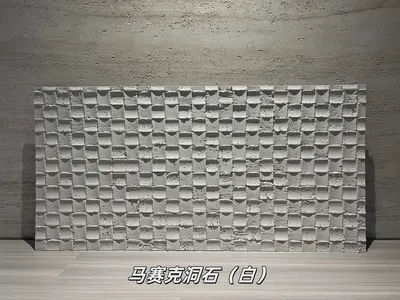
White mosaic travertine flexible stone
White mosaic travertine is a flexible stone in the travertine series. Its sur...
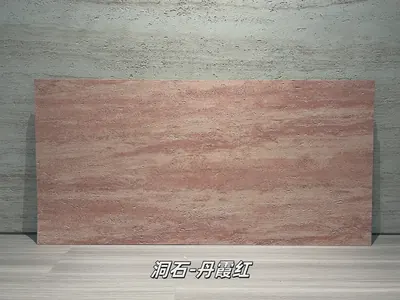
Danxia Red Travertine Flexible Stone
Danxia Red Travertine is a flexible stone in the travertine series. Its color...
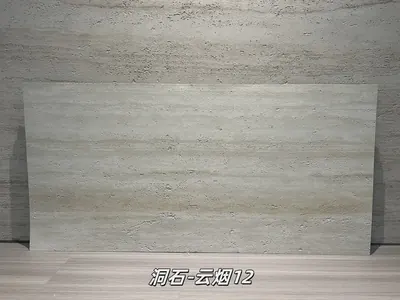
Cloud Smoke 12 Travertine Flexible Stone
Cloud Smoke 12 Travertine is a flexible stone from the Travertine Series, wit...
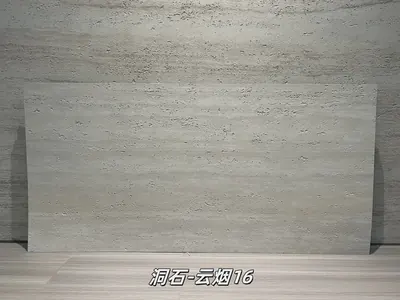
Cloud Smoke 16 Travertine Flexible Stone
Cloud Smoke 16 Travertine is a flexible stone from the Travertine Series, wit...

Clothing store 210㎡ New Line Stone (white) wall construction case
The clothing store project is located in Zhuhai City, Guangdong Province, and...
Clothing retail (customer return photos) 160㎡ travertine (Xiangri Yellow) wall construction case
The clothing retail (customer return photos) project is located in Liuzhou Ci...
Clothing store 200㎡ Star Moon Stone (light color) wall construction case
The clothing store project is located in Zhuzhou City, Hunan Province, and th...
Children's clothing store 150㎡ New Line Stone (white) wall construction case
The children's clothing store project is located in Yichang City, Hubei Provi...
cases related
Clothing store 210㎡ New Line Stone (white) wall construction case
The clothing store project is located in Zhuhai City,...
View cases →
Clothing retail (customer return photos) 160㎡ travertine (Xiangri Yellow) wall construction case
The clothing retail (customer return photos) project ...
View cases →
Clothing store 200㎡ Star Moon Stone (light color) wall construction case
The clothing store project is located in Zhuzhou City...
View cases →
Children's clothing store 150㎡ New Line Stone (white) wall construction case
The children's clothing store project is located in Y...
View cases →