
Is PU stone skin suitable for coffee bar counters? It's better to look at a real project that has already been completed than to just list parameters.
Let me give you a straight answer first:
The figures in the article all come from delivery archives; those marked "rough estimate" are inferred according to common industry magnitudes and are used to judge magnitude, not actual measured bills.The cutout list is a hidden product of the measurement stage: sockets, switches, access panels, monitoring positions, and sprinkler heads each correspond to an on-site cutout. The hole location drawing is issued together with the layout drawing, so the crew receives complete instructions rather than cutting wherever they get to.
Settle the base accounts first
First present the verifiable information; the subsequent analysis will all revolve around this table.
| City | Changsha City, Hunan Province |
| Space type | Coffee bar counter |
| Business type | Milk tea shop |
| Main material. | PU stone skin (gray) |
| Construction area | Approx. 60 ㎡ |
| Construction period | 3 working days |
| Schedule | 3 working days |
| Implementation standards | JG/T 540-2017 |
| Construction location | Milk tea shop cashier counter and bar background wall |
Wall-washing light flattens the texture, spotlights deepen the texture, and globe bulbs make the texture look warm—the same finish can show three different faces under three types of luminaires. Before finalizing the sample, obtain the luminaire selection schedule and test each one against the sample; this is far more reliable than only listening to the designer describe the color temperature.
The packing plan for whole-cabinet transport affects on-site loss. Wooden crates placed upright and laid flat have different rates of edge damage; the last mile from project port to site (mountain roads, ferries, manual handling) must be clarified in advance, and packaging strength should be set according to the worst section of the route.
The correct approach to knock and bump repair is to replace the panel rather than touch up the paint. Reserving 3%-5% spare material when ordering is for exactly this purpose: the real problem is when the replacement panel does not match the batch color difference. Spare material stored in the warehouse is much safer than loose panels left on site.
When receiving goods, do one thing first: check the batch numbers on the back of the panels against the packing list. If batches are mixed, do not argue—take photos on the spot for the record and distribute the mixed-batch panels across different facades. The cost of remediation is far lower than shrugging at the acceptance site.
How to arrange 60 square meters into one image
Panel count, waste, and reserve stock—only by calculating these three separately can you keep things straight. The calculation at the time: material calculation area and piece count recorded separately. Before finalizing the layout drawing, the soft-furnishing points were checked once—this is the only way to avoid "furniture in place, seam in the middle."
Three things separate a rendering from the real thing: vein density, seam method and gloss level. Stone-texture walls in rendering libraries are often 'density-amplified versions'; looking for materials by copying them directly will disappoint. The reliable path is to use the rendering to set the character, use samples to set specifications, and use a 1:1 sample wall to set final expectations.
The logic of submission documents is "model corresponds to report." Combustion performance is classified according to GB 8624, and the sample name, specification, and production date in the test report must match the purchased model one-to-one. Using the report for model A to submit a project for model B, what is usually rejected is not the material, but the documents.
Further questions related to PU stone skin
Q: Can it be applied directly when renovating an old wall?
Answer: It can be applied if the original wall is firm and free of hollow areas; old tile surfaces can also be directly covered. However, before construction, every wall must be checked for hollow areas, and hollow areas must be knocked out and redone—this step cannot be skipped.
How long does the schedule generally take?—This project is about 60 ㎡, with a crew of 2, completed in 3 working days (including substrate treatment and finishing). The application itself accounts for about 0 working days, and the rest is substrate work, setting out and acceptance. The main variable in the schedule is substrate condition—substrate rework will directly eat up the time saved on application.
By the way, answering a frequently asked question: can it be used in damp areas? Yes. The material itself does not absorb water, and after installation the wall surface is less prone to dampness and mold, so it can be used in damp environments and underground spaces. For wet areas such as restrooms, it is recommended to confirm the specific scope in conjunction with the wet/dry zoning plan.
Q: Is PU stone veneer suitable for a space like a coffee bar?
Answer: Suitable. Molded from three-dimensional stone blocks, with rounded edges and light weight, it can be directly applied even to masonry walls. This project uses it for the milk tea shop cashier counter and bar counter backdrop; the stone block texture of PU stone veneer is clearly layered on the small-scale bar backdrop.
Once a chain brand turns a single-store mock-up into a standard manual, the cost of replicating new stores drops precipitously: layout modules are fixed, detail construction is fixed, auxiliary material lists are fixed, and even the waste rate has a historical average to check against. The wall surface changes from a "design work" to a "delivered product"—this is the endpoint of material selection for chain retail.
The correct way to use samples is the "three comparisons": compare with the rendering to set the character, compare with on-site lighting to determine color temperature response, and compare with a substrate mockup to determine the wall installation method. Projects that only hold the sample, take a photo and send it via WeChat have a noticeably higher rework rate—the screen will not tell you about curved-surface rebound.
Two lessons learned and one mistake
If we could start over, we would allow half a day more for setting out the column segment layout. The rest of the process can stay the same and still be delivered.
The most common request from designer friends is "how do we make this wall in the rendering happen on site?". Our answer is usually the same: first answer three questions—where does the light come from, where do people walk, and which wall does the furniture lean against. Once the three questions are answered, the material list shortens itself.
The iron grip on the adhesive mounting stage
The construction difficulty of this order is not in the hands but in the sequence: inspection windows are left between the three stages of sample wall—large area—closing, which looks like half a day wasted but actually wins back three days.
The projects that go most smoothly for customers usually share one thing in common: they bring drawings and a list of questions to the first meeting. What material suppliers fear most is not being picky, but vagueness; the more specific you are, the more valuable the answers I give.
Dampness in underground spaces is a slow-acting issue. The finish can resist mold, but when air humidity is high, condensation will still form water. For projects where fresh air and dehumidification are inadequate, removable inspection nodes should be reserved in the wall solution.
Wall base, external corners, door edges—the trade jokingly calls these the "three exposed zones." Material selection at these three locations should prioritize hard edge protection: corner guards, metal trim, stone threshold. Sacrifice a little of the pure decorative look in exchange for three years without cracking or chipping.
How to finish joints, corners and ends
Closings reveal true quality. At the milk tea shop cashier counter and bar backdrop wall, each position corresponds to a specific closing method; end cap strips match the color—the attitude of a joint stands exactly where people linger.
After years in the industry, a pattern emerges: projects that fail are often not due to wrong material selection but wrong sequence of steps—choosing the pattern before calculating waste, quoting before layout, paying before inspecting the substrate. Get the sequence right, and any material choice leaves room to maneuver.
A self-check list you can copy directly
The checklist below is one we always go through on coffee bar projects:
- Relationship between starting point and column positions
- Brand and color of edge sealant
- Hollowing rate (tap each panel), joint width uniformity (check with a string line), verticality of external corners (straightedge), panel color difference (inspect under side light)
- Measured record of substrate moisture content
The quotation must be broken down to avoid being ripped off: material unit price, substrate treatment, auxiliary materials (adhesive, primer, edge trims), labor, loss, and transport and handling. If one of the six is missing, it may later become an added cost. For loss rate, 8%-12% for flat walls is the conventional range; curved surfaces, columns, and irregular patterns must be calculated separately by developed area.
Grey in this space under the light
Gray is a color that is particular about light. Under lighting, gray tones are the most honest about light—the wall changes with whatever color temperature the light has. Be sure to bring a light to compare on the day you confirm the sample.
The most valuable thing in construction organization is rhythm. Before the crew enters the site, the sample wall, layout marking, and material preparation should all be completed; the most commonly seen waste on site is boards not arriving, people waiting, and lights on. Organize transfer according to "materials never touch the ground," finish and clean the work area the same day, and the construction period will naturally be shortened.
Bending is not done at will. The material's bendable radius is related to thickness, backing and substrate stiffness; the consequence of forced bending is internal-stress spring-back — it sticks at the time, and half a year later the seams open up for you to see. Always test-bend at small-radius locations before ordering.
Four passages copied from the archive
What I like doing most during reviews is going through the records from that time. Excerpting four passages:
Usage effect and daily maintenance
7.1 Perceptual and lighting environment Three-dimensional stone block casting, rounded edges, light weight, and can be directly pasted on masonry walls. The perception of the same wall is different under different color temperatures: warm light is warm, and cold light is neutral. This is also the reason why it is recommended to send physical samples for comparison under actual lighting. No single quotation is given in this article to avoid misguidance; for project quotations, please provide area, color, and delivery location.
Communication and confirmation process
Our side: PU stone veneer is adhesive-mounted—no framing, no wet work—so a small bar counter backdrop can be done in a day. Below are several questions both parties confirmed during material selection and construction, organized in conversation order.
Construction process and acceptance control points: on-site method for "PU Stone Skin"
Cutting: Cut according to the layout dimensions; cover cut edges with edge trim or pressure strips; determine hole positions at the layout stage. Substrate preparation: For walls with high moisture content, apply a sealing primer first; the interface agent selection differs for different substrates. Full-surface bonding installation: The full-surface bonding method is recommended; start laying from the main viewing surface and proceed toward both sides and upward; for curved areas, lay along the curve direction.
The base layer — this point cannot be overstated. Hollowing, sanding, and moisture content are the three unavoidable safety gates for adhesive-applied finishes. Tap once to listen, run a straightedge once to check flatness, and on walls with heavy moisture, take several readings with a moisture meter. When the base layer is substandard, whatever facing material you apply is just putting a lid on the problem — the spots that bulge three months later are often exactly where the work was skipped at the time.
Acceptance carried out in four stages
Acceptance was not formalistic: batch verification (batch number on the back of the panel), tight joints in wet areas, no wrinkles on cylindrical wrapping, and texture alignment on the feature wall. Two small dents were picked out on the spot, repaired with patches, and half a day's work was deducted from the crew.
The essence of layout is to avoid narrow strips. If, after aligning panels to the end, a narrow strip of less than 20 cm appears, cutting waste and edge chipping risk will soar. A mature layout method is to place the starting point at an inconspicuous internal corner, leave full panels for the first sight line when entering, and hide cuts behind furniture. The joint positions on the drawings should be checked against the soft furnishing points in advance.
Actual photo site of the coffee bar counter
There were not many site photos kept at the time, but each one corresponds to a decision point:
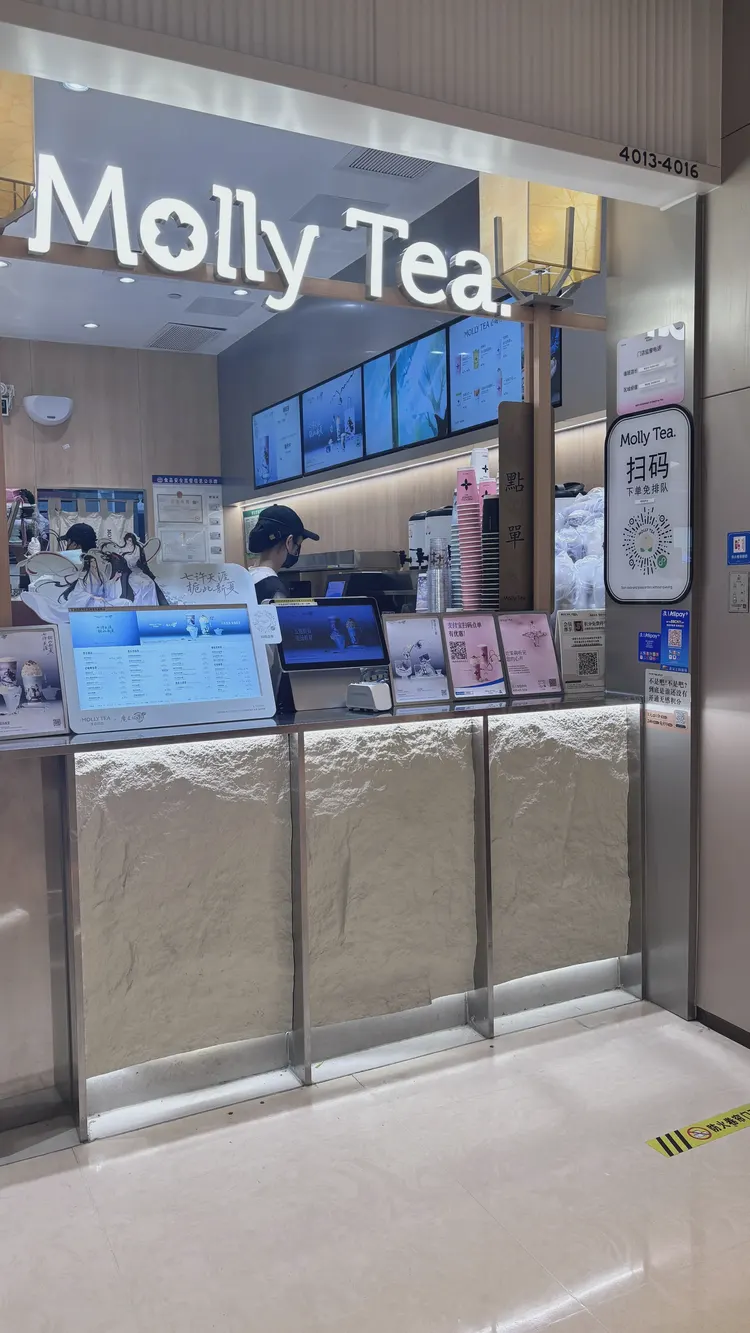
This photo was taken right after finishing a detail: milk tea shop counter and storefront, gray facade and in-store equipment.
Note another view of the milk tea shop storefront, gray counter and signboard in this image: the edge trim color is most easily compared here
A blunt statement in the archive
Excerpted from the construction log: 7. Use effect and daily maintenance 7.1 Visual impression and light environment Three-dimensional stone blocks are formed by mold casting, with rounded edges and light dead weight; they can also be directly applied to masonry walls.
Walls in dark-scene spaces (cinemas, bars, clubs) absorb light severely. Dark colors will appear one level darker under low illuminance. To achieve the effect of "texture visible but material boundaries not visible," it is often necessary to choose a color number half a level lighter than the target color, or embed a wall-washing light at the finishing edge.
How the schedule was planned
3 working days, this speed depends on 'materials not falling to the ground': the board goes directly from the truck to the work surface.
The ceiling junction is a detail hotspot. Where the wall meets the ceiling, either leave a reveal to conceal lighting or cover it with an internal corner trim. Where it butts directly against the plaster cornice, if a crack opens up, it is unclear whose responsibility it is. Writing the responsibility boundary clearly in the contract is more useful than anything else.
Daily cleaning of the coffee bar counter
Don't overcomplicate maintenance. Don't blast the joints with a steam mop; when the sofa is occasionally moved, check the hanging hardware behind it—that's all.
Related reading
Follow the links below to trace every judgment in this article back to its source:
Previous:Analysis of approximately 140㎡ gold gilded panel at a hotel in Nanchang: entrance wall
Next:Wuxi approx. 80㎡ gray fabric-texture stone: on-site photos and joint analysis
Related articles
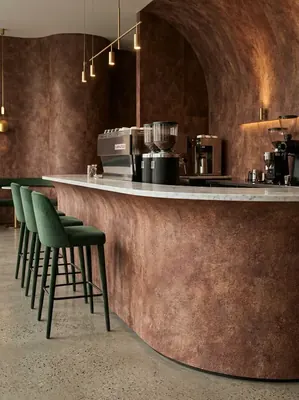
Coffee and tea drinks 220㎡ (sandstone texture) wall construction case
IGOODS provided flexible stone (sandstone texture) as wall material for a cof...
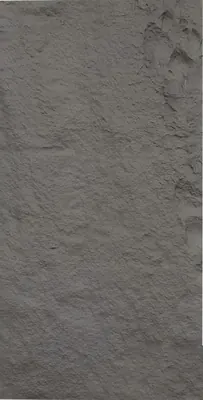
Ultra-thin PU stone veneer wall panel HCP-101A
Ultra-thin PU stone veneer wall panel HCP-101A is a PU three-dimensional wall...
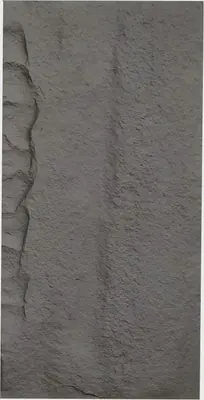
Thin PU Stone Veneer Wall Panel HCP-101B
Thin PU Stone Veneer Wall Panel HCP-101B is a PU 3D wall panel from the IGOOD...
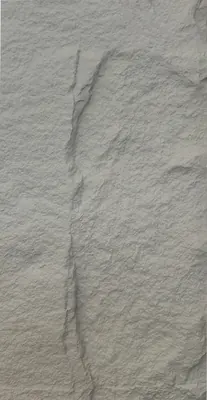
Thick version PU stone-skin wall panel HCP-101C
The thick version PU stone-skin wall panel HCP-101C is a PU three-dimensional...
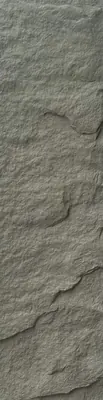
Large Panel Stone Veneer Relief-600mm PU Stone Veneer Wall Panel HCP-102A
Large Panel Stone Veneer Relief-600mm PU Stone Veneer Wall Panel HCP-102A is ...
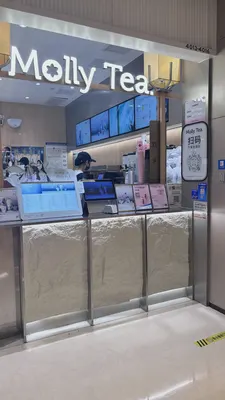
Milk tea shop 60㎡ PU stone skin (gray) wall installation case
The milk tea shop project is located in Changsha, Hunan Province, and the mai...