
Construction case of rough rammed earth (New South Red) wall surface in a 1860㎡ atrium-style hot pot restaurant
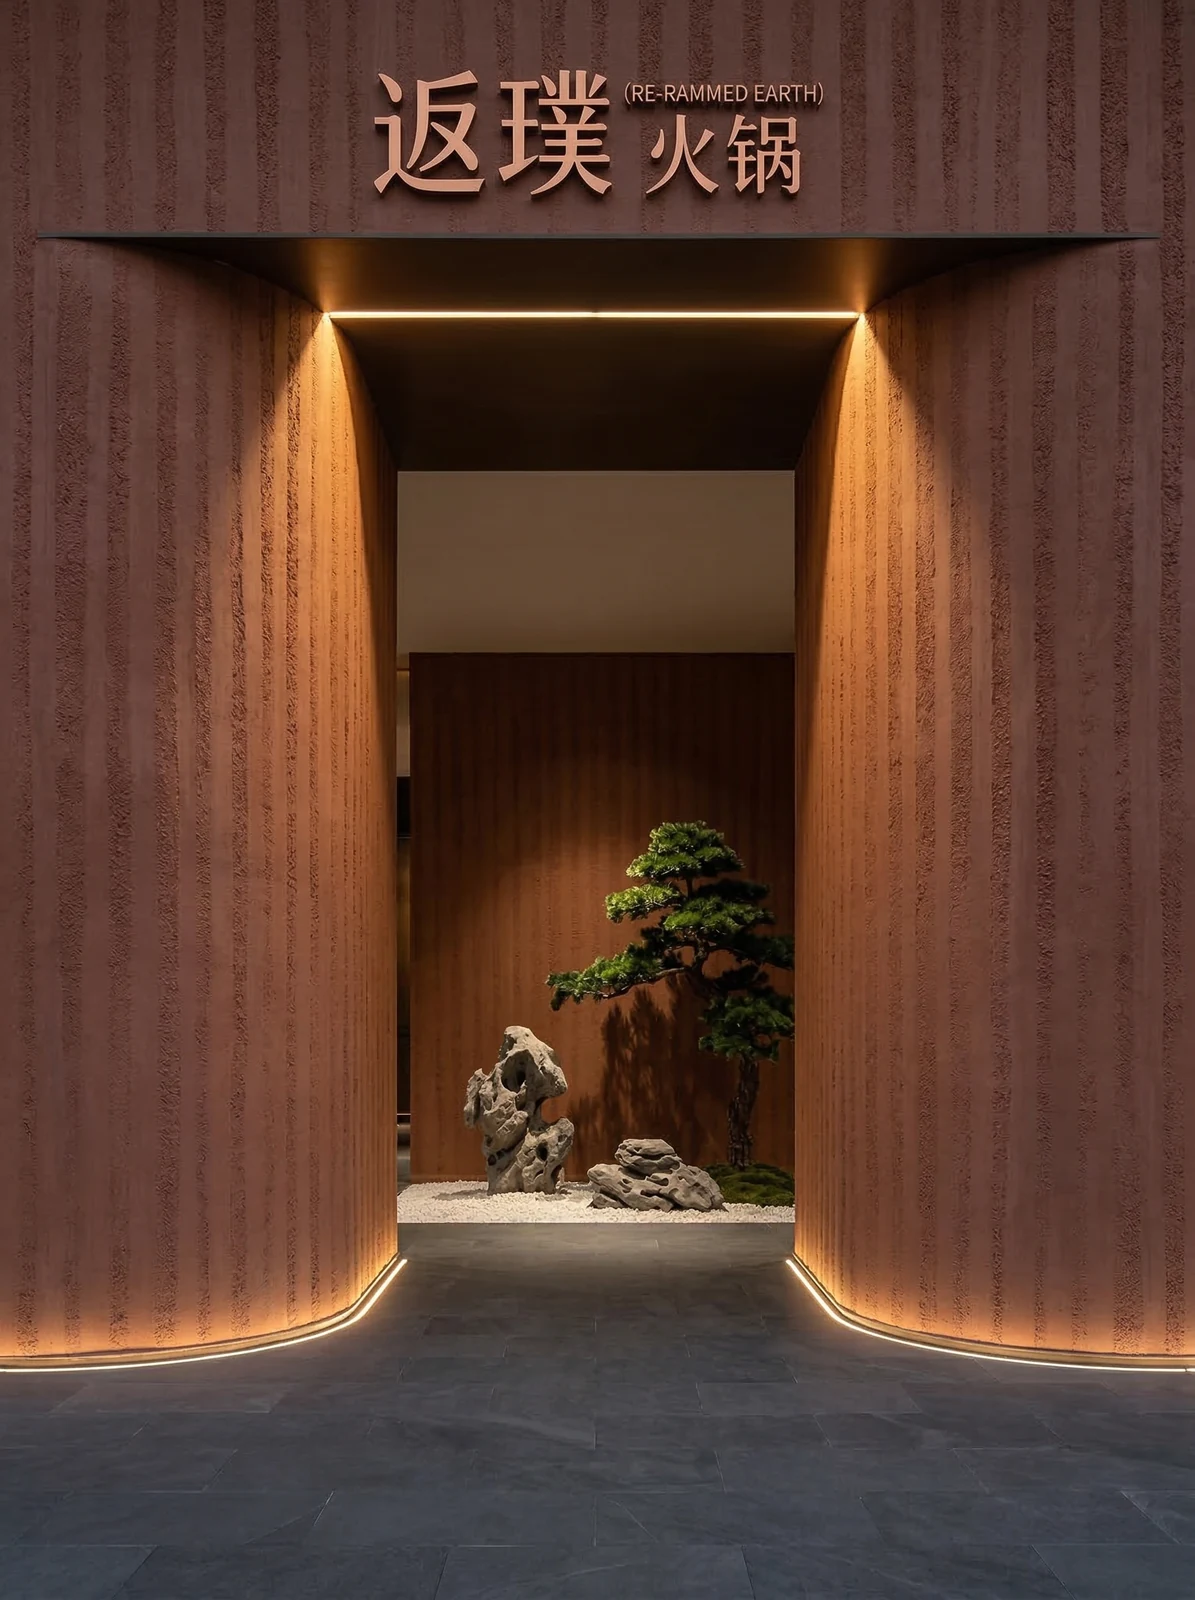
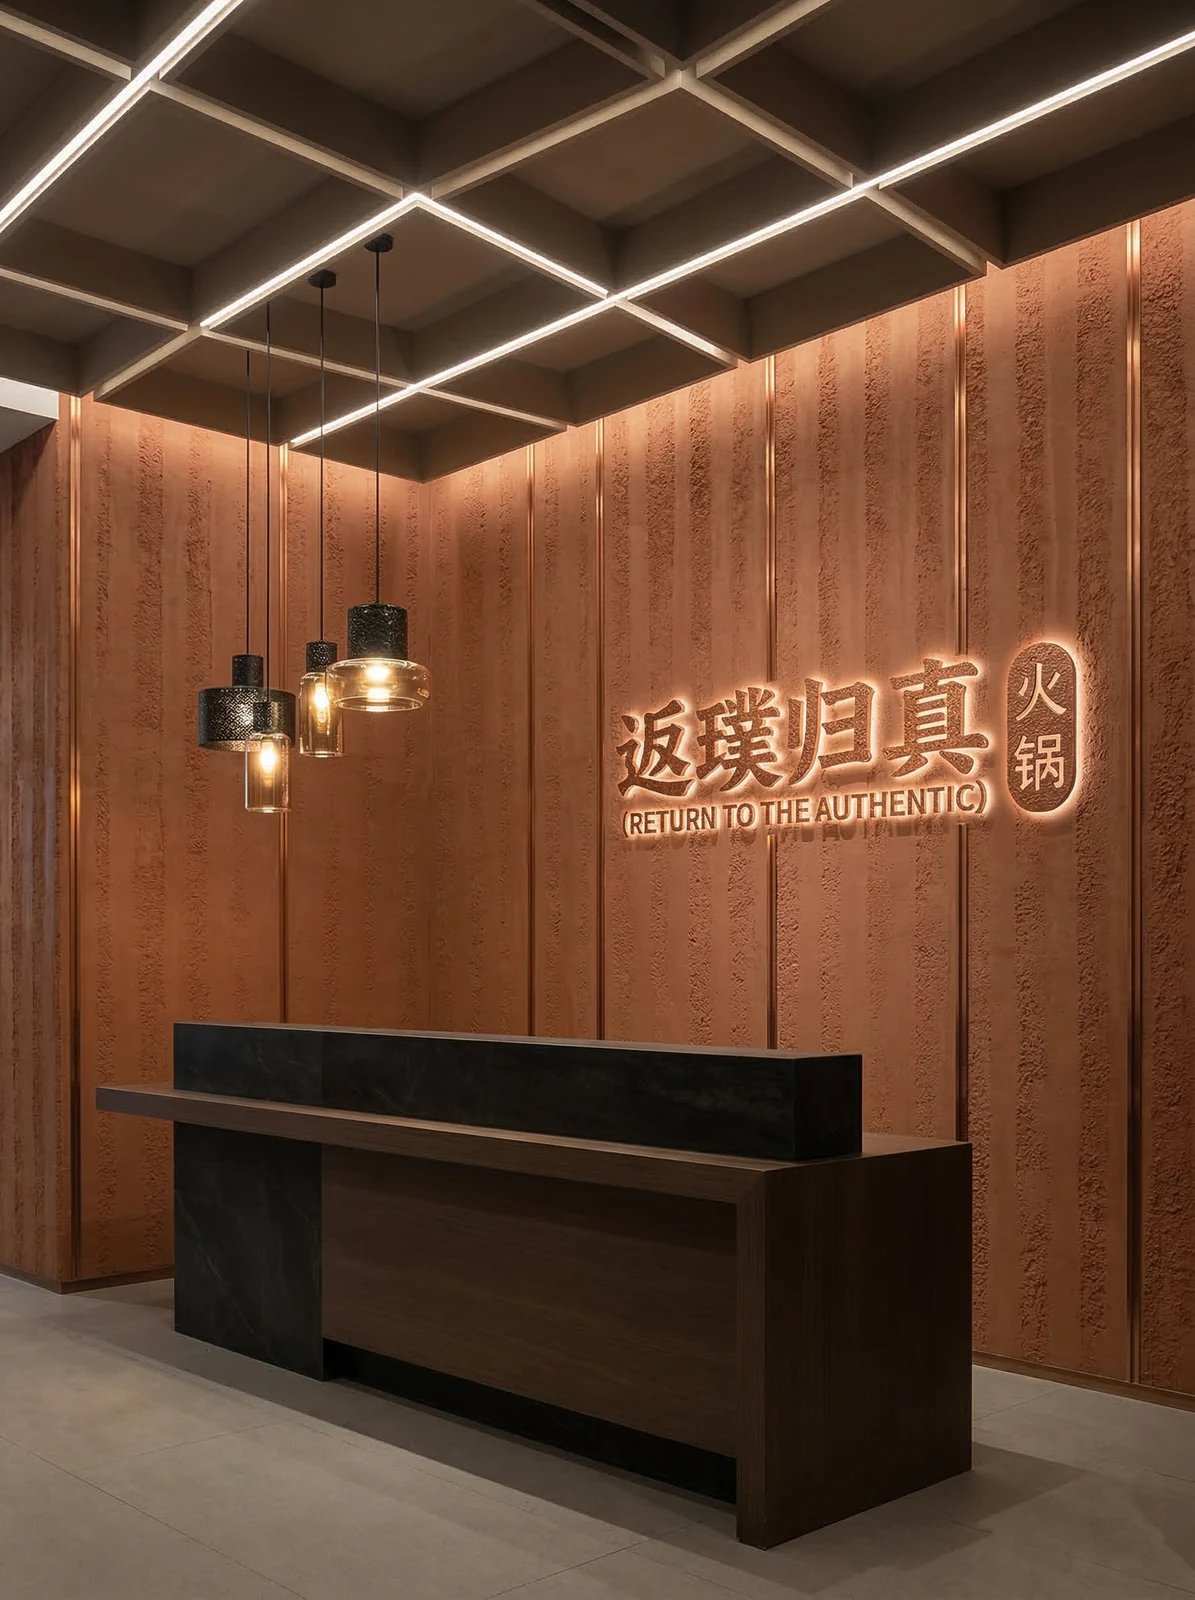
The atrium-style hot pot restaurant project is located in Nan'an District, Chongqing, and the main wall material selected is rough rammed earth flexible stone (New South Red), used for the hot pot restaurant's atrium, corridor, spiral staircase and lobby walls. The construction area is about 1860 ㎡, completed by 6 people in 30 working days.
Introduction
The atrium-style hot pot restaurant project is located in Nan'an District, Chongqing, and the main wall material selected is Coarse rammed earth flexible stone (New South Red), used for the atrium, corridors, spiral staircase, and main hall walls of a hot pot restaurant, with a construction area of about 1860 ㎡, completed by 6 people in 30 working days. This article explains the material selection basis, quantity and schedule estimation, construction control points, application photos, and common questions all at once.
- Project: Atrium-style hot pot restaurant · hot pot restaurant atrium, corridor, spiral staircase and main hall walls
- Location: Nan'an District, Chongqing
- Main material: Coarse rammed earth flexible stone (New South Red)
- Construction area: Approx. 1860 ㎡
- Schedule: 30 working days / 6 people
- Implementation standards: JG/T 540-2017
Project file
| Project | Content |
|---|---|
| Project name | Hot pot restaurant wall material recommendation - Red Rammed earth board flexible stone application case (Chongqing Nan'an) |
| Space type | Food & Beverage Spaces |
| Business type | Atrium-style hot pot restaurant |
| City | Nan'an District, Chongqing |
| Scale | Atrium 3-story corridor + lobby with 32 tables |
| Construction location | Walls of the atrium, corridor, spiral staircase and hall in a hot pot restaurant |
| Main material. | Coarse rammed earth flexible stone (Xinnanhong) |
| Construction area | Approx. 1,860 ㎡ |
| Construction period | 30 working days |
| Number of construction workers | 6 people |
| Implementation standards | JG/T 540-2017"Flexible Stone-like Facing Materials for Buildings" |
1. Customer industry usage scenario: the real wall requirements of an atrium-style hot pot restaurant
- Organization of high-altitude work in the multi-level atrium Cross-level construction in the atrium: the organization of scaffolding and work surfaces directly determines the construction period. The adhesive method without keels can proceed continuously without separately erecting dry-hanging frames for each floor; this is its most intuitive difference compared with dry-hung stone.
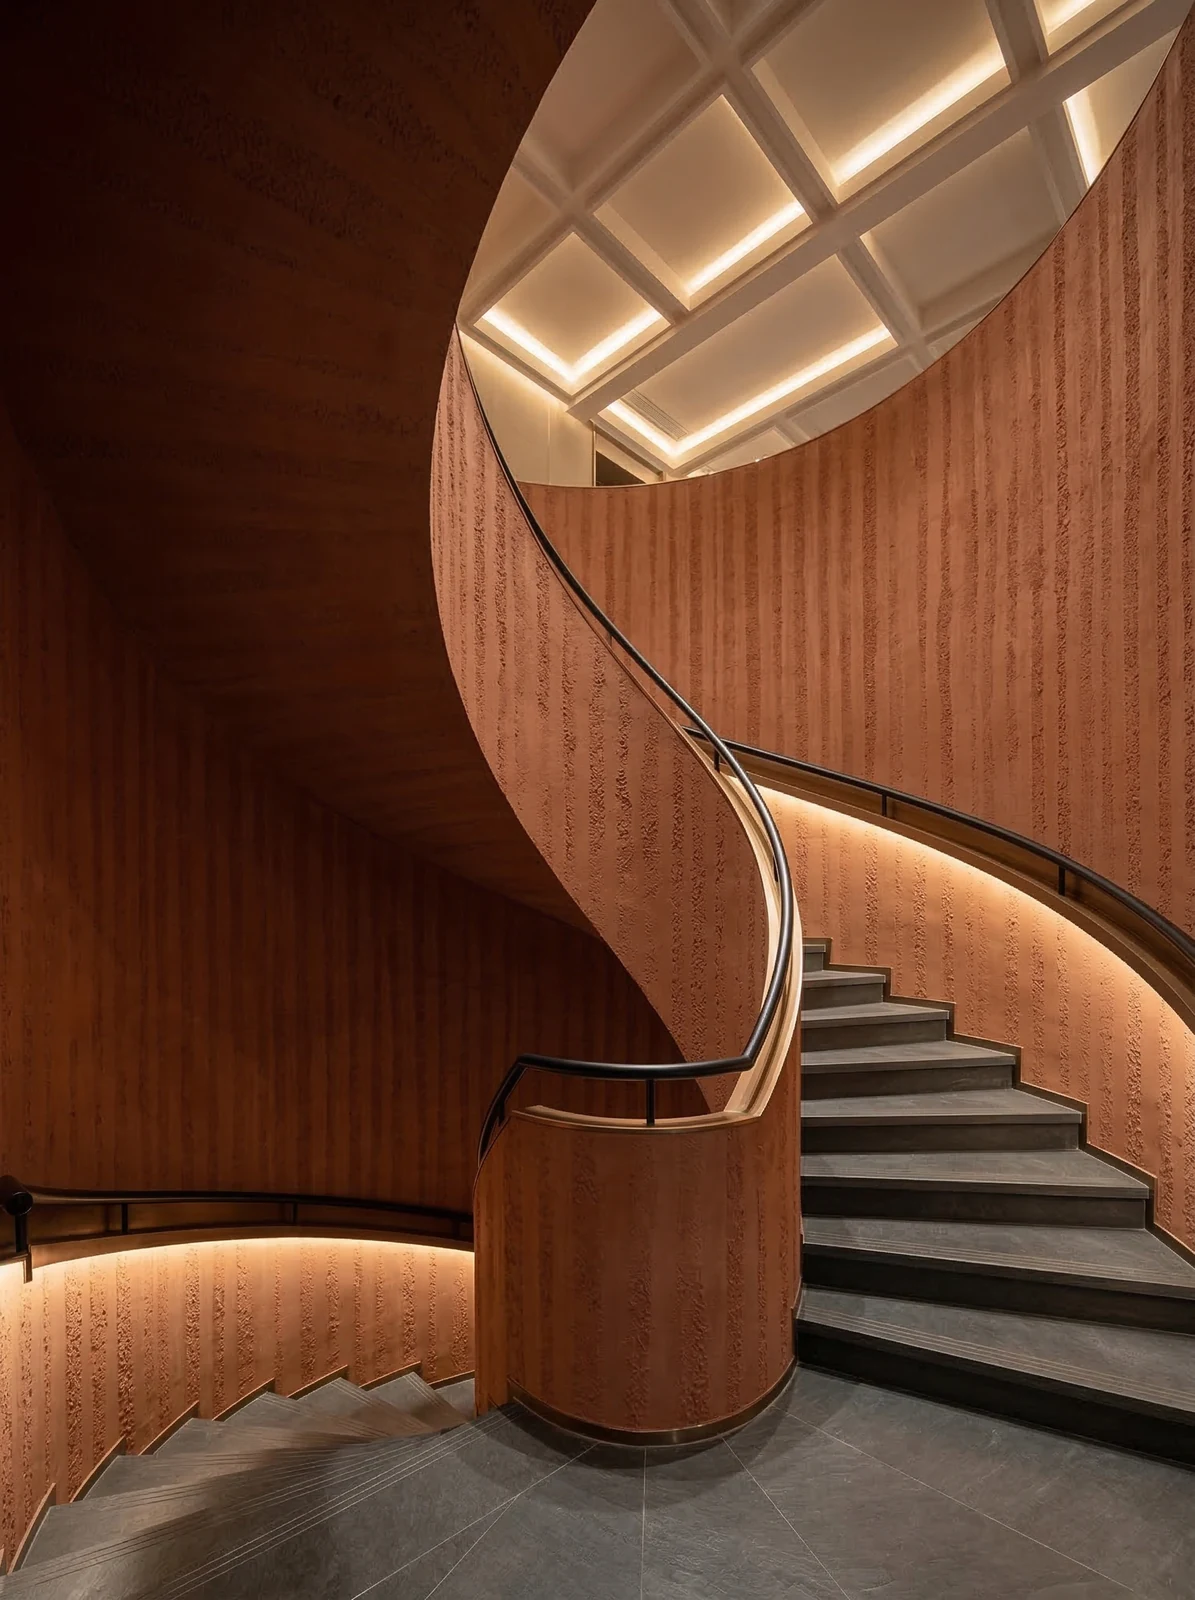
- Curved closing of spiral staircase The stair balustrade and the curved wall form a continuous curved surface, and every turn is a termination point. A material that can bend into an arc can wrap across in one piece, with seams running along the curve, so that the visual effect stays continuous.
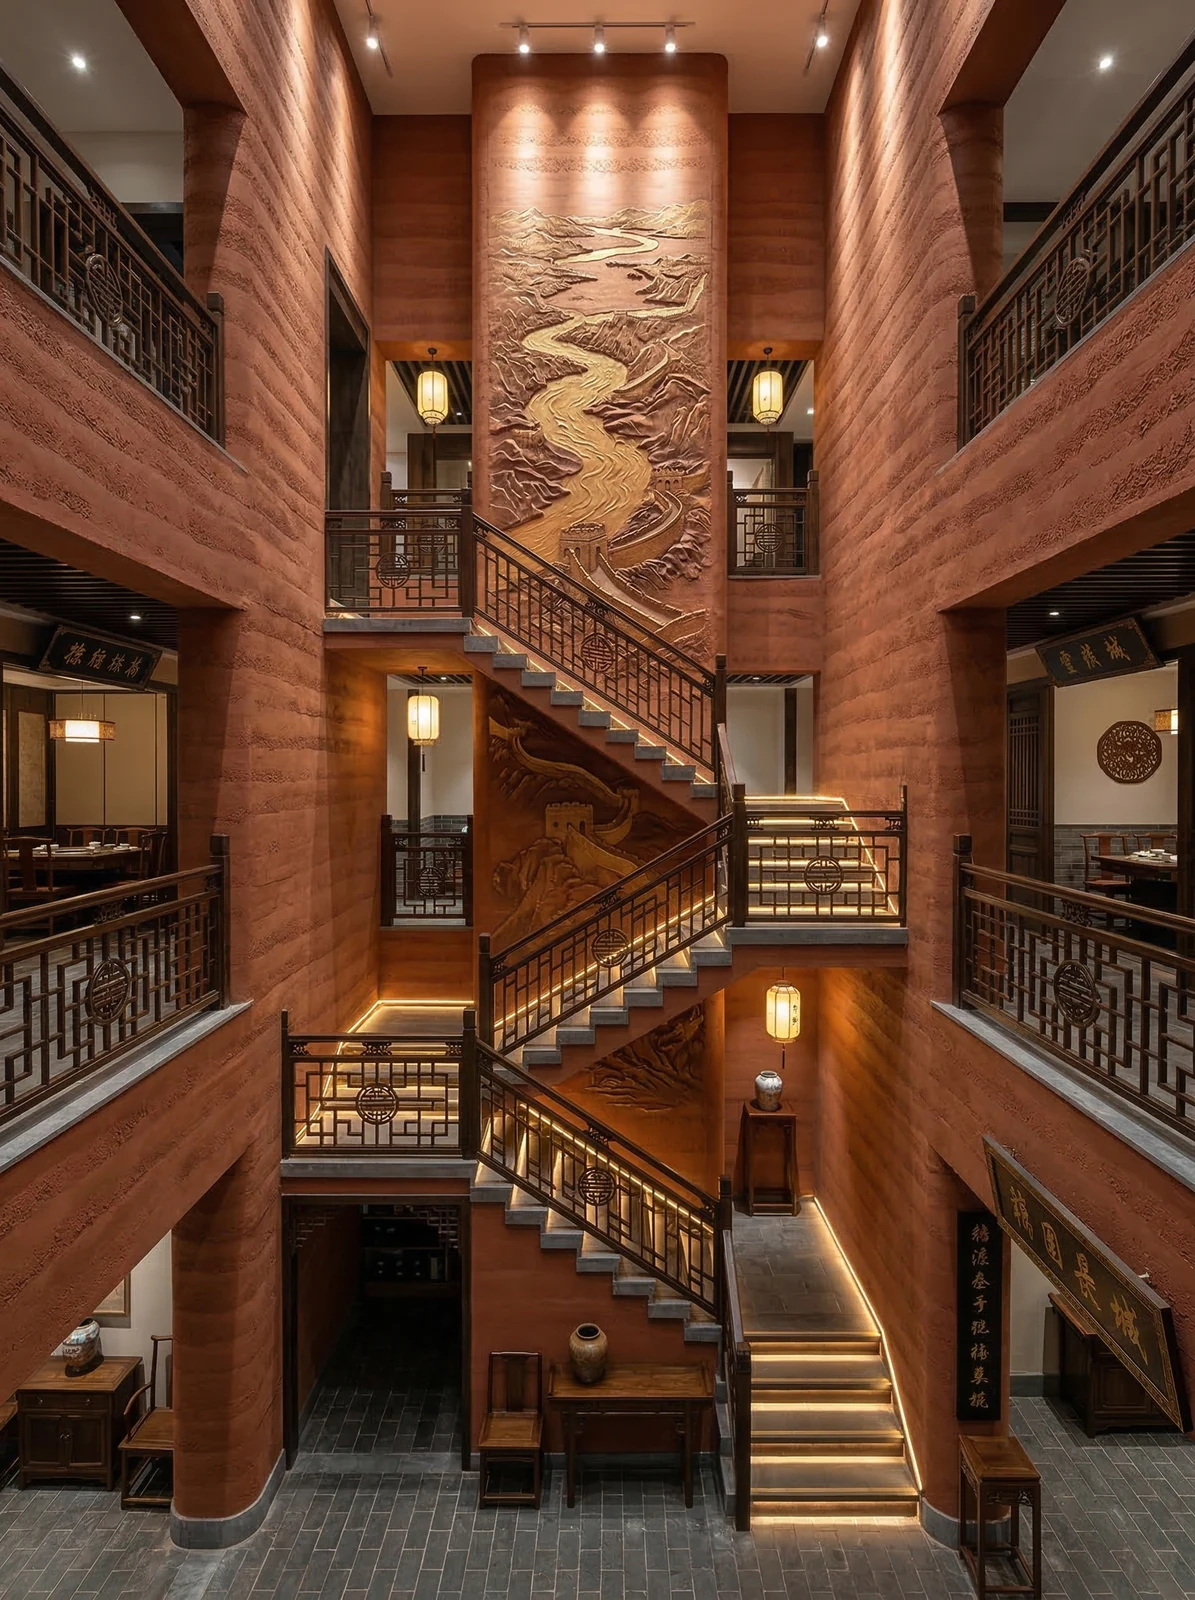
- A large full wall must not look flimsy The atrium main wall is often several stories high, so the material must either have sufficient texture layering or rely on shaping to break it up. The layered texture of rammed earth shows detail up close, while at a distance it reads as a stable warm-toned surface; it works at both viewing distances.
- The corridor parapet wall cannot bear load The parapet walls of the atrium corridor are mostly masonry and do not have conditions for dry hanging. The weight per square meter of the material is a hard constraint that determines whether this wall can be done at all, rather than whether it will look good.
- Scrub resistance in high-traffic areas The passage walls of a hot pot restaurant are repeatedly brushed against during peak foot traffic. A dense surface that can be wiped with a neutral cleaner is a basic requirement and also a key variable in later maintenance costs.
- Coordination of lighting and texture The atrium often uses light strips and spotlights to wash the wall; the height differences in the texture only show under angled light. At the layout stage, the positions of the light strips and the joint lines must be determined together; the wall cannot be completed first and the lights installed afterward.
II. Material comparison: why choose "coarse rammed earth flexible stone"
When comparing wall materials side by side, what really determines the selection is often not "which one looks better," but rather whether the base layer can bear the load, whether the schedule can be compressed, and whether the shape can be achieved.
| Comparison item | Coarse rammed earth flexible stone | Tile / Slab. | Natural stone. | Traditional wood veneer |
|---|---|---|---|---|
| Weight per square meter | Approx. 4.0–4.4 kg/㎡ | Noticeably heavier, substrate reinforcement required | Heaviest; mostly requires dry hanging | Includes thicker base coat |
| thickness | 2.5–3 mm | 6–12 mm | 15–30 mm | Includes base coat 15 mm or more |
| Curved surface and column | Can be curved within a certain radius, covering the entire surface | Small pieces must be cut and pieced together, with dense joints | Requires waterjet processing; cost and lead time increase | Requires steam heat bending or slitting |
| Construction method | No skeleton required, full adhesion after leveling the base | Special adhesive, high requirements for joint-gap process | Mostly dry-hung, requires embedded parts | Requires furring strips or a backing board |
| Moisture-proof and mold-proof | Does not absorb water, does not swell | It does not absorb water itself, but dirt easily collects in the seams | Some stone absorbs water | Prone to swelling and mold when damp |
| Schedule | Short, no wet work or painting | Medium | Length | Length |
| Points to note | Not recommended for ground installation | Not good at curved surfaces | Not good at special shapes | Not good at wet areas |
Description: The values in the table above are common ranges for various materials, used to illustrate applicable boundaries and not constituting a ranking of any material. For this project, coarse rammed earth flexible stone was ultimately selected because it is applied across the full height of the multi-level atrium, and the rammed earth texture holds up both up close and from a distance.
2.0 Why Coarse rammed earth flexible stone
This is a heavy dining project with an atrium and a spiral staircase, with the largest wall area and the most complex shapes. At this scale, red rammed earth panels provide sufficient material depth and can wrap the curved atrium walls and staircase surfaces in one continuous sheet; being lightweight, they can also be applied directly to non-load-bearing balustrade walls such as those in the corridor.
2.1 Three questions for selection
Condense the selection into three questions, and the direction can basically be set:
- Is the wall curved or column-shaped? Yes → prioritize flexible materials that can bend; No → then compare weight and construction period.
- Can the substrate bear the weight of the stone? Cannot (lightweight partition walls, old walls, insulated walls) → prioritize flexible materials; can → natural stone is also an option.
- What kind of atmosphere does the space want? The corridor parapet wall is non-load-bearing, so rammed earth panels can be directly adhered without dry hanging.
The answers to the three questions for this project: for the full-height installation across floors in the atrium, the rammed earth texture holds up both up close and from a distance; the curved surfaces of the spiral staircase and the balustrade wall are fully wrapped in one piece, with seams continuing along the curve; and the corridor balustrade wall is non-load-bearing, so rammed earth panels can be directly applied without dry hanging. Therefore, coarse rammed earth flexible stone was selected.
3. Configuration plan
3.1 Material specifications and packaging
| Specifications (mm) | Thickness (mm) | Approx. weight per panel (kg) | Wooden crate packaging (pieces/crate) | Area of wooden crate after packaging (㎡) | Weight after packaging approx. (kg) |
|---|---|---|---|---|---|
| 600×1200 | 2.5–3 | 3–3.2 | 300 | 216 | 820 |
| 1200×2400 | 2.5–3 | 12.5–13 | 100 | 288 | 1200 |
Optional colors: white, New South Red, Old South Red (other colors can be customized).
Texture and light perception notes: the layered feel of rammed earth texture comes from surface height differences, and angled lighting creates natural light-dark transitions.
3.2 Allocation by space
Different parts of the same project do not have the same requirements for materials. The table below breaks down the actual space of an atrium-style hot pot restaurant and explains why each part is specified this way.
| Space / Location | Area share ★ | Material usage | Why set it this way? |
|---|---|---|---|
| Main viewing surface (the first wall directly facing you when entering) | 20% or so | Full-piece laying, seams kept away from the center | Where the line of sight rests longest, the overall appearance is most complete |
| Side walls and passageways | about 35% | Conventional installation, with joints aligned continuously | Large area, with the focus on smooth, continuous seams |
| Curved wall / partition | about 15% | Full-piece curved wrapping | Piecing curved surfaces into small pieces creates dense diagonal seams |
| Column wrapping | about 8%% | Full-piece wrapping on the column surface, with seams kept at the sides and rear | The key is that no seams are visible from the front |
| Door openings and window casings | about 10% | Use matching termination pieces; do not butt-join on site | Cut edges easily expose the panel backing |
| Form and local areas | About 12%% | Custom-shaped panels according to drawings | On-site cutting precision for irregular pieces is insufficient |
★Description: The proportions in the table above are common distributions for similar spaces and are used to estimate material quantities for each part; actual quantities are subject to on-site measurement and layout drawings.
3.3 Estimation of Quantity and Construction Schedule
The calculation process is given below so it can be reviewed according to your own project's basis.
| Project | Calculation formula | Result |
|---|---|---|
| Net installation area | On-site measurement | Approx. 1,860 ㎡ |
| Material preparation area | 1860 times (1 + 12% loss) | Approx. 2,083 ㎡ |
| Number of wooden crates | 2083 ÷ 216 m²/box, round up | Approx. 10 boxes |
| Substrate treatment | Leveling, repair, primer | 2–3 working days |
| Layout setting-out | Snap lines, align seams, set the starting point | 1-2 working days |
| Adhesive mounting | 6 people per group, average daily area of 60-100 ㎡ ★ | Approx. 26 working days |
| Finishing and acceptance | Edge trim, cleaning, acceptance | 1-2 working days |
| Total | Configure for 6 people | 30 working days |
3.4 Material List
| Auxiliary materials | Purpose | Description |
|---|---|---|
| Special adhesive | Main material for full-surface bonding method | Select according to product instructions; use weather-resistant type for outdoor or damp areas |
| Interface agent | Substrate sealing | Select according to substrate material |
| Edge trim / internal and external corner pieces | Corners and closures | Same color family as the main material; prioritize matching accessories rather than on-site cutting |
| Joint filler material | Joint sealing | Close to the main material color number to avoid overly prominent joint lines |
| Detergent | Completion cleaning | Neutral cleaner; strong acids and alkalis prohibited |
IV. Construction process and acceptance control points: on-site practice for "coarse rammed earth flexible stone"
4.1 Seven steps
- Substrate inspection: Moisture content, flatness, and strength must all pass. Flatness is checked with a 2 m straightedge; sanding and loose layers must be removed down to a solid substrate, and hollow areas must be knocked out and redone.
- Substrate treatment: Walls with high moisture content require a sealing primer first; different interface agents are selected for different substrates.
- Layout setting-out: Put the layout plan on paper before starting work; mark door and window openings, switches, sockets, and internal/external corner positions; align seam lines across different walls in the same space where possible.
- Cutting processing: Cut to layout dimensions; cover cut edges with trim or pressure strips; determine opening positions at the layout stage.
- Full bonding installation: The full-surface bonding method is recommended, starting from the main viewing face and progressing to both sides and upward; apply along the arc direction at curved areas.
- Finishing treatment: Internal and external corners use matching trim pieces; junctions with door frames, ceilings, and floors are executed according to the node drawings.
- Cleaning acceptance: Use a neutral cleaner to remove residual adhesive and fingerprints, and check item by item according to the acceptance checklist.
4.2 Acceptance Control Sheet
| Inspection items | Control points | Criterion |
|---|---|---|
| Substrate flatness | 2 m straightedge inspection | Gap not exceeding 3mm ★ |
| Substrate moisture content | Seal damp areas first | No obvious moisture marks, no water seepage |
| Joint line alignment | Align joint lines within the same space | Smooth and free of steps by visual inspection |
| Curved-surface installation | Direction along the arc | No obvious sharp folds, no edge lifting |
| External corner closure | Use matching termination pieces | No exposed board bottom, consistent color |
| Hollowing | Spot-check by tapping each piece | Hollowing rate not exceeding 5% ★ |
| Surface cleaning | Neutral cleaner | No residual glue, no scratches |
The specific allowable deviation values shall be subject to the standards and contract terms of the project location; the table above shows the common industry practice ranges.
4.3 Special methods for arc and column
Curved walls, columns and irregular corners are where flexible materials differ most directly from traditional finishes. There are several points that must be confirmed in advance for the installation method:
| Location | The method. | Items to confirm in advance |
|---|---|---|
| Large-radius curved wall (R ≥ 2m) | Full-piece curved application, seam following the curve direction | Arc radius, panel thickness, ambient temperature |
| Small-radius curved wall (R < 2m) | Test the bend first; when there is obvious springback, switch to narrow-strip splicing | Must first test bending with a physical mock-up |
| Cylindrical column cladding | Full-piece wrapping, seam left at the side rear | Column diameter and whether there are embedded parts on the column surface |
| Arches and door openings | Continuous curve, use matching termination pieces | Door opening squareness |
| Internal and external corners | Use matching termination pieces; do not butt-join on site | Whether the color of finishing pieces is consistent with the main material |
4.4 Common problems and avoidance
| Phenomenon | Reason | Workaround |
|---|---|---|
| Joint misalignment | Uneven substrate, cumulative error block by block | First snap lines to control continuous joints, and start installation from the main sightline |
| Curved-surface edge lifting | Radius smaller than the material's usable range | Test bending before installation to confirm; change to narrower strips if necessary |
| External corner showing through to the substrate | On-site cutting and butt-joining | Use matching inner and outer corner pieces |
| The light strip reveals the joints | Joint conflicts with the position of the light strip | Determine the joints together with the light strips during the layout stage |
| Color difference concentration | Mixing different batches | Order enough at once for the same batch, and mix materials before installation |
| Hollowing | Base-layer sanding and insufficient adhesive dosage | Substrate treatment in place, full-adhesion installation |
4.5 Construction tools and personnel allocation
| Project | Configuration | Description |
|---|---|---|
| Measuring tools | 2 m straightedge, level, tape measure, chalk line | Base-layer acceptance and chalk-line layout |
| Cutting tools | Utility knife / board cutting knife, straight ruler | On-site cutting according to layout dimensions |
| Mixing tools | Electric mixer | Mix the adhesive according to the specified ratio |
| Adhesive application tools | Notched trowel | Full-surface bonding method: control consistent adhesive layer thickness |
| Compaction tool | Pressure roller / rubber mallet | Remove air bubbles and ensure full adhesion |
| Cleaning tools | Soft cloth, neutral cleaner | Completion cleaning |
| Staffing | Adhesive mounting, 2–4 people per team ★ | This project is staffed with 6 people |
| Daily production capacity per group | 60–100 square meters per group ★ | Related to substrate conditions and modeling complexity |
★Description: Staffing and daily capacity are common industry ranges, used to estimate the construction period; actual efficiency is affected by substrate conditions, shape complexity, floor height and on-site access conditions.
V. Image display and application description
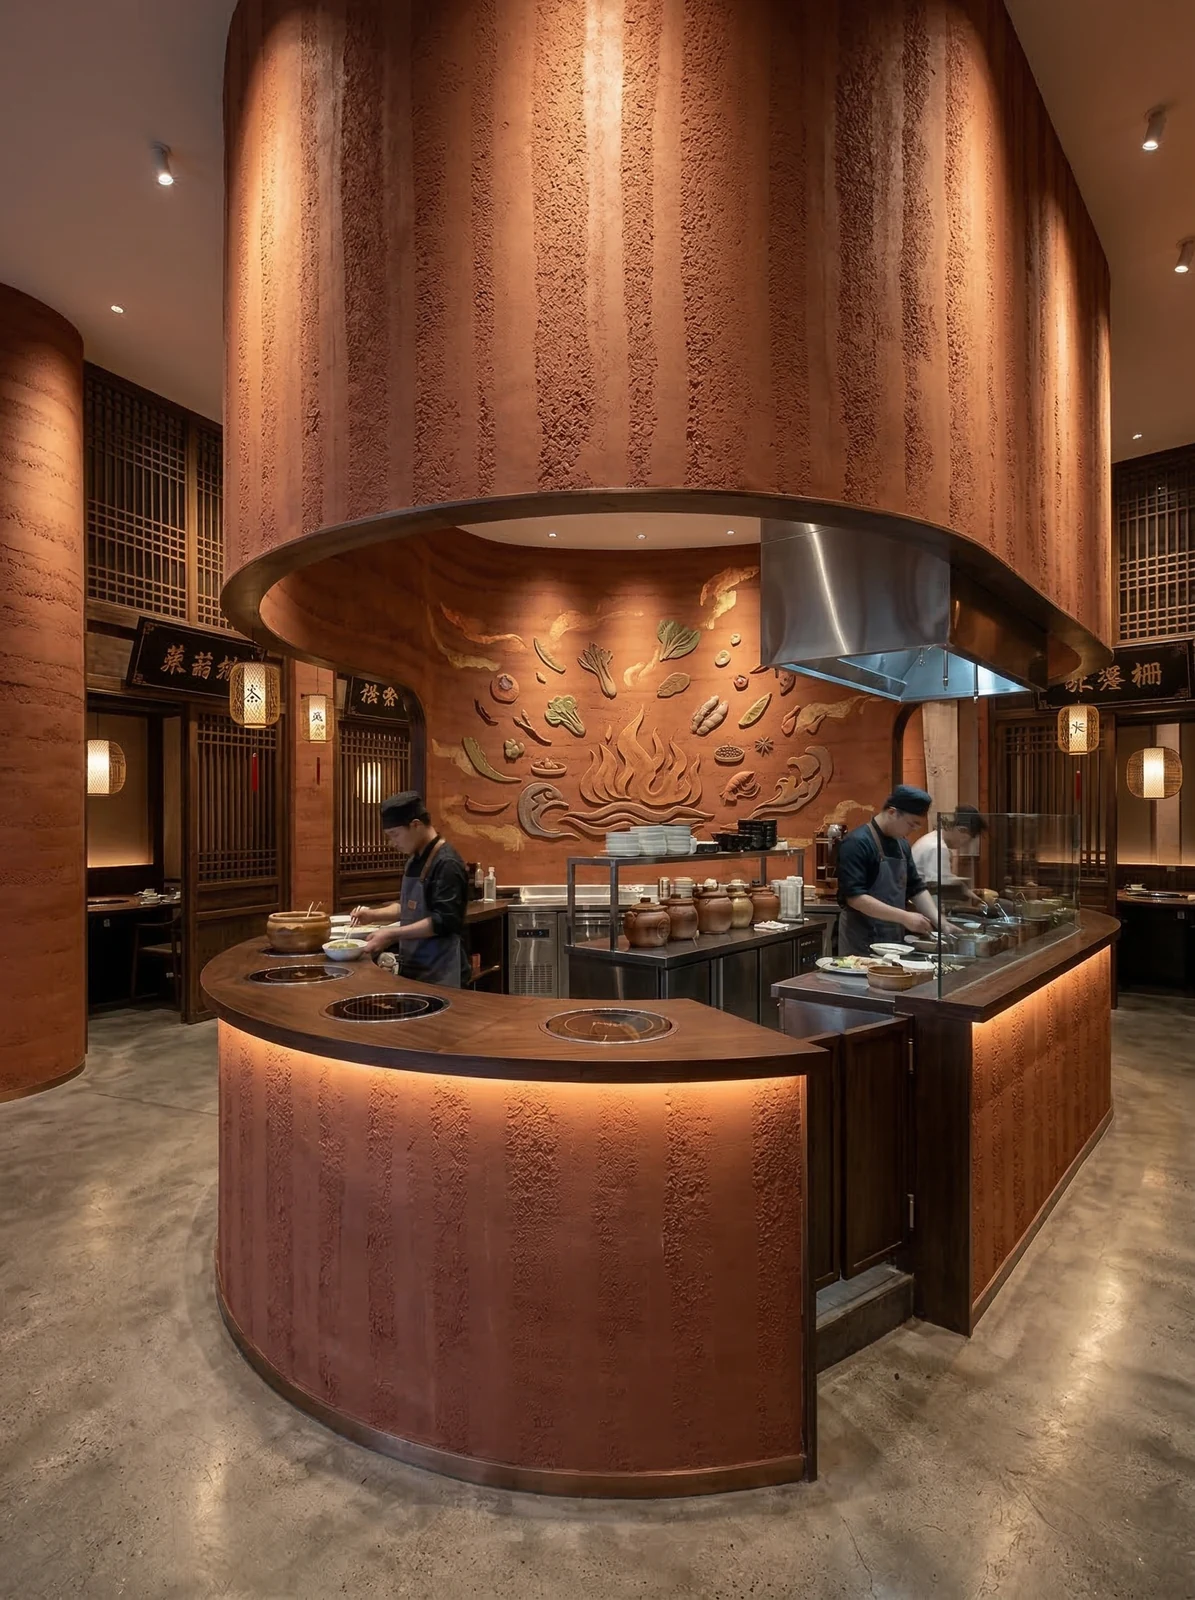
5.1 Catering Entrance
5.2 Reception Area
5.3 Spiral Stairs
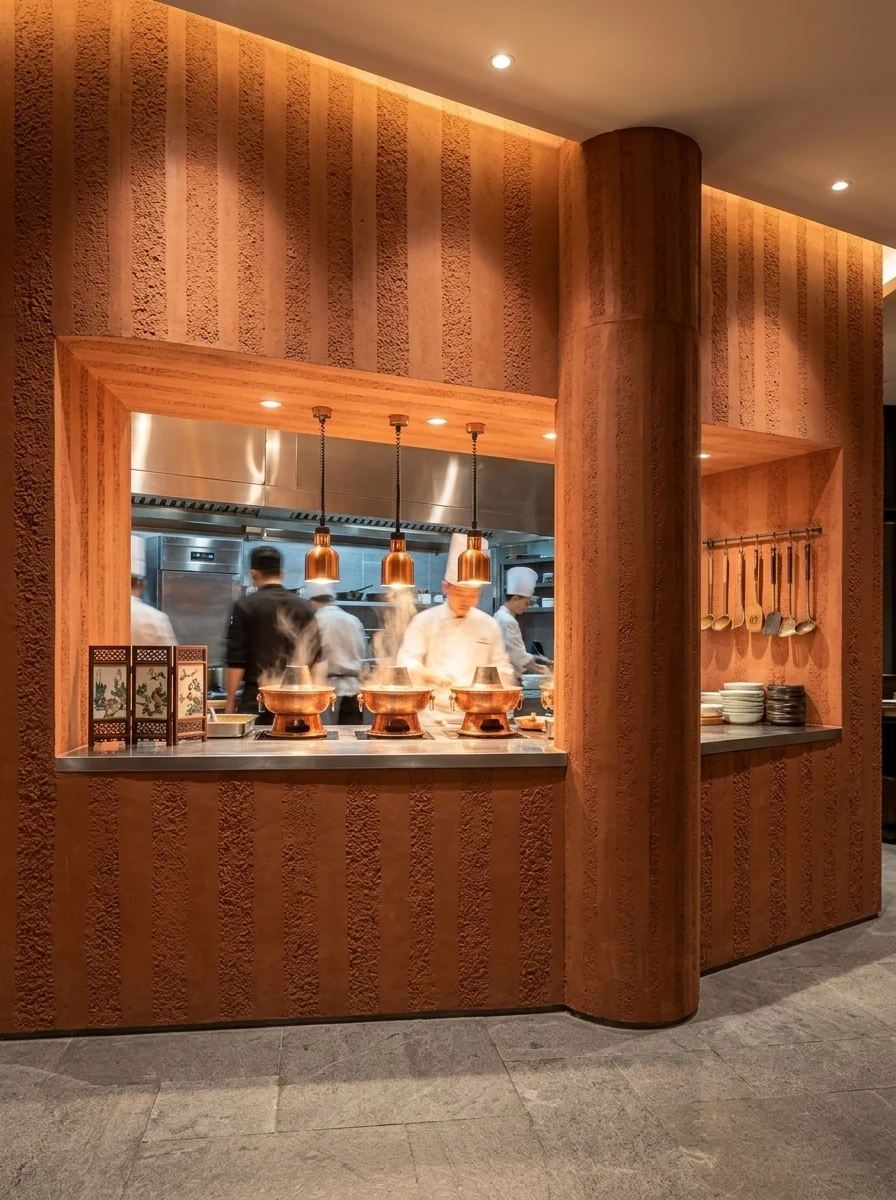
5.4 Open Kitchen Window
5.5 Self-service dining area
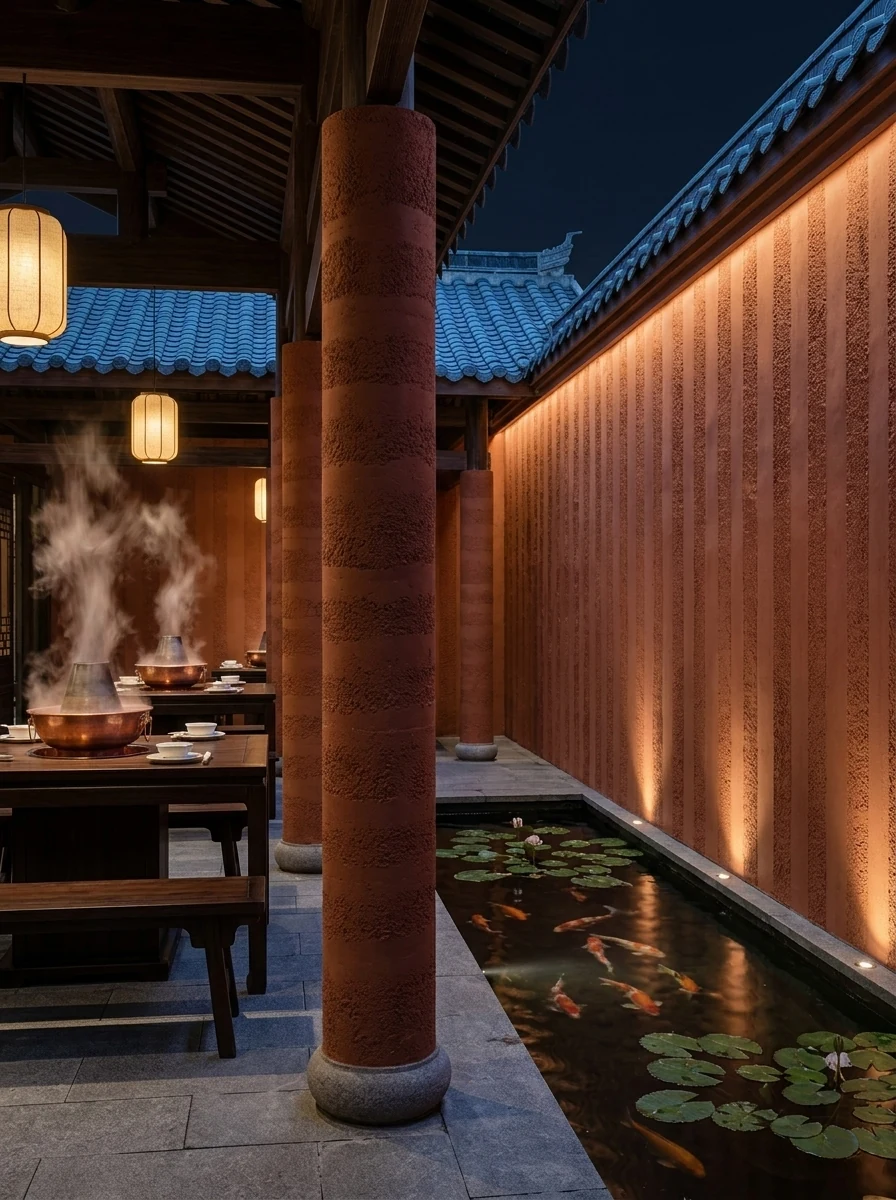
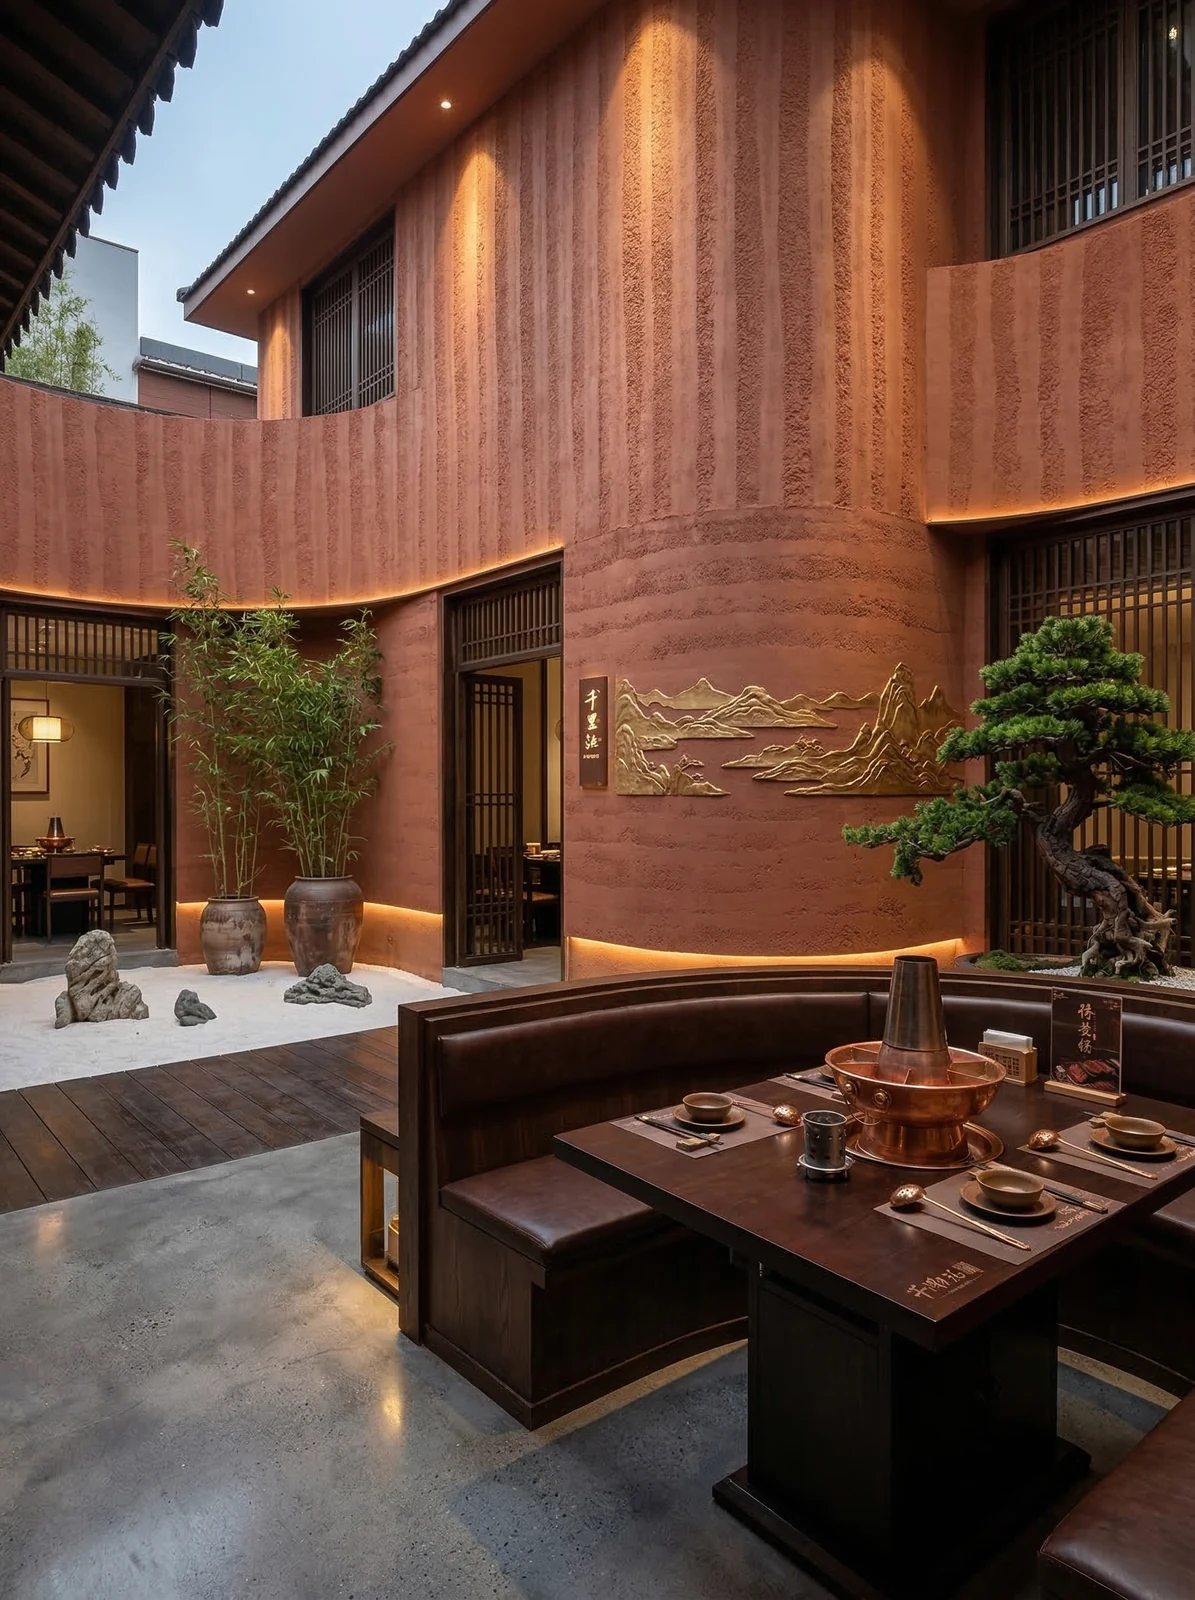
5.6 Courtyard Dining Area
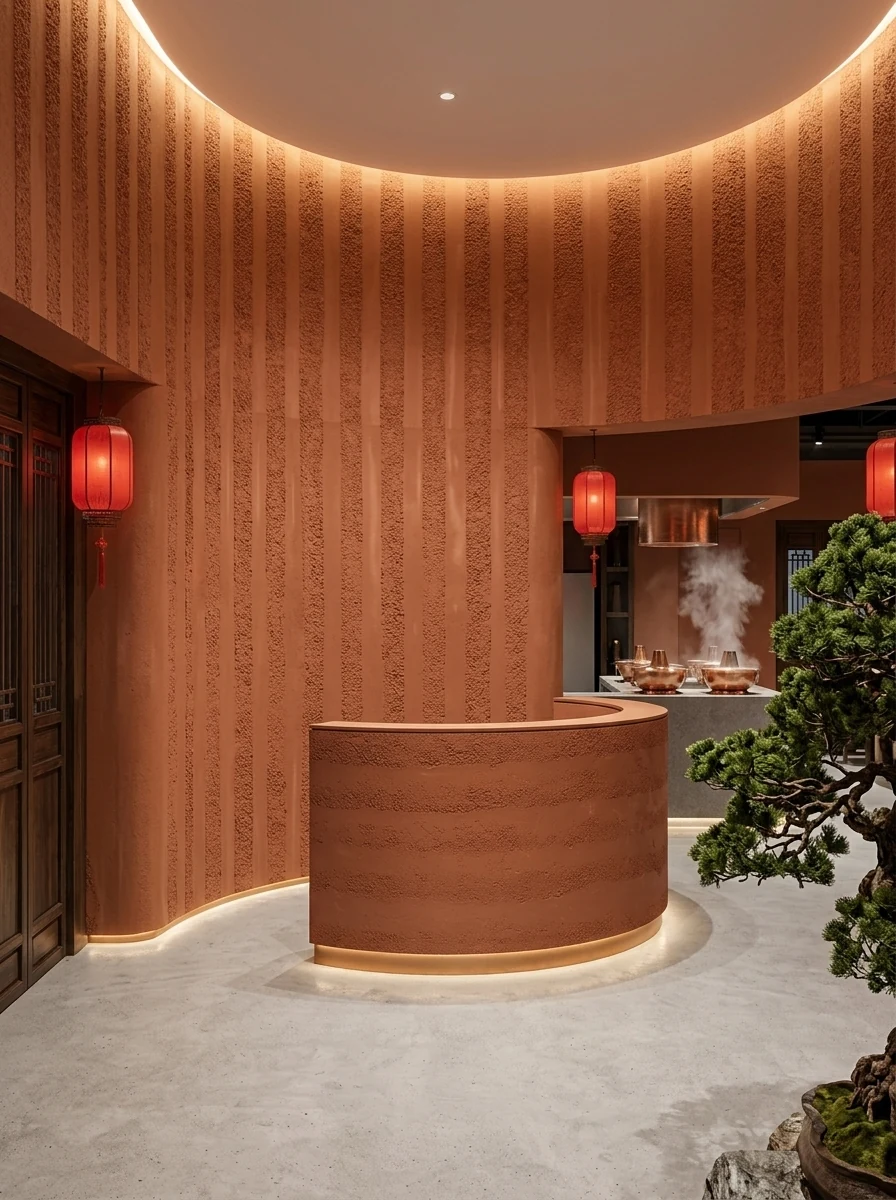
5.7 Reception Area
5.8 Multi-story Atrium
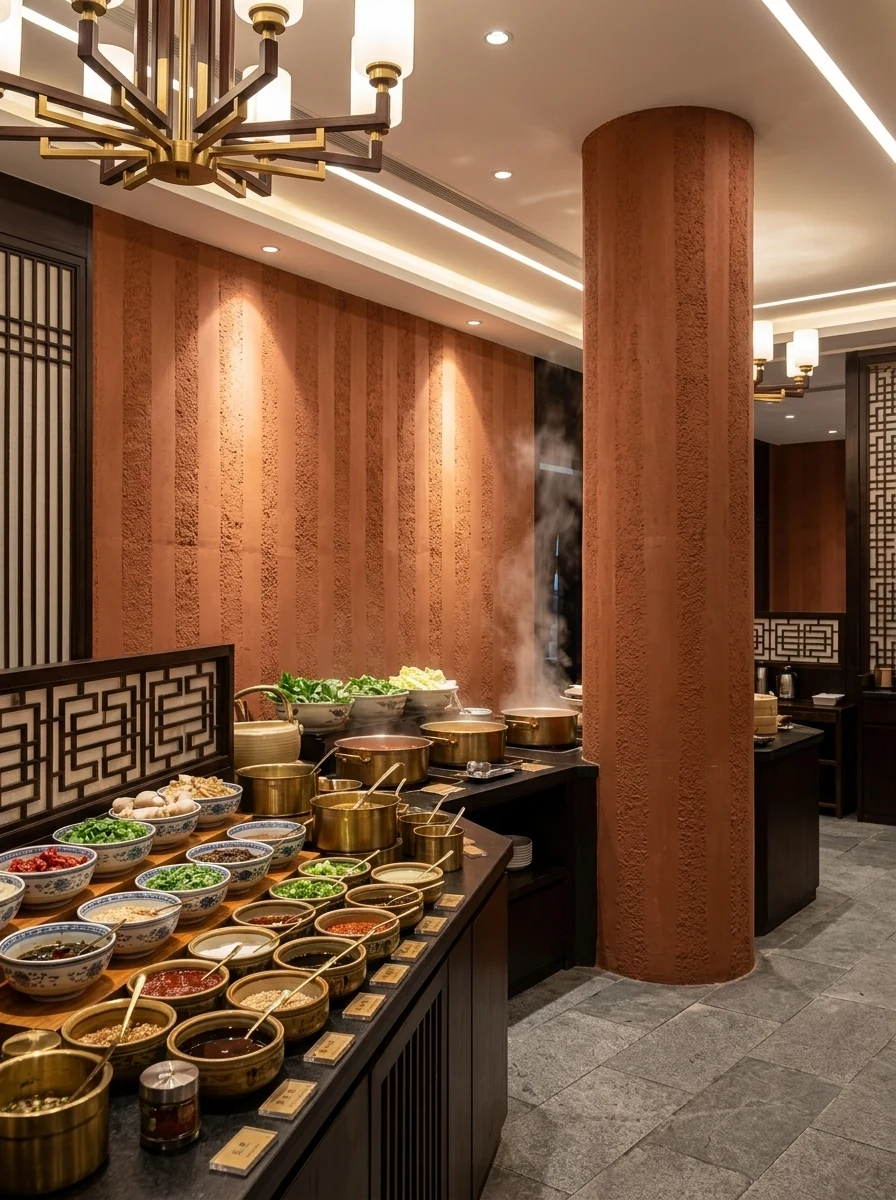
5.9 buffet area
5.10 courtyard
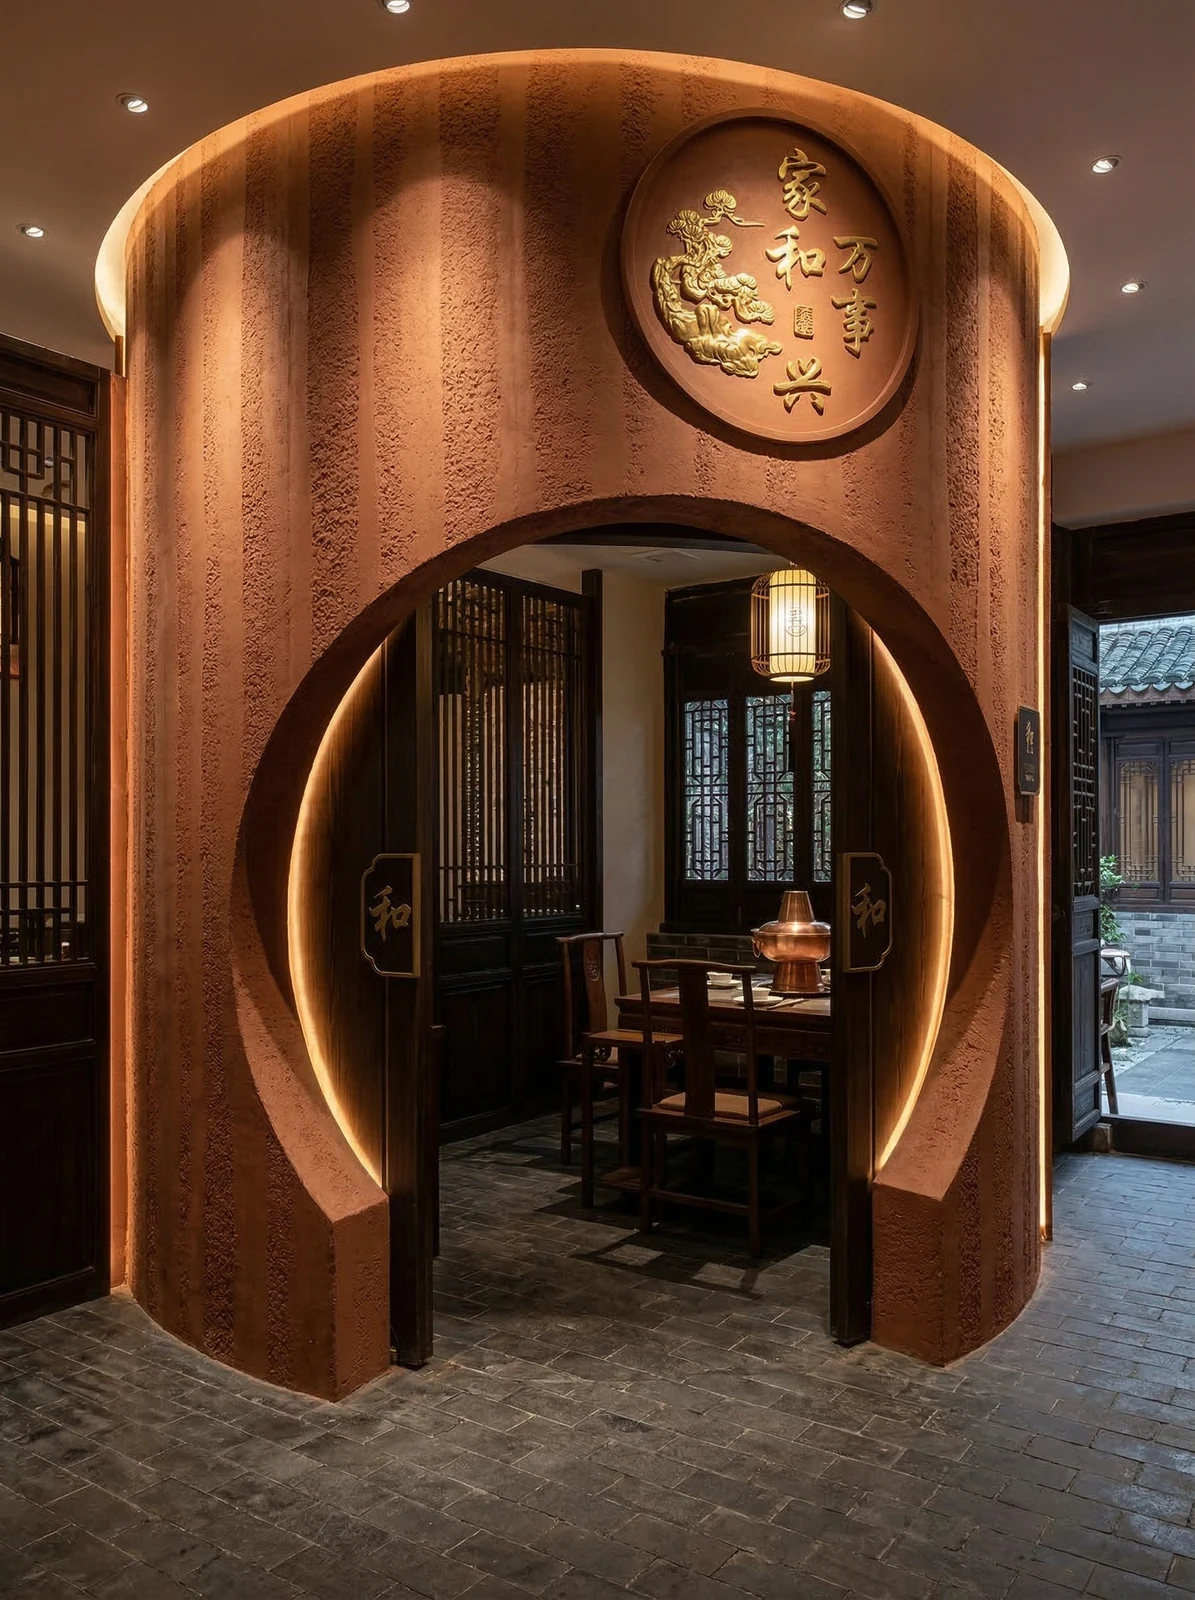
5.11 Private room entrance
VI. Communication and confirmation process
The following are several questions confirmed by both parties during material selection and construction, organized in the order of the conversation.
- General contractor: The three atrium levels need to be done together—how should the scaffolding be arranged?
- Our side: Adhesive installation does not use keels and can be continuously advanced floor by floor along the scaffolding, without separately erecting dry-hanging frames for each floor, so the schedule can be compressed.
- Design party: Can that curved balustrade wall by the staircase be done in one whole piece?
- Our side: Yes, the seam follows the arc. Test-bend at small-radius positions first; if springback is obvious, switch to narrow strips, and the seam direction following the arc will actually look better.
- Owner: The wall in the corridor is masonry and cannot bear weight.
- Our side: Perfect timing. The material is lightweight, so it can be applied directly to the leveled masonry wall.
- Construction party: If the light strip is hidden in the wall joint to wash the wall, will it reveal the joint?
- Our side: Yes. Therefore, the joints and light strip positions must be laid out together; you cannot build the wall first and install the lights later.
Scope statement: The above is a written summary of the communication content, used to explain the decision-making process; it does not represent a commitment to results, and the contract terms and on-site conditions shall prevail.
Seven, usage effects and daily maintenance
7.1 Perception and light environment
The layered feel of the rammed earth texture comes from the height differences in the surface, and lighting at an angle creates natural light-dark transitions. The same wall looks different under different color temperatures: warmer under warm light and more neutral under cool light, which is also why we recommend sending physical samples first to compare under actual lighting.
7.2 Daily maintenance
| Project | The method. | Note |
|---|---|---|
| Daily cleaning | Wipe with clean water or neutral detergent | Do not use strong acids or strong alkalis |
| Oil stain treatment | Neutral cleaner + soft cloth | Do not use steel wool |
| Localized damage | Individual panels can be replaced | Replaceable conditions were retained during layout |
| Damp areas | Maintain ventilation | Does not absorb water, does not swell |
| Outdoor areas | Regular washing | Execute according to the design scope |
7.3 Post-delivery Recheck Sheet
| Review items | Suggested timing | Points of concern |
|---|---|---|
| Joints and closures | 7 days after handover | Whether there is lifting or cracking |
| Hollowing | 30 days after handover | Sampling and tapping inspection |
| Color consistency | 30 days after handover | Comparison across different walls and different areas |
| Cleaning status | Daily | Whether there are stubborn stains |
7.4 Intersection with Adjacent Materials
Wall materials rarely exist alone; there will always be neighbors such as ceilings, floors, wood veneer, metal parts and glass. How well the junctions are handled directly determines whether the elevation looks "clean" or "fragmented."
| Adjacent materials | Transition method | Note |
|---|---|---|
| Ceiling / suspended ceiling | Press the edge with a top trim strip, or leave a 3–5 mm reveal | Joint width must be consistent over the full length |
| Floor / skirting | Skirting line presses the lower edge of the panel | Do not let the bottom edge sit directly on the floor, to avoid dragging wear |
| Wood finish | Transition within the same color family, with the joint left at an internal corner | Placing the two materials on the same wall requires comparing color differences first |
| Metal edge trim strip | Metal strips press the seam, with the direction parallel to the grain direction | Colors are mainly matte dark tones to avoid stealing the show |
| Glass partition | Use a pressure strip for finishing, leaving a caulking gap between the glass and the panel | Cut edges of the panel need to be covered with trim |
| Door and window casings | Use matching termination pieces; do not butt-join on site | Door opening squareness directly affects the finishing result |
7.5 Cost Estimation
The cost of a wall consists of three parts: main material + auxiliary materials + labor. The budget estimate basis is as follows (◆budget estimate, not an actual measured bill):
| Composition | Scope | Influencing factors |
|---|---|---|
| Main material. | Preparation area approx. 2083 ㎡ ÷ 216 ㎡ per box | Color, thickness, specifications, batch |
| Auxiliary materials | Adhesive + primer + trim pieces + grout | Substrate conditions, termination complexity |
| Manual | Mounting area × labor cost per unit area | Form complexity, floor height, proportion of special shapes |
◆Estimate: Specific unit prices vary with pattern, thickness, order quantity, and construction conditions; a wide range is normal. This article does not provide a single quotation to avoid misleading; for project pricing, please provide the area, pattern, and delivery location.
VIII. Common questions (FAQ)
Below are the questions most frequently asked about material selection and construction in this project.
Is coarse rammed earth flexible stone suitable for spaces such as dining areas?
Suitable. The layered feel of the rammed earth texture comes from the surface height variation, and natural light-to-dark transitions appear when light strikes at an angle. This project uses it for the hot pot restaurant's atrium, corridor, spiral staircase and lobby walls. The atrium is clad across floors at full height, and the rammed earth texture holds up both up close and from a distance.
Can curved walls and column cladding be done in one continuous piece?
Yes. The material has a certain flexibility and can be bent within a certain radius, so columns, curved walls and irregular corners can achieve full-panel wrapping with continuous seams. The specific usable radius depends on the selected model, thickness and substrate conditions; it is recommended to first test-bend a physical sample at the corresponding curvature to confirm.
How long does the schedule generally take?
This project is approximately 1860 ㎡, staffed with 6 people, and completed in 30 working days (including substrate preparation and finishing). The installation itself accounts for about 26 working days, with the remainder for substrate work, layout marking, and acceptance inspection. The main variable in the schedule is substrate condition—substrate rework will directly eat into the time saved on installation.
Can it be used in damp areas?
Yes. The material itself does not absorb water, and after construction the wall surface is not prone to dampness or mildew, so it can be used in humid environments and underground spaces. For wet areas such as bathrooms, it is recommended to confirm the specific scope in conjunction with the wet/dry zoning plan.
What about fire performance?
The material has flame-retardant properties; the specific combustion performance ratingshall be in accordance with the valid inspection report of the selected model. If the project has specific requirements for fire rating, please specify before placing an order.
How much difference in texture is there compared to natural stone?
Differences are visible up close: natural stone has naturally occurring random variation, while the texture of Coarse Rammed Earth flexible stone is formed by embossing or printing, giving greater consistency within the same product. From a distance the overall look is similar. When placing natural stone and flexible materials on adjacent walls in the same space, it is advisable to make a small sample comparison first.
Can old walls be renovated by direct pasting?
If the original wall surface is firm and has no hollowing, it is possible; old tile surfaces can also be covered directly. But before construction, each surface must be checked for hollowing, and hollowed areas must be knocked out and redone—this step cannot be skipped.
Does the material have test reports? What standard does it follow?
Execution JG/T 540-2017 'Building Flexible Stone-faced Decorative Material' (issued by the Ministry of Housing and Urban-Rural Development). Environmental protection and combustion performance test reports for the corresponding models can be provided with the goods.
How to confirm color and texture?
It is advisable to request physical samples and compare them under the project's actual lighting before deciding the color number. There are differences between screen display and actual materials; in particular, stone-texture materials look different at different angles and color temperatures.
Can a single damaged panel be replaced later?
Yes. During layout, the seam lines and termination positions have already been determined, and a single piece can be pried out from the termination for replacement. It is recommended to reserve 1–2 boxes of same-batch material as spares at delivery.
IX. Project File and Contact Information
| Project | Content |
|---|---|
| Project name | Hot pot restaurant wall material recommendation - application case of red rammed earth board flexible stone (Nan'an, Chongqing) |
| Location | Nan'an District, Chongqing |
| Main material. | Coarse rammed earth flexible stone (Xinnanhong) |
| Material series | Rammed earth and cement series |
| Construction area | Approx. 1,860 ㎡ |
| Schedule | 30 working days |
| Related sections | Project Cases · Food & Beverage Spaces |
| Implementation standards | JG/T 540-2017 |
Similar projects can be found in the Project Cases column; for material specifications and colors see Rammed earth and cement series.
Legend and specification notes
- ★Project experience = Industry common practice and experience range, not a reference for national standard data.
- ◆Estimate = Estimated value calculated based on the scale,not an actual measured bill; actual conditions are subject to the contract agreement and site conditions.
- Material parameters are taken from the corresponding product file; combustion performance, environmental grade, etc. are subject to the valid test report for the selected model.
- Area, schedule, and quantity are estimates based on industry-scale figures; the calculation process is provided and can be reviewed against your own project's basis.
Materials used in this case
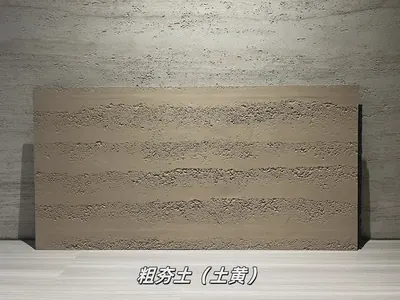
Earth-yellow coarse rammed earth flexible stone
Earth-yellow coarse rammed earth is a flexible stone ...
View materials →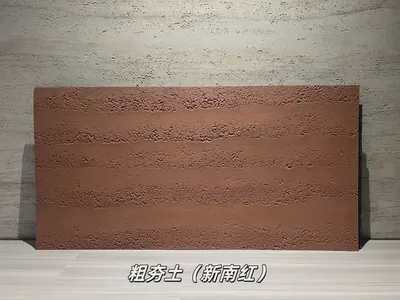
New South Red coarse rammed earth flexible stone
New South Red coarse rammed earth is a flexible stone...
View materials →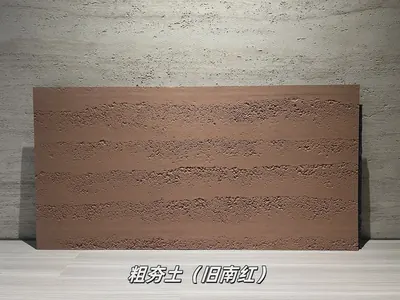
Old South Red Coarse Rammed Earth Flexible Stone
Old South Red Coarse Rammed Earth is a flexible stone...
View materials →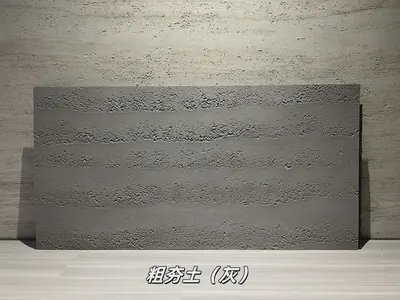
Gray Coarse Rammed Earth Flexible Stone
Gray Coarse Rammed Earth is a flexible stone in the R...
View materials →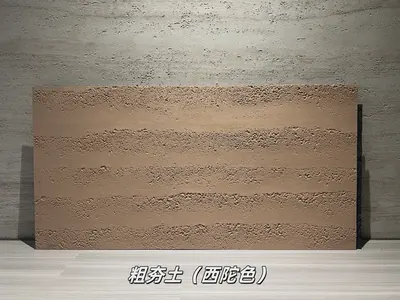
Xituo color coarse rammed earth flexible stone
Xituo color coarse rammed earth is a flexible stone i...
View materials →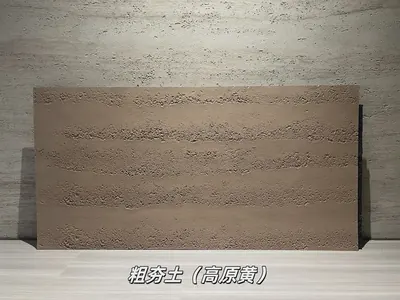
Plateau yellow coarse rammed earth flexible stone
Plateau yellow coarse rammed earth is a flexible ston...
View materials →Same category scene cases
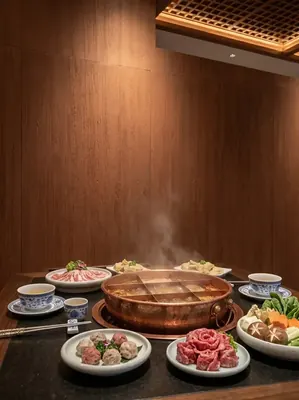
Wall construction case of 780㎡ wood grain board (warm wood color) in a hot pot restaurant
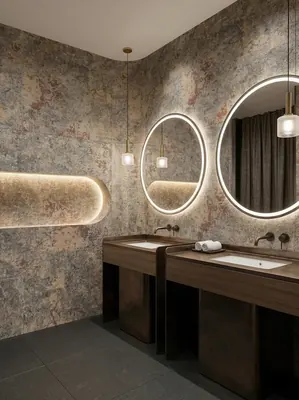
Construction case of printed slate (gold sand) wall surface in a 1080㎡ Chinese-style hot pot restaurant
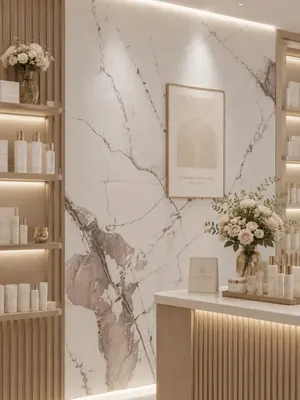
Skin Management Center 460㎡ Marble Grain Flat Panel (White) Wall Construction Case
Fusion restaurant 620㎡ printed soft stone (dark base with light veins) wall installation case
Relevant Materials and Solutions
Flexible Stone Solutions Selection Guides Request sample quotationFind the appropriate wall expression for your project.
Provide the type of space, wall area, and design intention. Communicate about materials, samples, and quotations.