
The sample section of the atypical curtain wall, if it is made too small, it is as if it has not been done. The verification of the sample section is not whether the "color looks good or not", but whether this method can be implemented at this location". If the area, location, and verification items do not match, even after the sample section is completed, it is still impossible to judge whether there will be problems in the construction of a large area. This article gives the applicable conditions for three scales, as well as the actual size of the three projects.

Figure: How big should the sample section be - area, location, convex and concave angles, openings, and arcs determine the verification items.
1. The two uses of the sample section, first clarify
Verification section. The purpose is to verify the method: whether the substrate can meet the requirements, the open time of adhesive at this temperature, whether the arc can bend to the right position, and whether the hem can be sealed neatly. The verification section does not need to look good, but needs to "expose the problems".
Display section. The purpose is to show the effect to the client: color, texture, seam width, and performance under lighting. The display section needs to be complete, clean, and have nodes.
The two uses are often mixed in one section, resulting in neither being verified thoroughly nor looking good. A more reasonable approach is to do the verification section first, then the display section, or to mark out a "verification area" and a "display area" within the same section.
After clarifying the purpose, 'how big' is the only answer: the area of the verification section is calculated according to 'how many types of methods are covered', and the area of the display section is calculated according to 'whether the overall effect can be seen.'
Second, three types of scales: 20 square meters, 50 square meters, and whole span
20 square meters level Suitable for walls with single methods and regular parts. It can verify the base layer, adhesive, and joint width, but it cannot verify the overall layout rhythm of the whole wall - 20 square meters cannot see the cumulative error of joints over a length of ten meters.
50 square meters level. A wall suitable for including two to three methods, such as a flat wall with a concave angle and a hole. This scale can expose the problems of layout and closure, and is a reasonable starting point for most projects.
Whole span level. Suitable for atypical curtain walls, full-height spaces, and curved continuous sections. The whole span means "a complete visual unit", such as a column, an opening, or an arc. The whole span can verify cumulative errors, but it is expensive and time-consuming.
The choice of the three scales is not based on the budget, but on "where is the risk at this location". The risk is in the subgrade, twenty square meters are enough; the risk is in the cumulative layout, starting from fifty square meters; the risk is in atypical and cumulative superposition, whole span.
Three, three types of parts: flat, arched, and column-bound
Flat. The verification items are the flatness of the base, the coverage of the adhesive, and the straightness of the seam. The flat template is the easiest to make and is most easily taken as 'all'.
Arched. The verification items are trial bending, the junction of the arched section with the straight section, and the distribution of the seam on the arched surface. The key to the arched template is not how good the bend looks, but whether the edge is even after the bend is in place. If the bend is not in place, the edge will curl, and the mouth will not close.
Column-bound. The verification items are the equal division of the circumference, which direction the seam falls on the column, and the upper and lower closures. The column-bound template must be made in its entirety; making half of it cannot verify the division error.
The verification items of the three parts are completely different. One only made a flat sample section, which cannot prove that the arc can be made; one only made a straight section sample, which cannot prove that the column can be stitched.
Four, what will be missed if it is made too small?
Missing cumulative error. Twenty square cannot see the seam offset of ten meters in length. During large-scale construction, this offset will accumulate into 'more crooked as it goes on'.
Missing temperature effect. The sample is usually made when the weather is good, and construction is carried out in bad weather when rushed. If the temperature and humidity of the sample section are not recorded, the construction conditions after that cannot be compared.
Missing handover. If only one wall of the model section is constructed, it cannot be verified for connection with other materials. The closing at the junction is often the most difficult part of the entire project.
The differences between the groups are overlooked. The model section is made by one group, while the large area is made by multiple groups. The model section should record "who did it, how long it took, and how many people"; this data is the basis for the large-area scheduling.
The fourth item is the most easily overlooked among the four. The value of the model section is not only "to verify the method", but also "to determine the rhythm of the group".
Five: the model methods of three projects
Three-story commercial center facade, six groups of facades. This project's approach is not to do a section, but to make a local section for each of the six groups of facades: main facade, corner oblique, main entrance, street-side window display, square block, night view. Each group verifies different things - the corner verifies the arc-shaped corner and joint, the main entrance verifies the edge of the opening, and the window display verifies the junction with the glass. After doing six groups, it is equivalent to checking all the risk points of the entire building once.
Banquet hall, 8.9 meters high, with 12 columns. The prototype is built on a column and an opening. The column is verified for the equal division of the perimeter and the column mouth, and the opening is verified for the horizontal seam position of the full height. The reason for choosing "a column + an opening" instead of a wall is that the risk of the full-height project is concentrated in the cumulative vertical direction.
Menghai Resort, about 2100 square meters of rough rammed earth arched outer wall. The prototype focuses on the junction of the arched section and the straight section. The arched plate is first bent, and the bent plate is arranged for a section on the prototype, verifying whether the seam distribution on the arched surface is even. Although the area of this project's prototype is not large, the number of bending batches is large - each curvature is tested once.
The common points of three projects: The shape of the sample section follows the risk, not the area.
Six, the five must-check items of the sample section
- Subgrade conditions: Is the flatness, hollowing, and moisture content consistent with large-area construction?
- The glue window: Record the actual operable time at the current day's temperature.
- The actual width of the seam: Measure once after completion, and compare it with the drawing.
- The integrity of the joint: At least one concave angle, convex angle, and opening.
- Team rhythm How many people, how long it took, how many square meters were laid?
Among the five items, the third and fifth are most likely to be skipped. The seam width is not measured, and the rest relies on the eyes; if the rhythm is not remembered, the scheduling is all about guessing.
There is also one piece of experience: take three photos of the sample section - look at the whole from the front, the flatness from the side, and the seam width with a ruler. Three photos are more informative than a paragraph of description, and also serve as a basis for later comparison.
Seven or eight questions
How big can the sample section be?
Twenty square meters is a common lower limit, and it must include one concave corner, one convex corner, and one opening. Only making a flat wall sample cannot verify the junction.
Is it necessary to do the whole span for the abnormal-shaped curtain wall?
It is recommended to do a full span or at least one complete visual unit. The risk of irregular shapes lies in cumulative errors, and local samples cannot be verified.
Should the sample section be kept?
Yes. Keep it until the completion of acceptance, as a benchmark for color and seam width comparison. The removed sample is equivalent to losing the only physical basis.
What should be done if the sample is completed and the client does not recognize it?
Return to the sealing sample process: sample + sealing part + signature. A sample without signed confirmation is just "done", not "confirmed".
How many times should the curved sample be bent?
Categorize by curvature, and try at least once per category. Different curvatures correspond to different material cutting methods, and one bend cannot represent the whole.
Who bears the cost of the sample section?
It is usually stipulated in the contract. It is recommended to list it separately, not included in the comprehensive unit price, otherwise it is easy to be regarded as 'free gift' and infinitely exaggerated.
Can the sample section replace the inspection report?
No. Sample verification practice, report proving compliance, both cannot be exchanged.
With a tight construction period, can we skip the sample and directly carry out large-area construction?
It is not recommended. The time saved by skipping the sample is usually repaid in multiples when the work is redone. At least make a minimum verification section.
Supplementary one: The record table of the sample section
The value of the sample section is half in doing and half in recording. It is recommended to record six items.
- Date and weather: Temperature, humidity, whether it rains.
- Subgrade conditions: Flatness test results, hollow check results, moisture content.
- Material information: Model, batch number, thickness.
- Auxiliary material information: Adhesive model, batch number, open time.
- Construction data How many people, how long it took, how many square meters were laid?
- Problem records: Where it does not go smoothly, how it was handled, how to avoid it next time.
Among the six, the sixth is the most important. The significance of the sample section is to expose problems in advance. If the record says "no problem", it usually means that the record has not been done.
This table is archived with the sample, and it is checked according to the table during large-scale construction. The role of the check is to determine whether the conditions for large-scale construction are consistent with the sample, and if not, adjustments should be made.
Supplement two: trial bending batches for irregular parts
For the template of the curved part, trial bending should be done in batches, not all at once.
Trial bending should be carried out at different curvature levels: small, medium, and large curvature, each to be tested once. Record the edge condition, rebound, and whether there are fine cracks on the surface after bending.
Temperature should also be recorded during trial bending. The same model is more brittle at low temperatures and more likely to have uneven edges during bending. The templates made in winter cannot directly represent large-scale construction in summer.
The significance of the trial bending batch record is to provide a basis for large area material cutting: which curvature to use for which material cutting method, how much allowance to leave, and whether preheating is needed. These parameters are determined by the template, not by guessing.
Supplementary three: the three common disputes of the template section
Dispute one: is the area sufficient? The client believes that "it is too small to see the effect," and the contractor believes that "the method can already be verified." The solution is to separate the verification section from the display section: the verification section is calculated according to the covering method, and the display section is calculated according to the visual unit, with each determining the area separately.
Dispute two: who pays the cost. The cost of the sample section usually includes materials, labor, scaffolding, and demolition. If the contract is not clear, it will become a three-party wrangle of "material party sends, construction party does, and the owner does not recognize". It is recommended to list one item separately, specifying what is included and what is not.
Controversy three, leave or not. The owner wants to dismantle it before delivery, and the contractor wants to leave it until completion as a benchmark. The reasonable approach is to leave it until acceptance, and then handle it according to the owner's requirements, but keep the photos and records.
The three controversies are not technical issues, but issues of agreement. Write the three points into the minutes of the meeting before the start of the project, which is more effective than explaining after the fact.
Supplement four: three things after the sample section
The sample is not over yet, there are still three things to do.
The first thing is to seal the sample. Seal a section of the sample along with the model number and batch number, and get the signatures of all three parties. The sealed sample is the physical benchmark for comparison of all subsequent batches.
The second thing is to brief. Hand over the record sheet of the sample section to all the teams involved in large-scale construction, and explain each item one by one. The significance of the sample is to "let everyone know what the standard looks like", not just to satisfy the client.
The third thing is to compare. After the large-scale construction begins, compare with the sample regularly: whether the seam width, color, and closure method are consistent. Correct deviations on the spot, do not wait until completion to check.
Three things done, the prototype truly plays a role. If only the prototype is made without doing these three things, it is just a demonstration.
In conclusion, the prototype section is not a performance for the client, but a manual for the team. Its size is determined by risk, its value by records, and its lifespan should be until completion, not just until photography.
Chapter 8: Extended Reading
- Flexible Stone Product Page: Specifications and bendability description, confirm before selecting the prototype.
- Engineering Cases Library: Record of prototype for irregular and high-rise projects, can be compared with scale and location.
- Selection Guide: Single practice of base layer, adhesive, junction, and acceptance.
- Fact and Verification Page: Check and verify the diameter of detection and certification, check together when confirming the prototype.
- Contact page: Provide location and curvature, you can first make a prototype scheme suggestion.
The size of the prototype section should be determined by risk, not by budget. Risk accumulates, do the entire span; risk in closing, do the node; risk in the foundation, twenty square meters is sufficient.
Write and review: Chengdu Igoods Technology Co., Ltd. Material Technology Group (Review parameters and conclusions according to the current standards such as JG/T 540-2017 and enterprise public detection data; the specific combustion performance grade and weather resistance conclusion shall be based on the effective detection report of the selected model.)
Previous:一张立面图上,柔性石材要画清楚的 7 个节点
Related articles
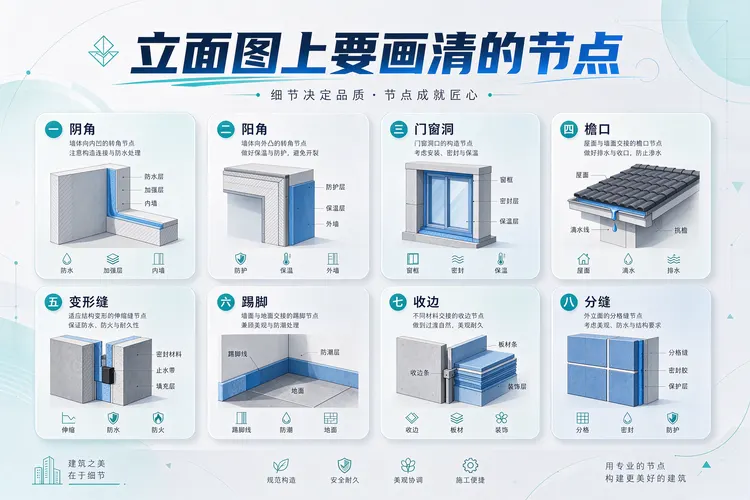
一张立面图上,柔性石材要画清楚的 7 个节点
立面图上画不清的节点,最后都会变成现场的口头决定。柔性石材贴墙面,真正需要画死的只有七处:三个边缘、三个开口、一处分缝。这七处画清楚,施工方按图能做,监理...
Wood Veneer Gilded Series · Pattern Group 2—the most frequently asked question is how to choose colors; the answers are all in lighting and scenarios
Wood Veneer Gilded Series · Pattern Group 2 material selection notes: from te...
Wood Veneer Gilded Series · Pattern Group 1: 18 patterns—which scenarios can they open up? One article explains it thoroughly
How to choose from all 18 styles in the Wood Veneer Gilded Series · Pattern G...

Don't be fooled by color cards: the true performance of wood veneer metal series · Color Group 2
Those choosing wood veneer metal series · Pattern Group 2 can easily get conf...